Partner Onboarding
The Partners onboarding page helps you discover existing partners and start the process of becoming a partner. From this page, you can:
This page explains how to use both options, complete onboarding, review setup requirements, and manage your partner profile from the dashboard.
1. Become a Partner
Use Become a Partner to register as a partner through a structured onboarding flow.
The information you submit is used to:
- Create your partner identity in the portal.
- Create a Fynd Commerce development company for your workspace.
- Fynd Academy account for access to Fynd-specific learning courses.
- Determine the setup items shown on the Partners dashboard, such as profile completion, agreements, training, and required .configurations.
-
In the lower-left part of the window, hover over the Partners icon and click Become a Partner.
-
Select the partner type that matches what you will deliver:
- Service Partner: Provide implementation and consulting services
- Referral Partner: Refer clients and earn commission
- Integration Partner: Build and maintain integrations
- Affiliate Partner: Promote Fynd's solutions through content, tracked links, and earn commission on conversions attributed through the affiliate tracking system.
-
Choose one of the following account types: Individual or Company.
noteIf you chose Service Partner as your partner type, you can register only as a company. The Individual option is not available.
-
Provide the required details, such as your address and contact information.
noteIf you choose Company, the website field is mandatory.
-
Click Continue.
-
If required, click edit icon to update your partnership summary. You can use the AI Refine button to improve the description before submitting it.
-
Choose the products you want to work with, such as Commerce, PixelBin, Kaily, and more. Select only the products you actively plan to integrate with or support.
-
If required, click edit icon to update your personal and organizational information.
-
Do the required changes and click Save.
-
Click Review & Submit to submit your request.
After you submit the onboarding request, the system:
- Creates your partner account.
- Creates a development company automatically.
- Redirects you to the Partners dashboard.
Congratulations! Your onboarding steps have been submitted successfully.
2. Search for a Partner
Use this option to discover existing partners and express interest in collaborating with them.
- In the lower-left part of the window, hover over the Partners icon and click Search for a Partner.
- Browse the list of all verified partners.
- Review partner profiles to identify relevant collaboration opportunities.
Partners Dashboard Overview
The Partners Dashboard gives you quick access to onboarding and operational tasks. It is organized into sections to help you manage ongoing activities efficiently. Use Quick Start to track setup progress, Training Progress to monitor assigned learning modules, and Partner Profile to maintain your public-facing business details.
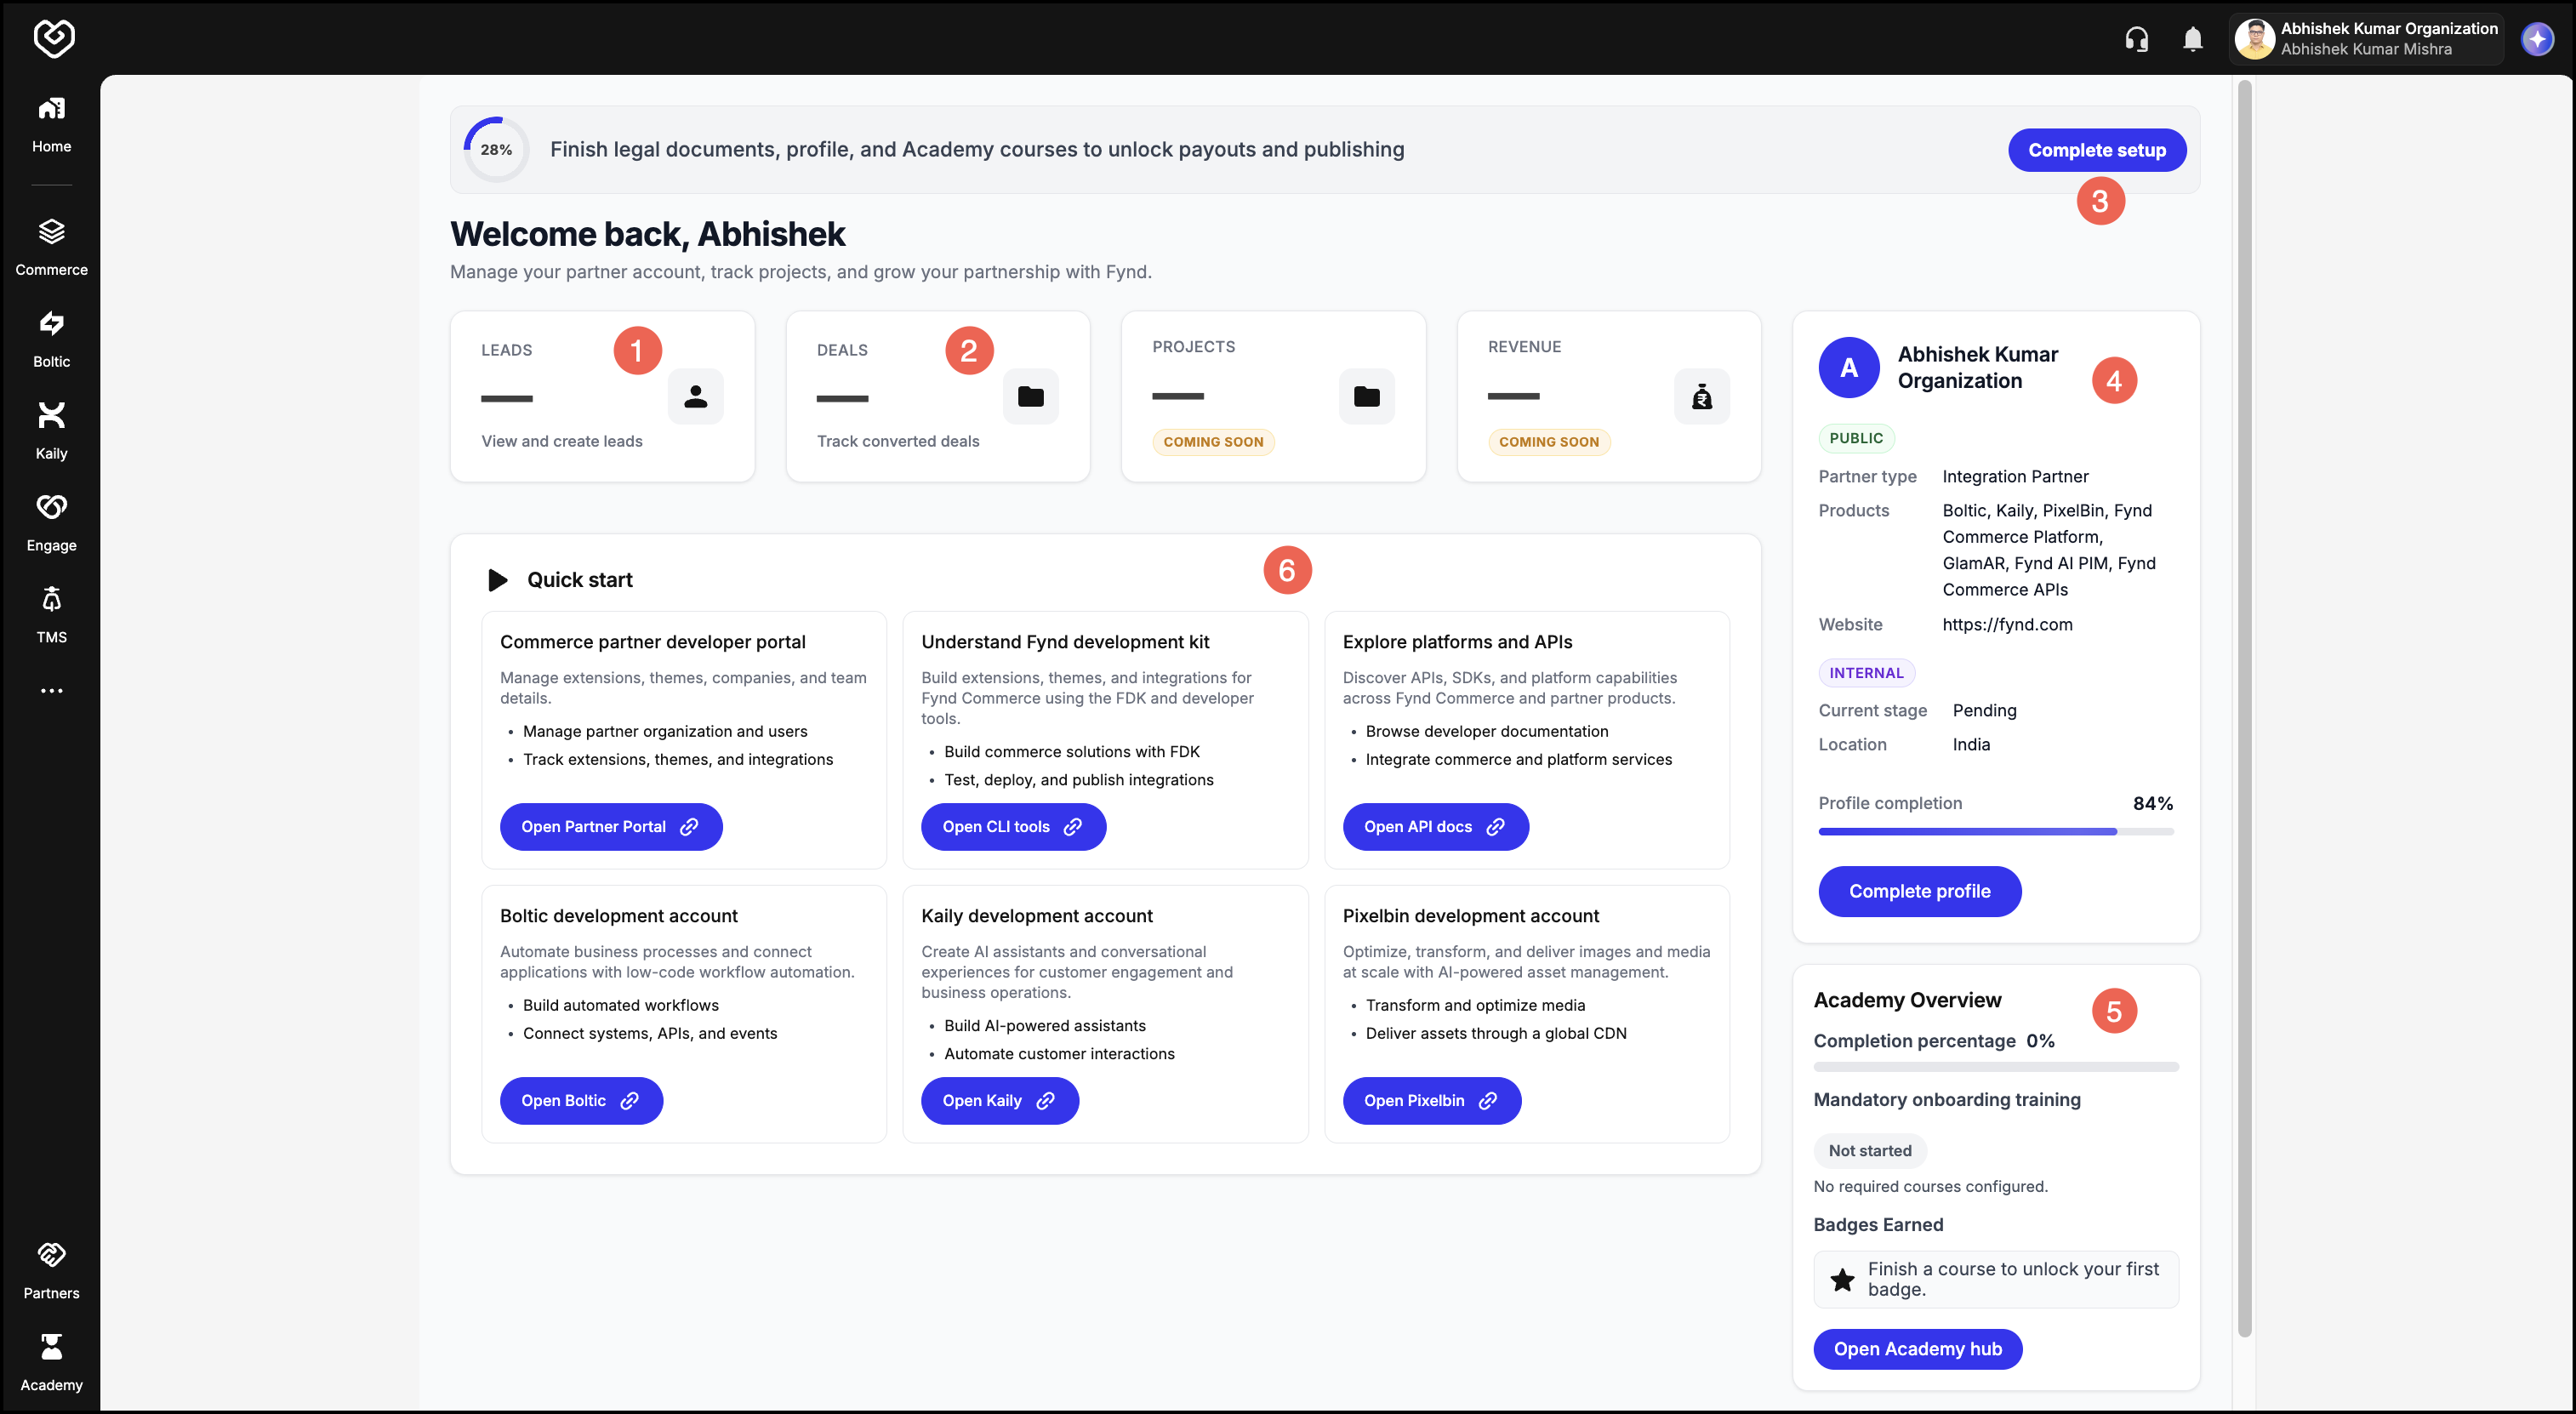
- Leads: Capture and submit potential customer opportunities for Fynd review.
- Deals: Track qualified opportunities through closure.
- Complete Setup: Guides you through the essential steps to finalize your onboarding process, including agreements and initial tasks.
- Profile: Lets you view and update your business information and details.
- Fynd Academy: Provides an overview of your assigned learning modules and tracks your completion status. These modules are essential for building a comprehensive understanding of both Fynd Commerce and the Fynd Partners program. Make sure you complete the following required trainings:
- Quick Start: Offers shortcuts to important actions needed for activation. To start creating extensions and themes, go to the Partner Portal tab and click Get Started to navigate to the Partners portal.
1. Complete Setup
After submitting your onboarding details, you are directed to the Partners dashboard. The Complete Setup progress bar helps you finish the remaining activation steps, such as signing required legal agreements and completing mandatory training.
Review and Sign Legal Documents
You need to review and sign the Partner Agreement document.
The agreement document details are generated using the information you provided during onboarding, such as your business name and primary contact information.
You can complete the partner agreement in one of the following ways:
1. Use Standard Document
By choosing to sign the standard document, you accept the standard commission rates set by Fynd.
2. Customize the Document
Select this option if your organization needs to modify specific terms, commission rates, or add organization-specific details before signing.
2. Manage Your Partner Profile
From the Partners dashboard, click Complete profile to open the profile management screen. You will see the following sections:
Update Your Public and Company Profile
In the Partner Profile page, click Edit to update the profile details.
The Public Profile is the information other partners can see on the Search for a Partner page.
Keep your profile accurate and up to date so other partners can evaluate your services and collaboration fit.
Add Payout Details
- Use the Payout Information tab to fill in the details required to receive payments.
Review Terms and Privacy
- Use the Consent tab to review the Terms & Conditions and Privacy Policy that apply to the partnership.
After updating these sections, return to the dashboard to complete any remaining setup tasks.
3. Complete Essential Training
Completing all assigned training modules is important not only for understanding the full range of collaboration features but also for becoming comfortable and proficient with the Fynd platform and its tools.
The training courses assigned to you are based on the services you selected during onboarding. Refer to the list of courses below:
- Boltic
- Boltic Advanced
- Boltic x Commerce
- Fynd Commerce
- Fynd Partners
- Fynd Product Training
- Fynd WMS
- Kaily
- Store OS
4. Leads
The Leads section helps you register potential customers you have identified and submit them for review by the Fynd Business team. Use this section to add a contact person, capture customer interest, and track the lead until it is qualified.
You must sign the required legal agreement before you can access Leads. Complete the steps under Review and Sign Legal Documents first.
Create a Contact
Before you can submit a lead, you must create a contact for the person who will receive all communications related to the lead. For example, this contact will be notified about any activity or updates regarding the lead. The details you provide are shared with the Fynd Business team to facilitate timely and relevant follow-ups.
-
From the Partners dashboard, open Leads.
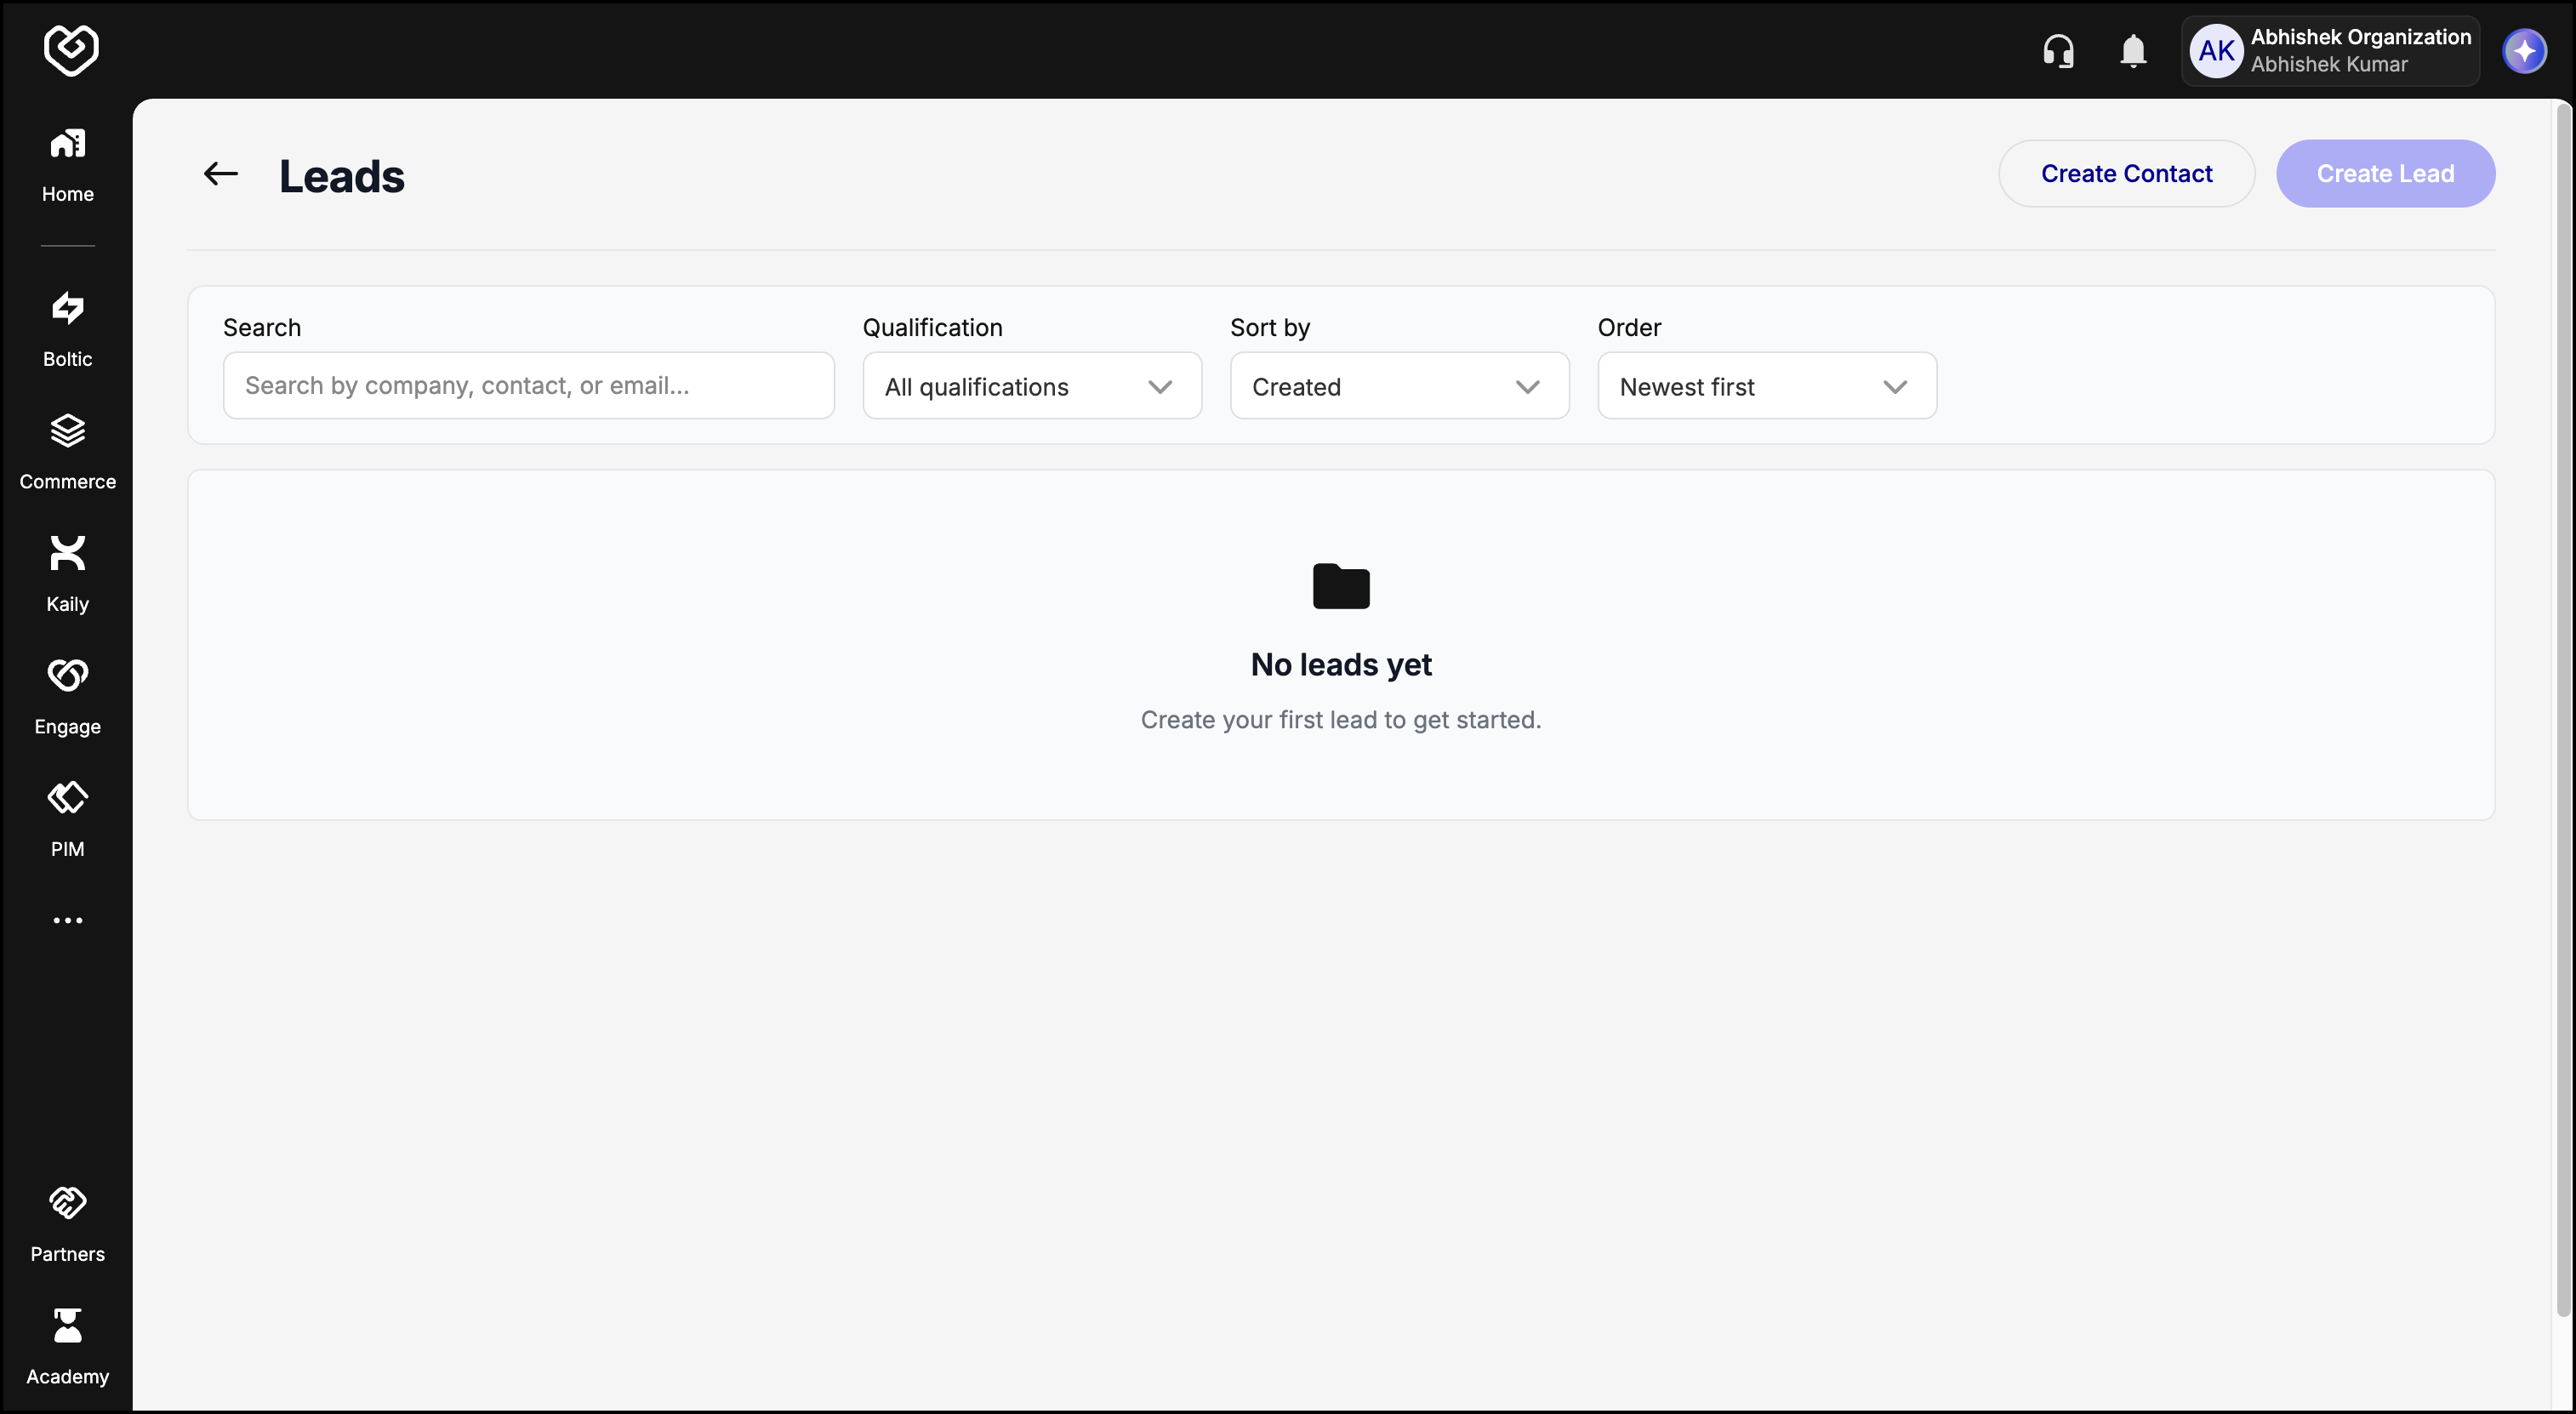
-
Click Create Contact.
-
Fill in the contact details for the person who will be the point of contact for the lead.
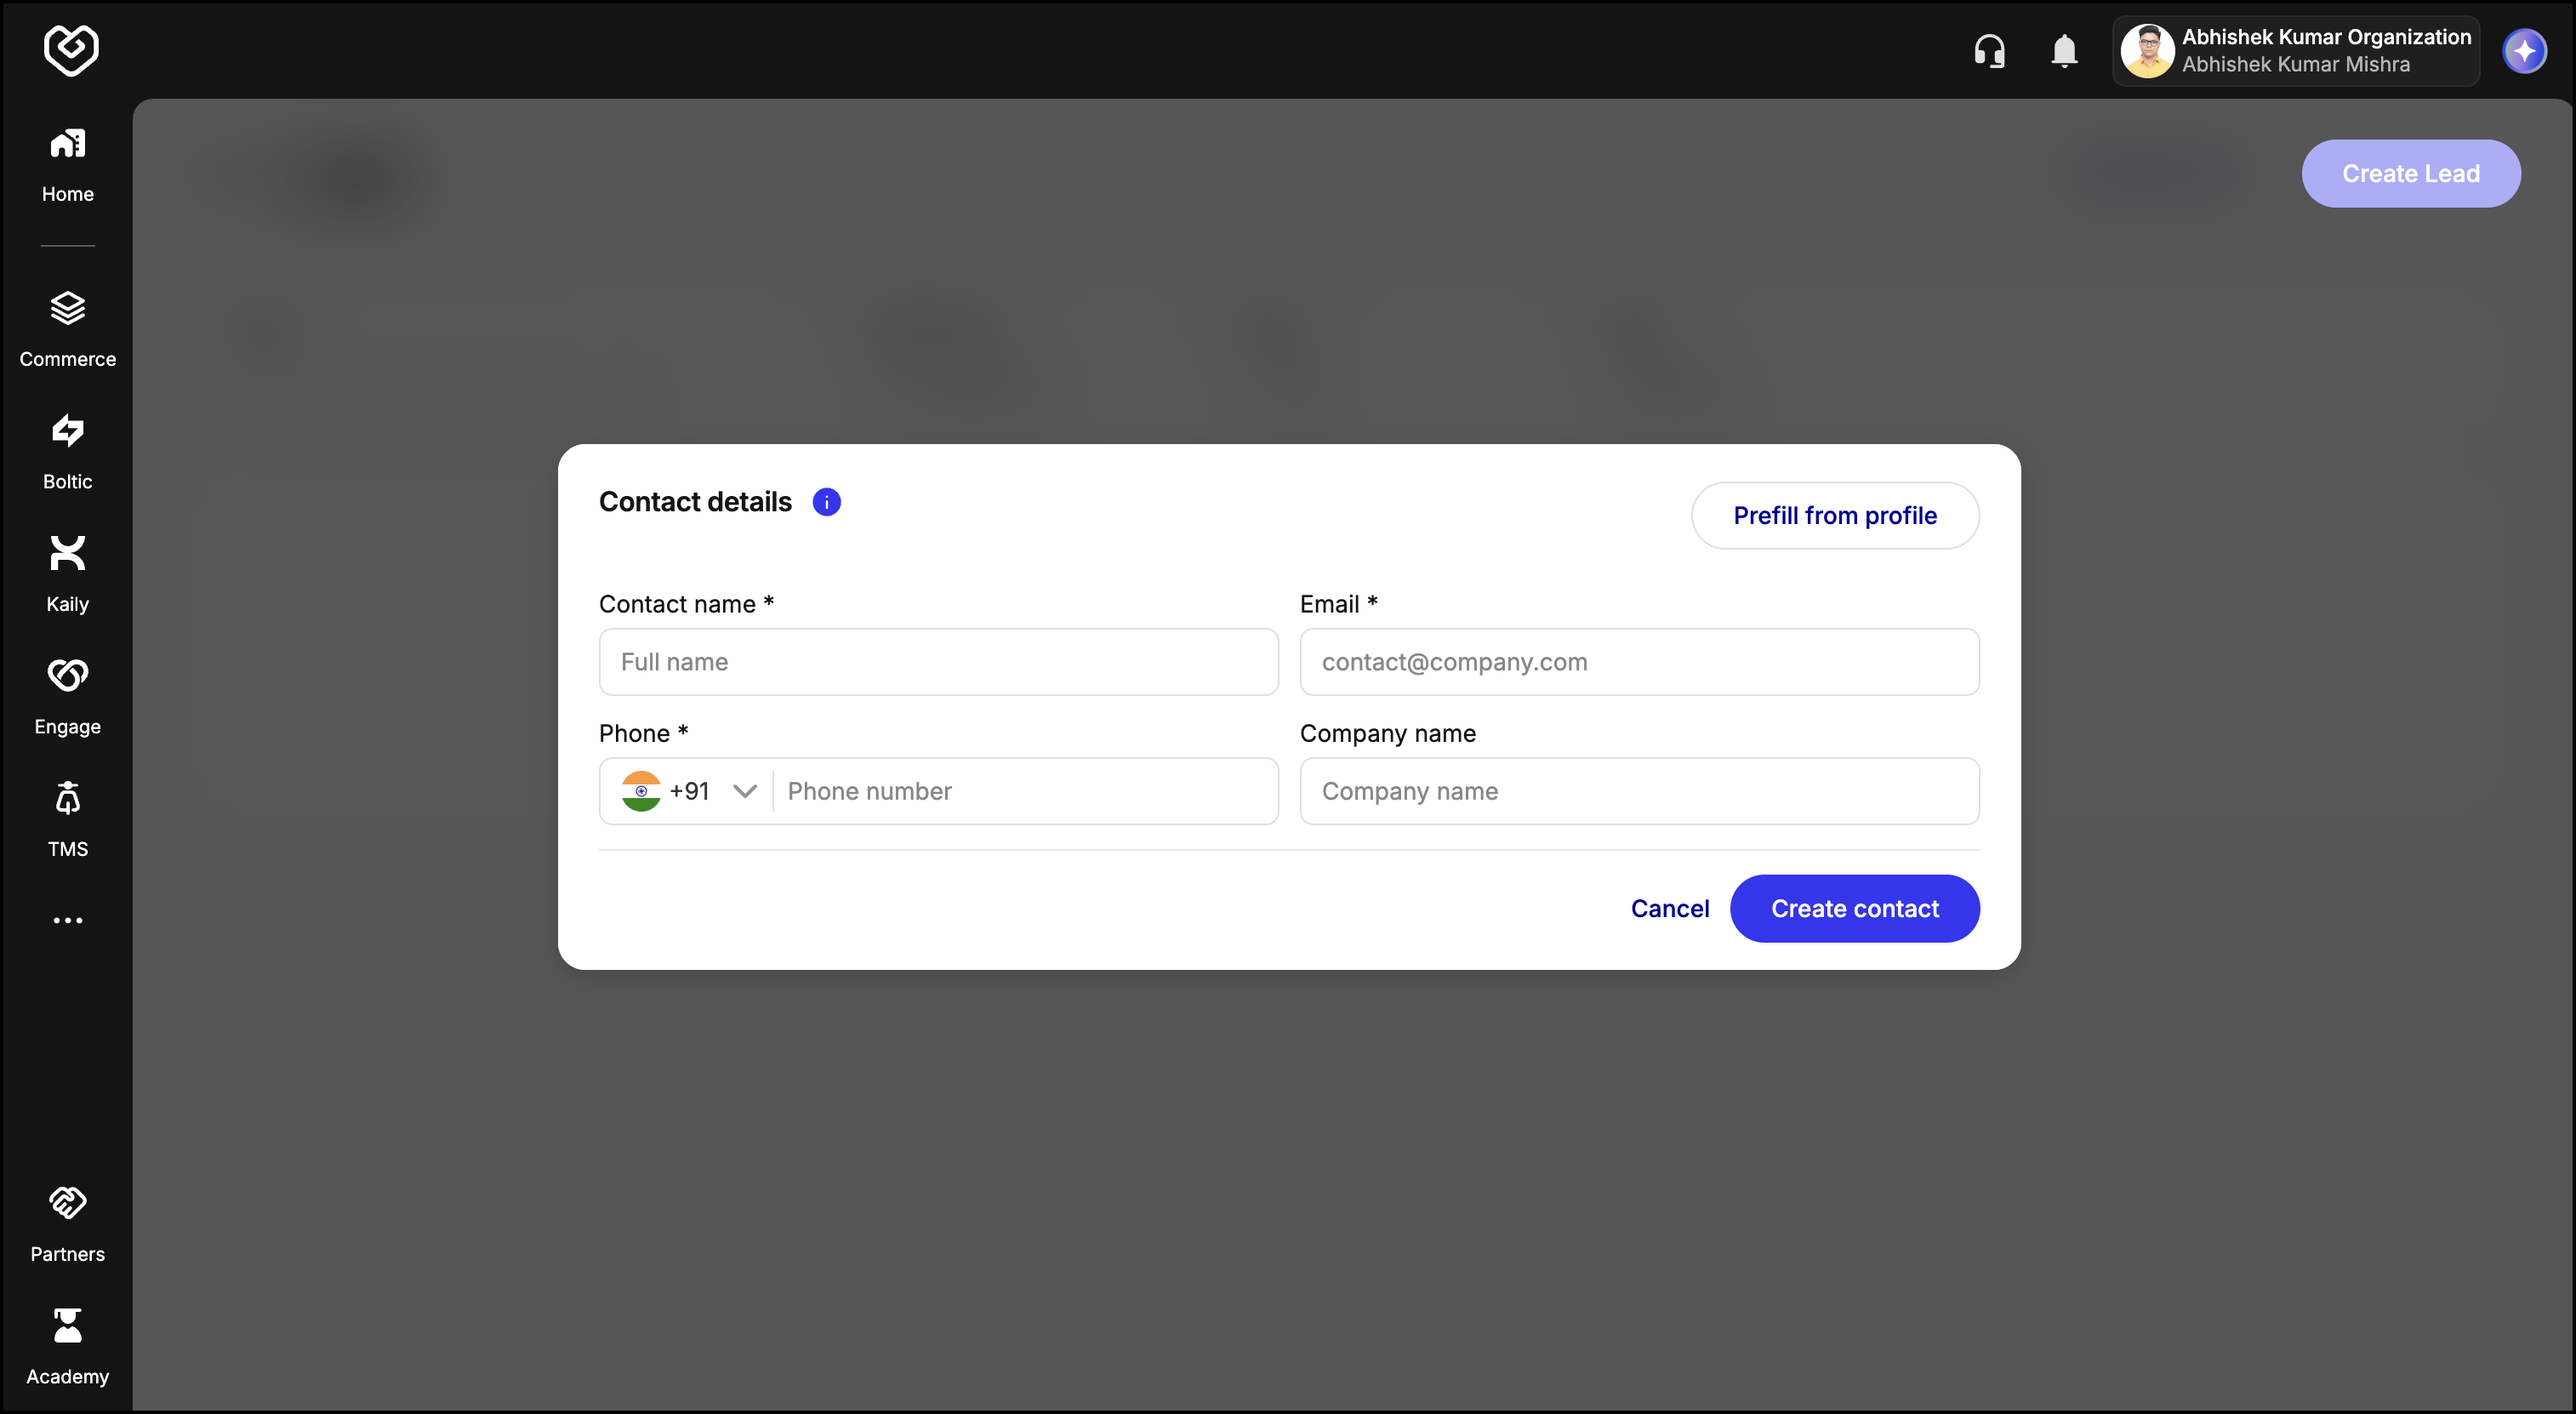
-
Click Create Contact to create the contact. You will see a success notification.
After the contact is saved successfully, the Create Lead option is enabled.
Create a Lead
After the contact is created successfully, you can submit a lead with the customer and product details.
-
On the Leads page, click Create Lead.
-
In the Customer Details section, fill in the required fields:
- Name
- Company name
-
Optionally, provide additional context:
- Phone
- Company domain
- Lead explanation
tipProvide a clear Lead explanation when available. Additional context helps the Fynd Business team assess the opportunity and respond faster.
-
In Products, select the Fynd products the customer has shown interest in using, such as Commerce, PixelBin, or Kaily.
-
Click Create Lead to submit the lead.
After you submit the lead, the request is sent to the Fynd Business team for review. They will update the lead status, for example, to Working while evaluating the opportunity.
When the Fynd Business team sets the lead status to Qualified, the opportunity moves to the Deals section for further tracking.
Each lead includes a Notes section where you can record updates, context, or follow-up details related to the opportunity. Use notes to keep a running log of conversations, customer requirements, or any information the Fynd Business team should be aware of.
Notes you add are visible to the Fynd Business team, helping them stay informed as they review and work on the lead.
5. Deals
The Deals section is where qualified leads are managed through the sales cycle. After a lead is marked Qualified, it appears here so you and the Fynd Business team can track progress toward closure.
Manage Deal Progress
From the Deals page, you can view qualified opportunities and track their outcome. Deal statuses reflect where each opportunity stands in the pipeline, for example:
- Closed: The deal was won.
- Closed Lost: The opportunity did not convert.
Use the Deals section to monitor status updates from the Fynd Business team and stay aligned on next steps for each qualified opportunity.
Each deal includes a Notes section where you can document progress, meeting outcomes, or other updates as the opportunity moves through the pipeline. Use notes to share context with the Fynd Business team—for example, customer feedback, next steps, or reasons for a status change.
Notes added on a deal are visible to the Fynd Business team, keeping both sides aligned throughout the sales cycle.