Introduction
Fynd Partners is a powerful platform that enables developers to build, manage, and monetize Extensions and Themes on Fynd Commerce. Whether creating extensions, developing themes, or managing company access, the Fynd Partners dashboard provides all the tools you need in one place.
This user guide is your go-to resource for understanding how to use the platform effectively. It provides step-by-step documentation for all major sections of the dashboard.
Sidebar
The Fynd Partners sidebar helps you navigate key sections of the platform easily. From a single, organized panel, you can access tools to manage themes, extensions, companies, teams, and more.
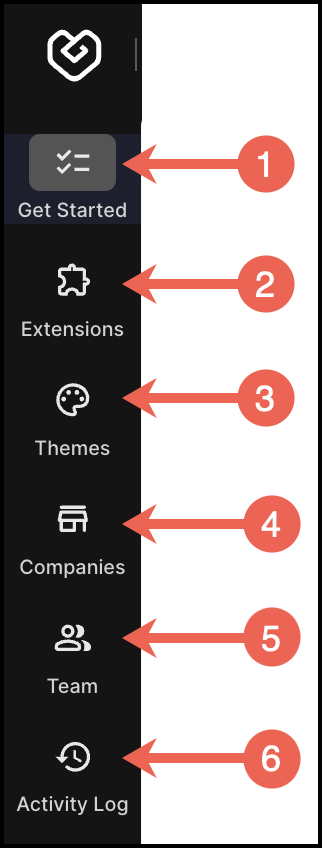
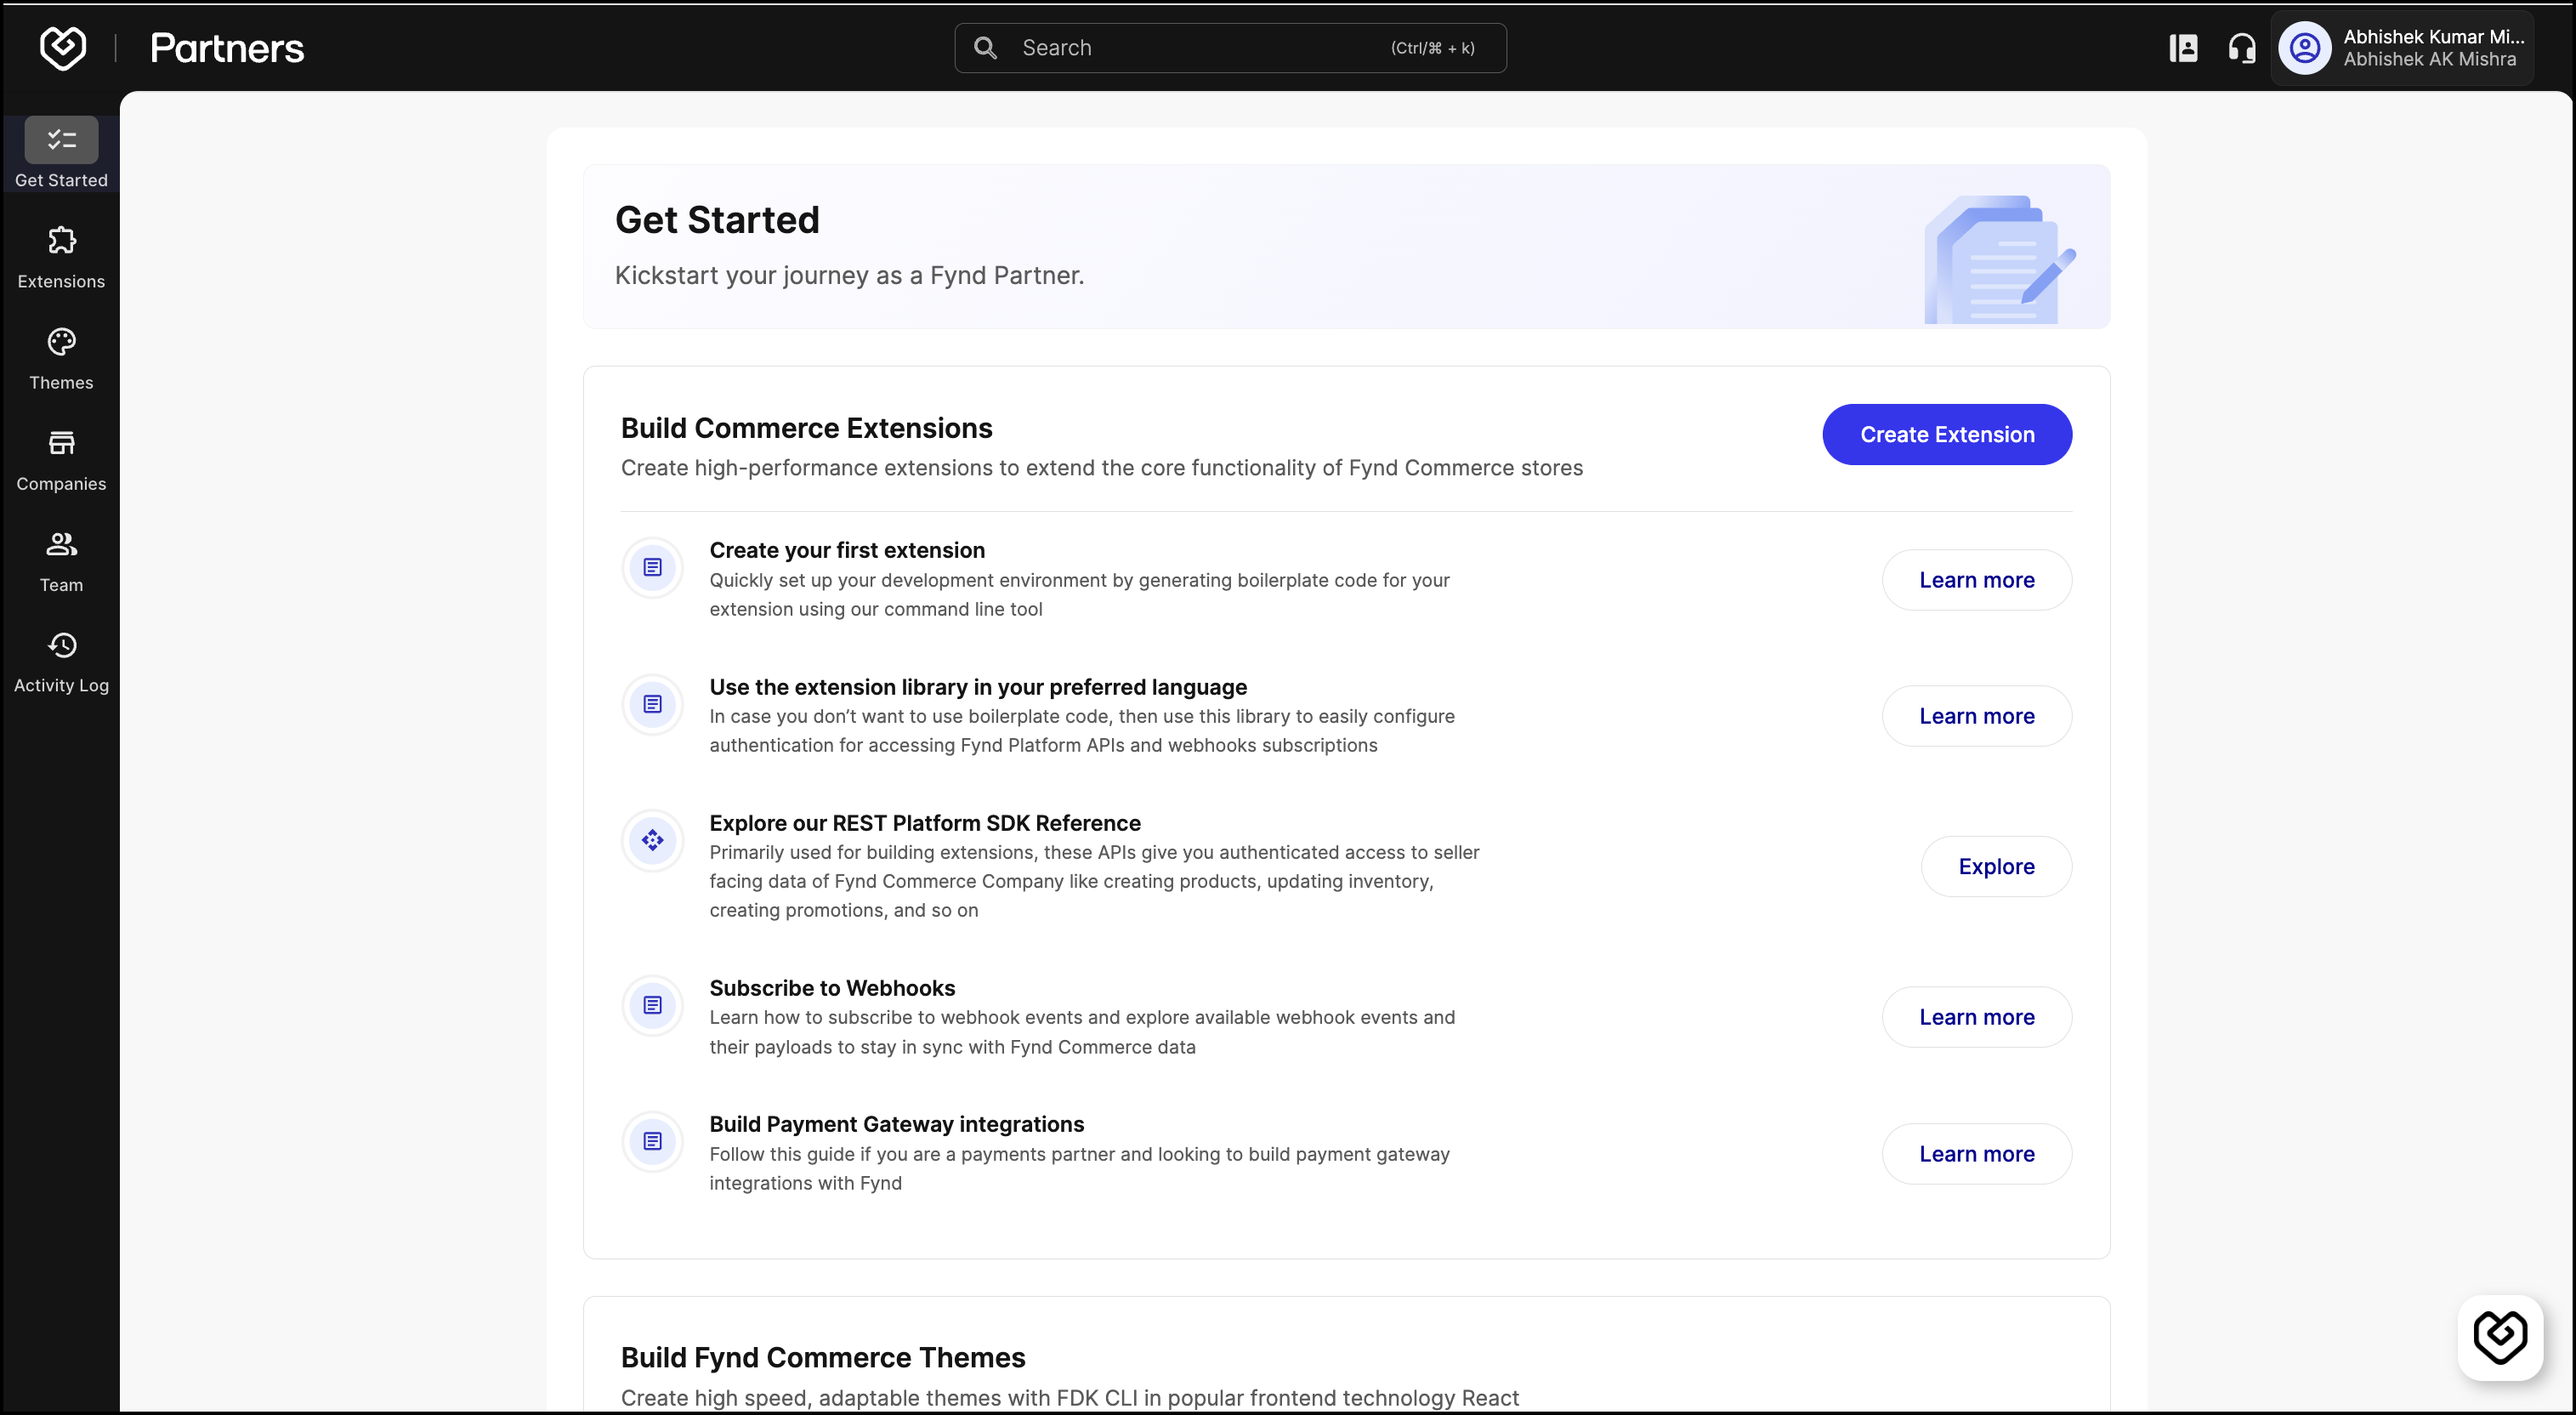
1. Get Started
Welcome to the Fynd Partners Developer console. This is your starting point to build extensions and themes for the Fynd Commerce platform.
The page includes Learn More links for each section to support your development journey. These links guide you to detailed documentation where you can explore how to use the extension library, access REST APIs, subscribe to webhooks, or integrate payment gateways. Similarly, in the Themes section, you’ll find links to helpful guides on customizing, building, and distributing themes tailored to Fynd’s platform.
You can click Create Extension to scaffold your development environment and build powerful commerce extensions. We explain how to create an extension later in this guide.
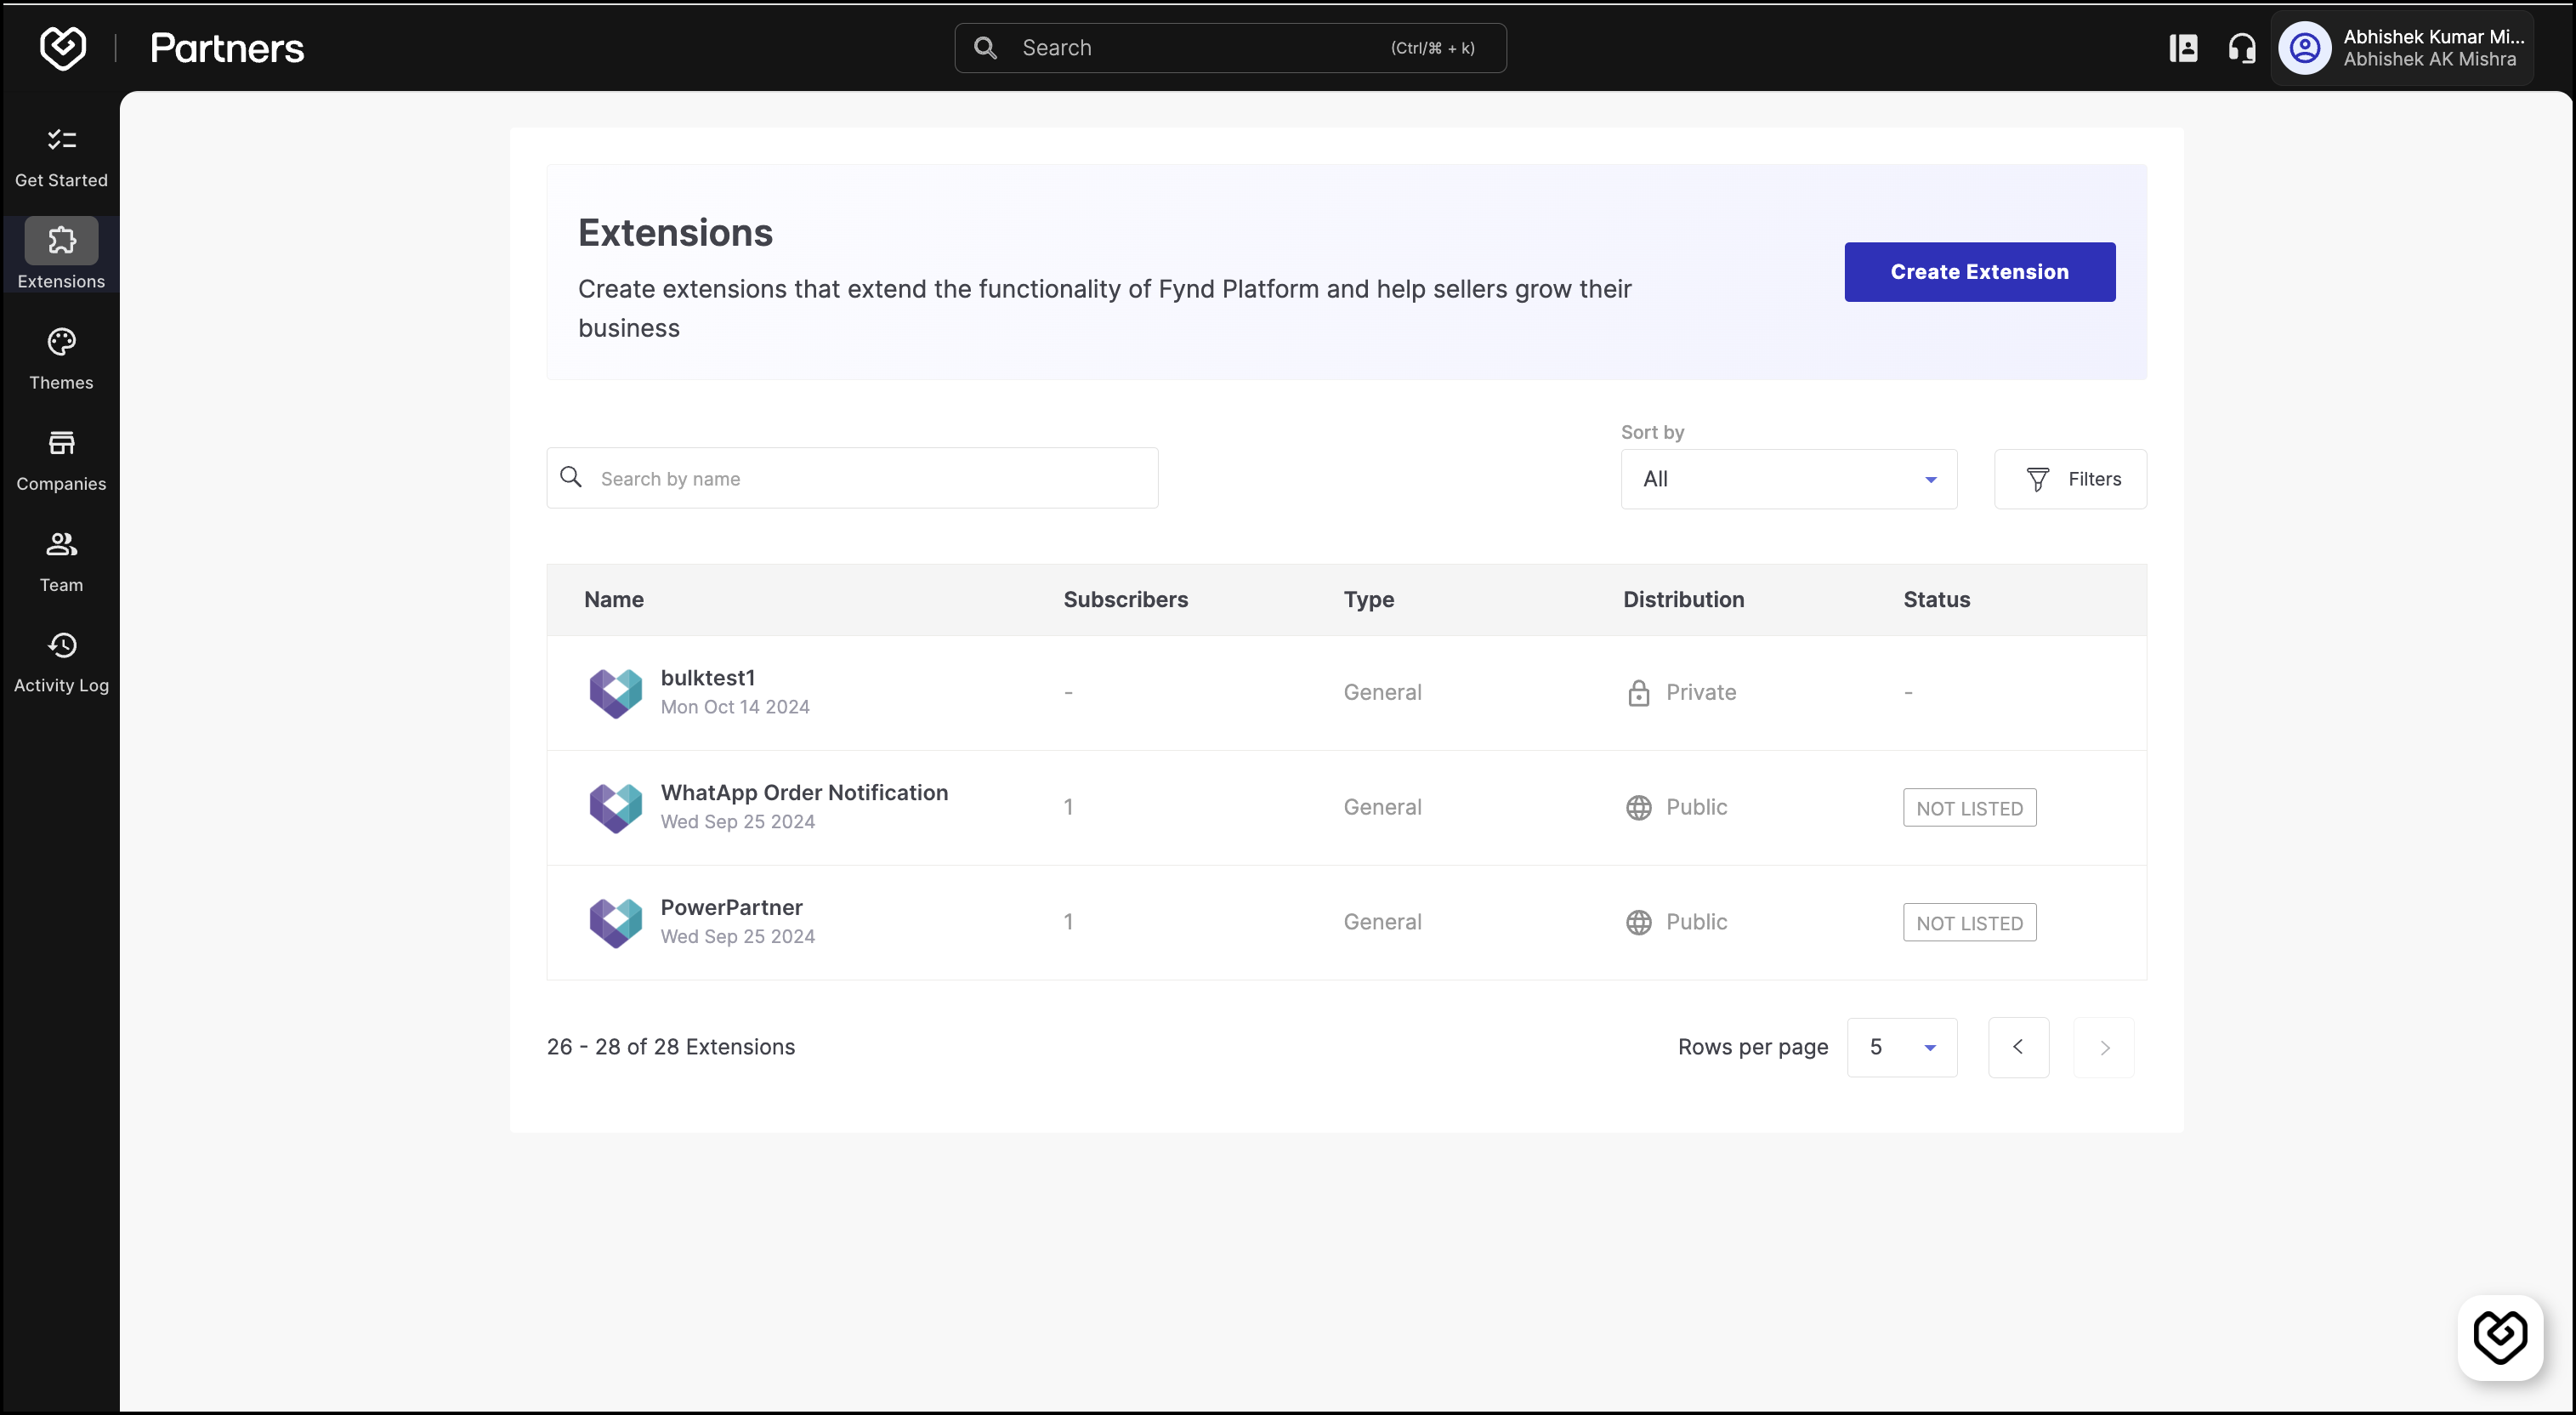
2. Extensions
The Extensions page allows developers to create and manage extensions. By clicking the Create Extension button, you can create a new extension.
Once an extension is created, it will appear in the list, along with key details such as name, type, number of subscribers, distribution status (Public or Private), and current listing status (e.g., Not Listed, Draft, Published).
Refer to the Extensions section for more details.
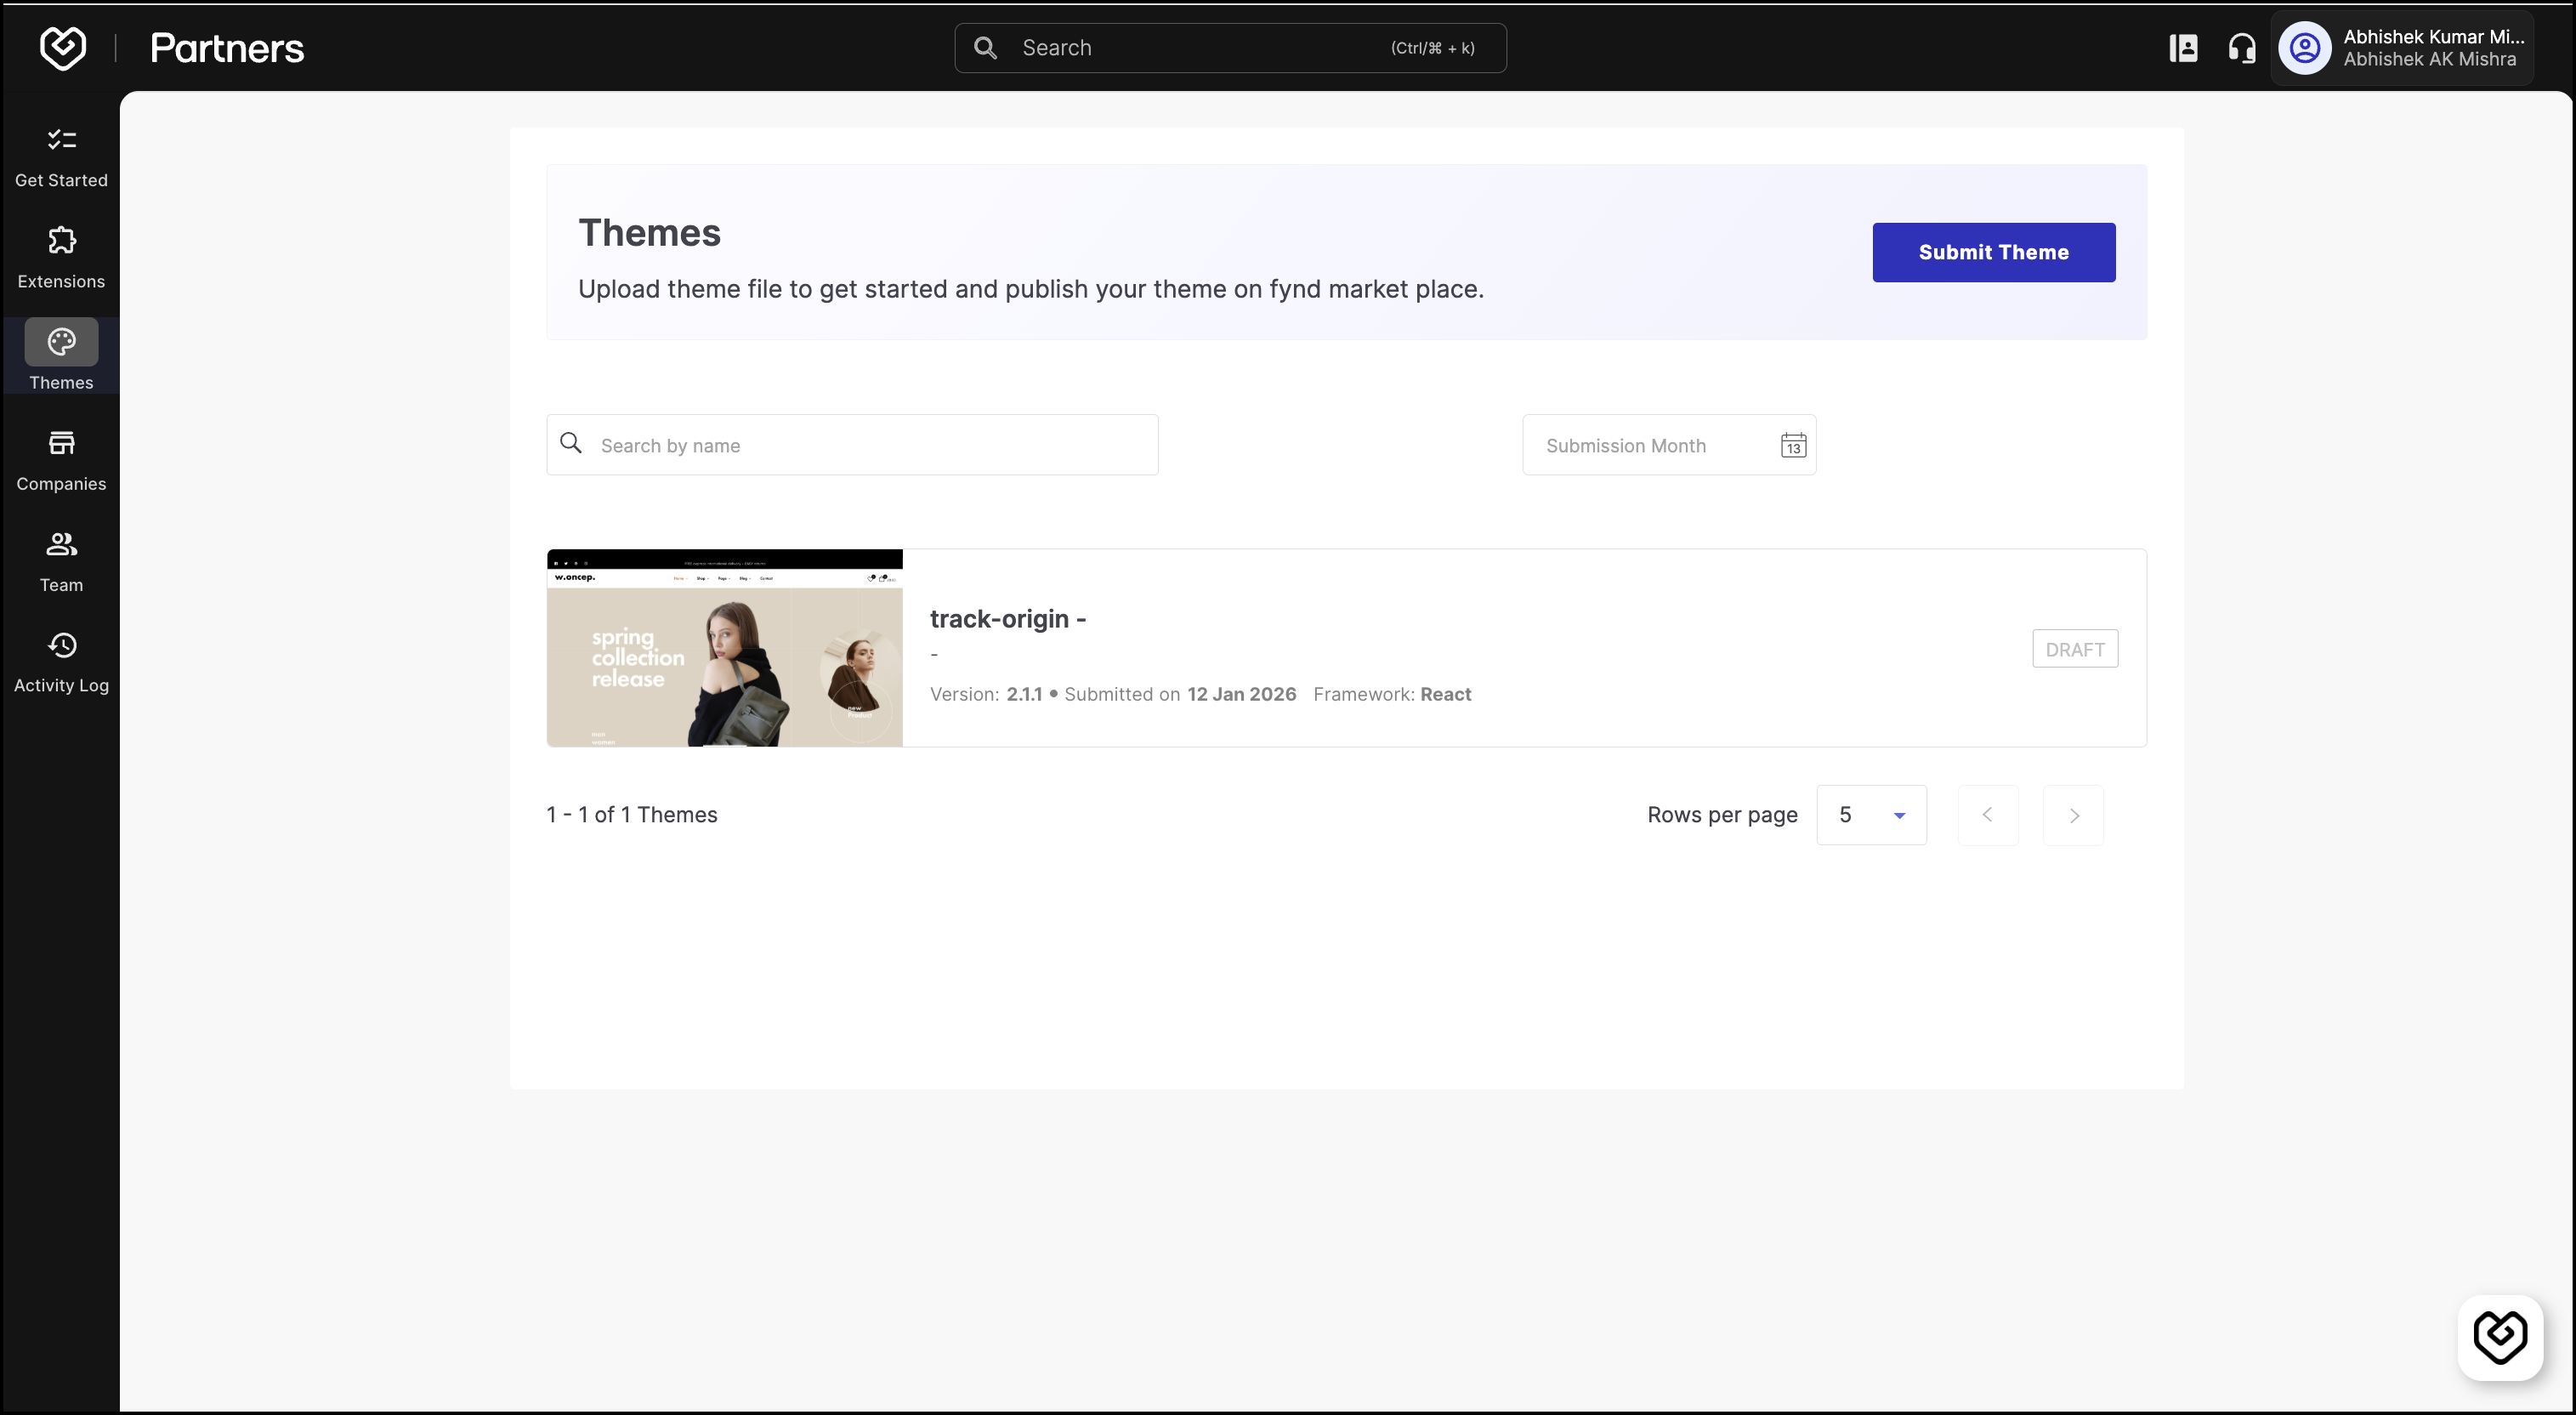
3. Themes
The Themes section lets you submit and publish your custom themes to the Fynd Themes Marketplace.
Once you have created a theme, you need to click Submit Theme to begin the submission process. We explain how to submit a theme later in this guide. Once published, your theme will be visible to sellers who are looking for unique and high-performing designs.
Refer to the Theme section for more details.
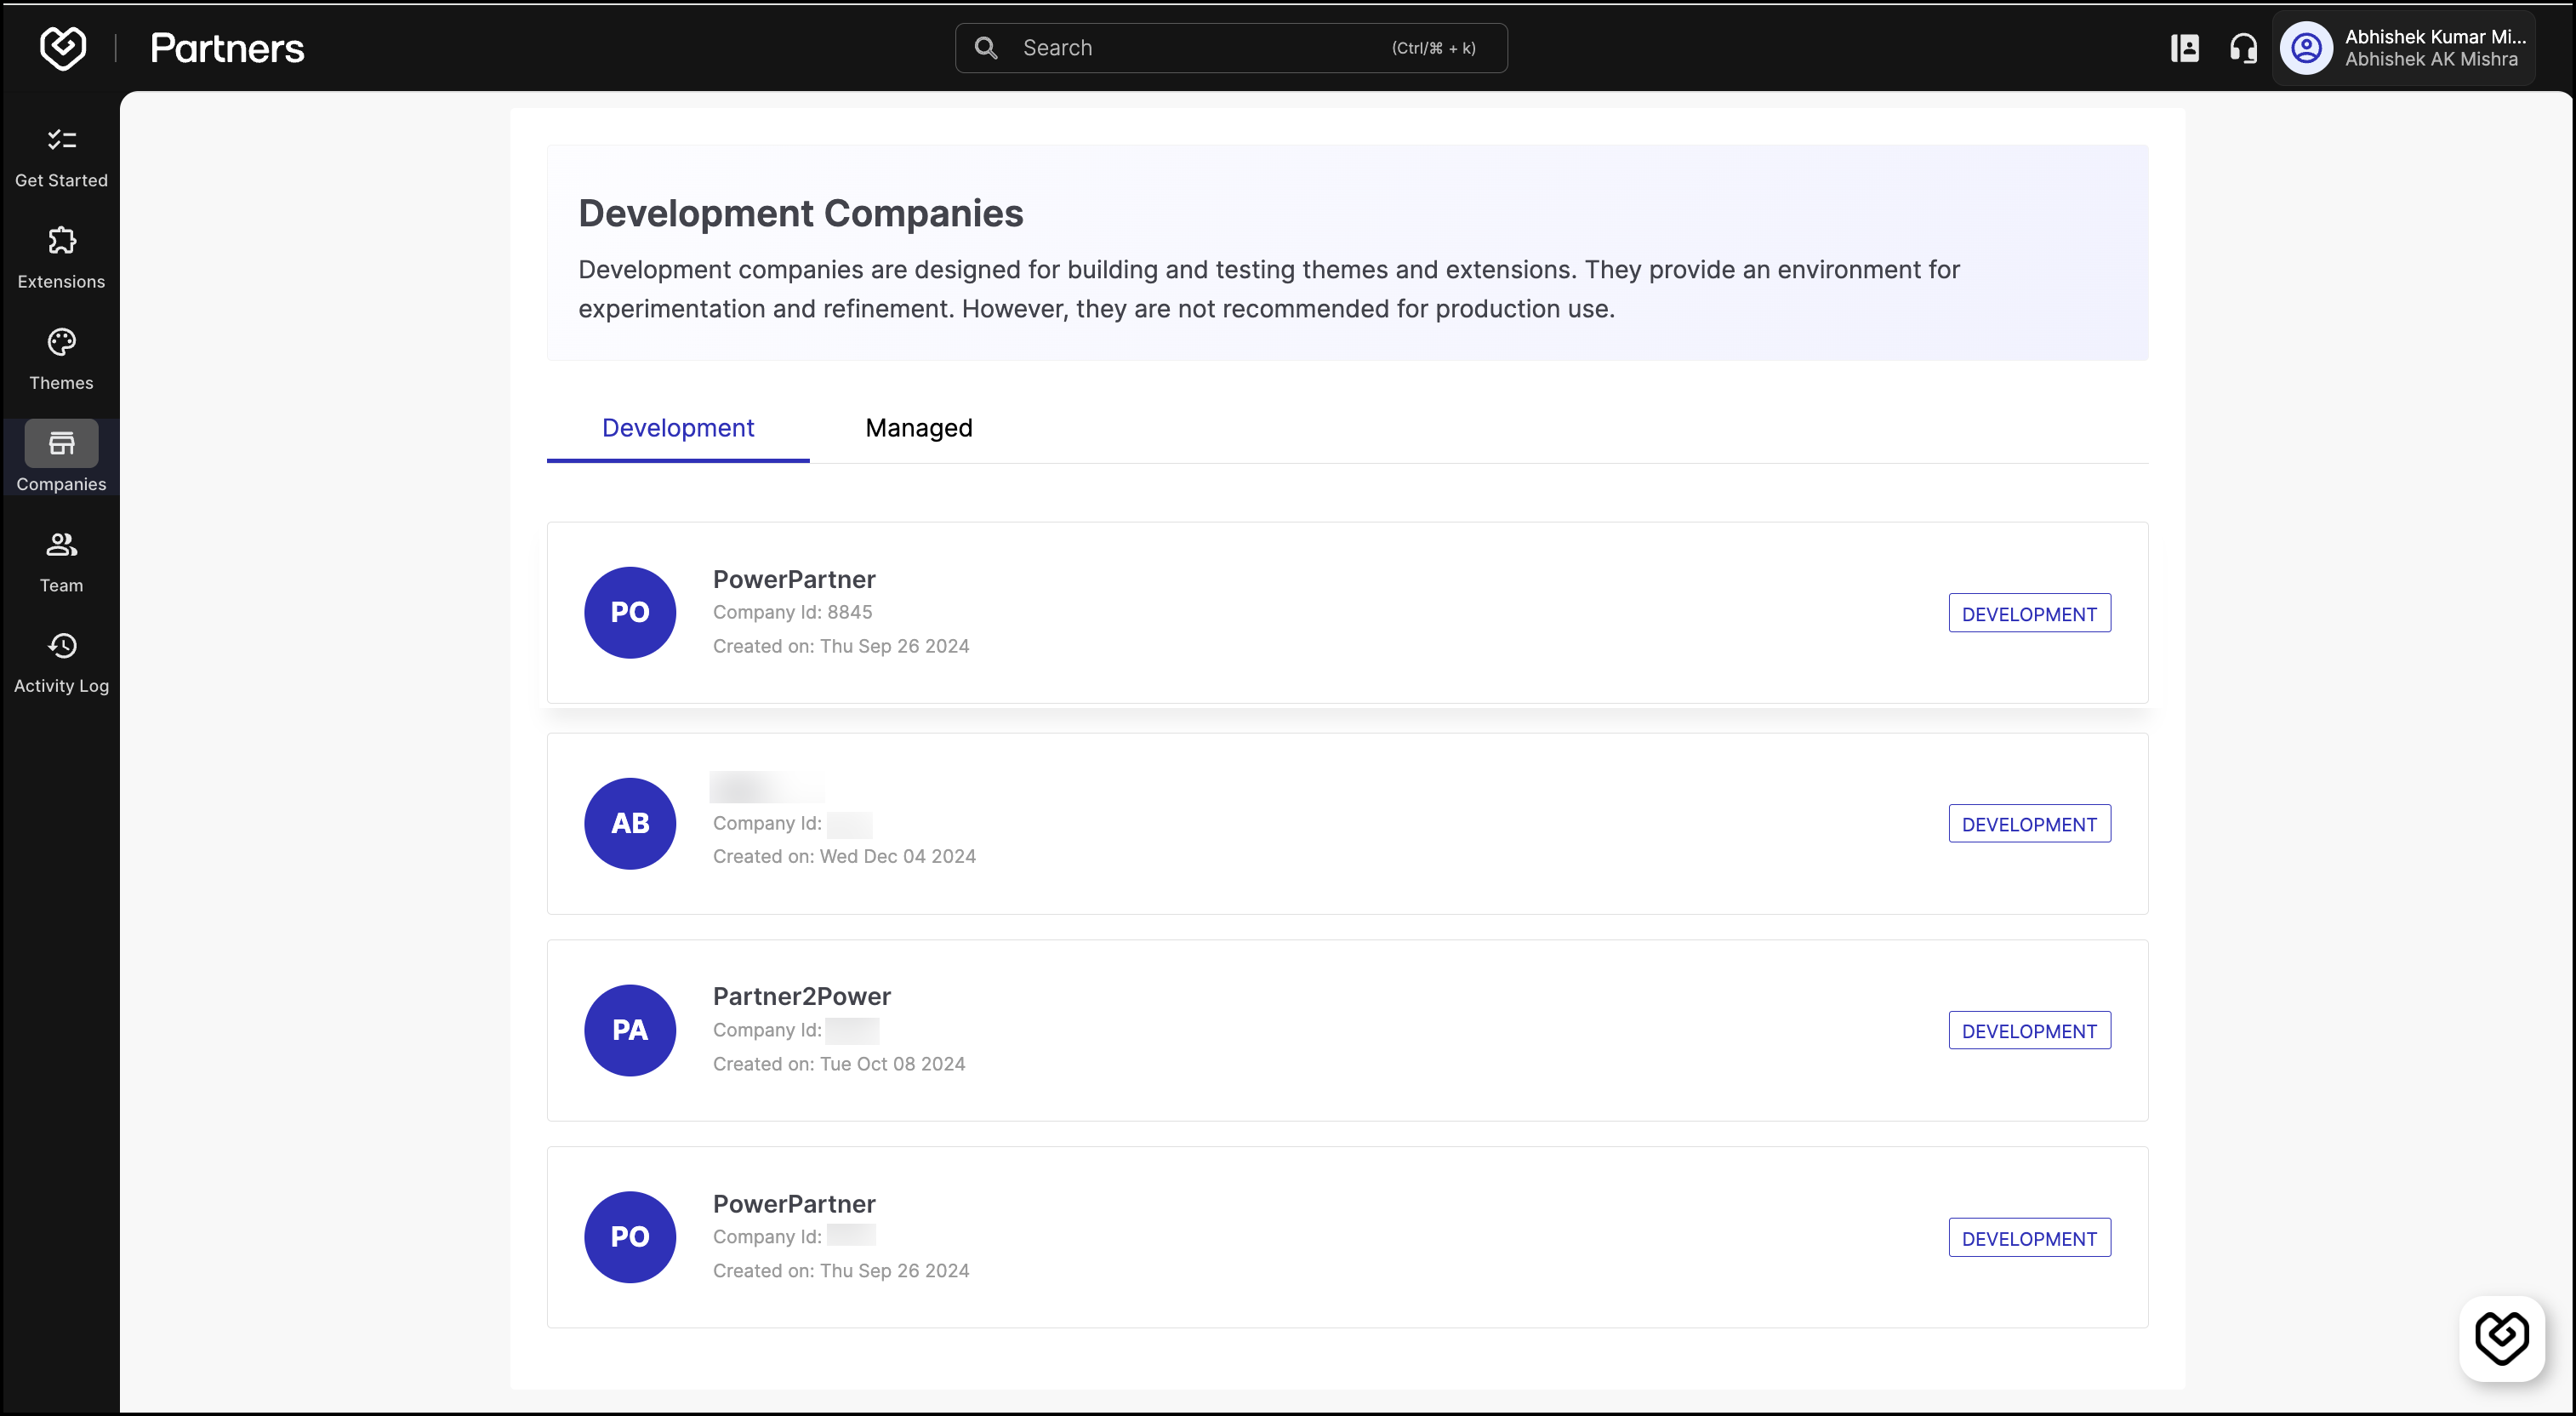
4. Companies
The Companies tab provides access to two types of company environments: Development and Managed.
Development
Development companies are intended for testing and experimentation. Partners can use these sandbox environments to build, preview, and refine themes or extensions before moving them into production. These companies mimic the seller setup but are not connected to live customer operations. They are ideal for validating changes and debugging issues during the development lifecycle.
Development companies should not be used for production or live seller operations.
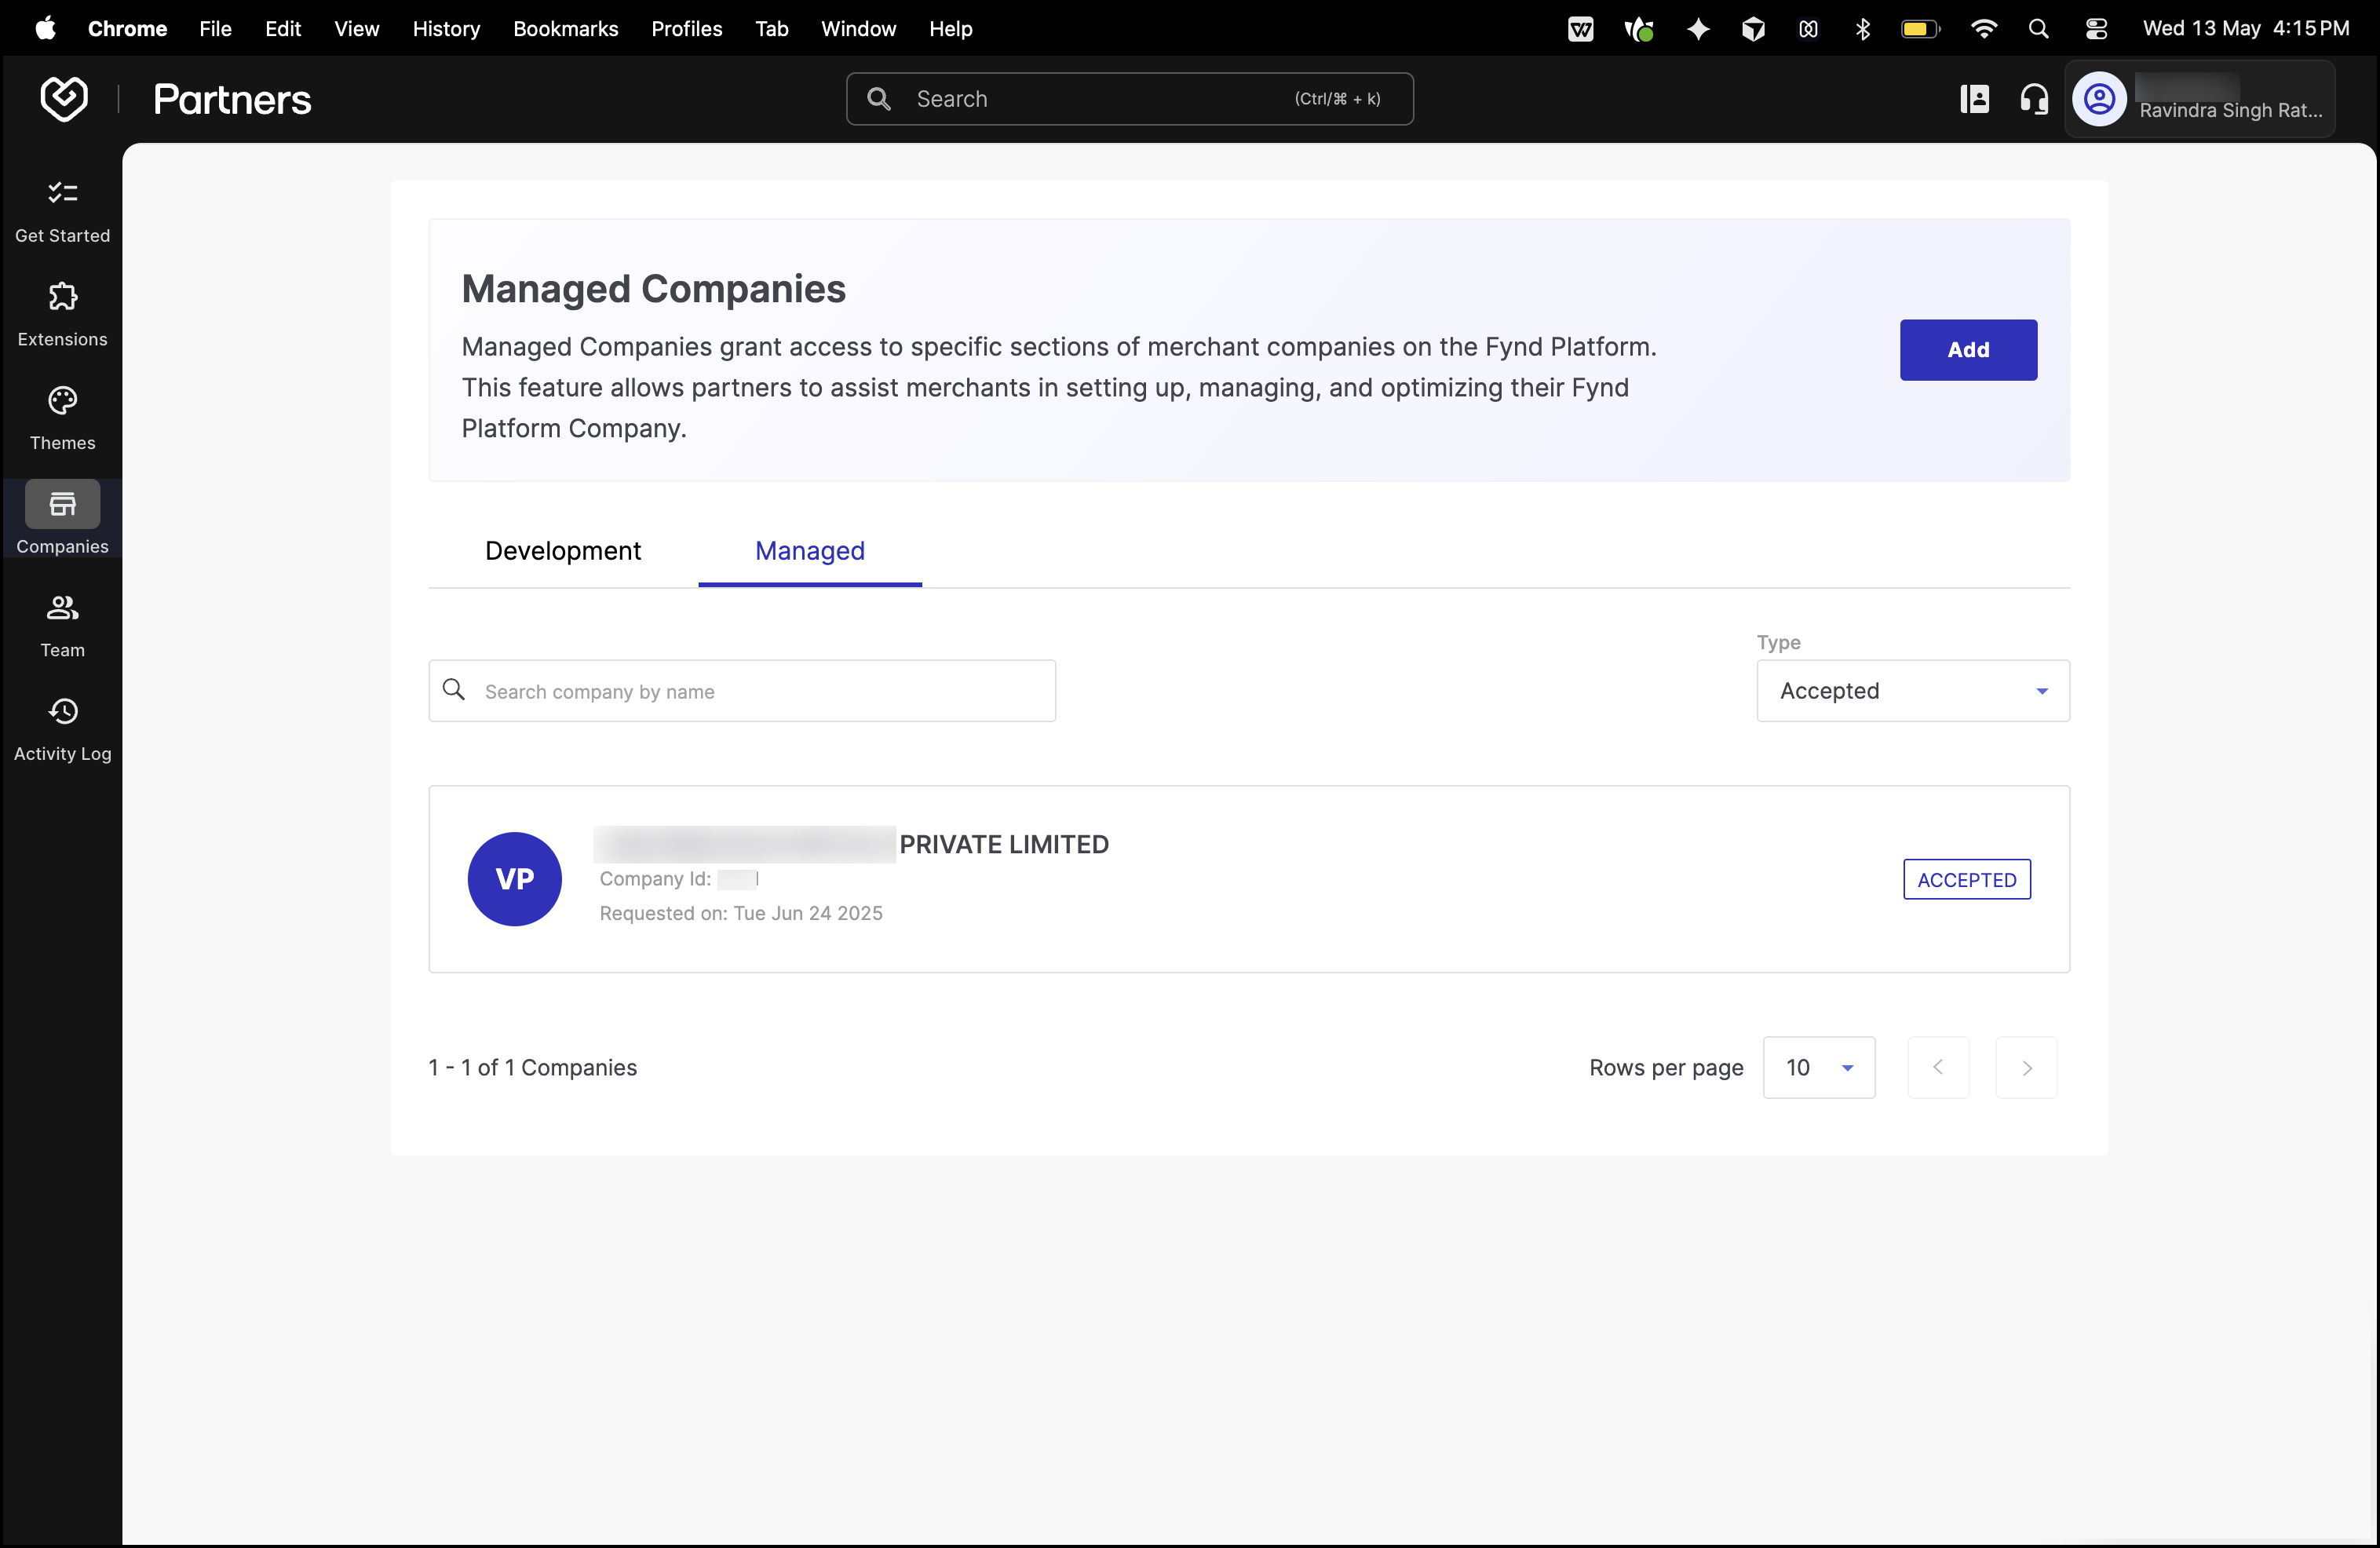
Managed
Managed companies allow partners to support actual seller companies on Fynd Commerce. Through this feature, partners can request access to specific sections of a seller’s company and assist them in setting up, configuring, and optimizing their online presence. This includes customizing themes, enabling extensions, and managing storefront functionalities. Access levels can be tailored to suit the partner’s role—either full access or custom access to specific sections of the company dashboard.
5. Team
The Team tab lets you manage your business by adding and collaborating with staff members. You can invite individuals to join your team, assign roles, and control their access.
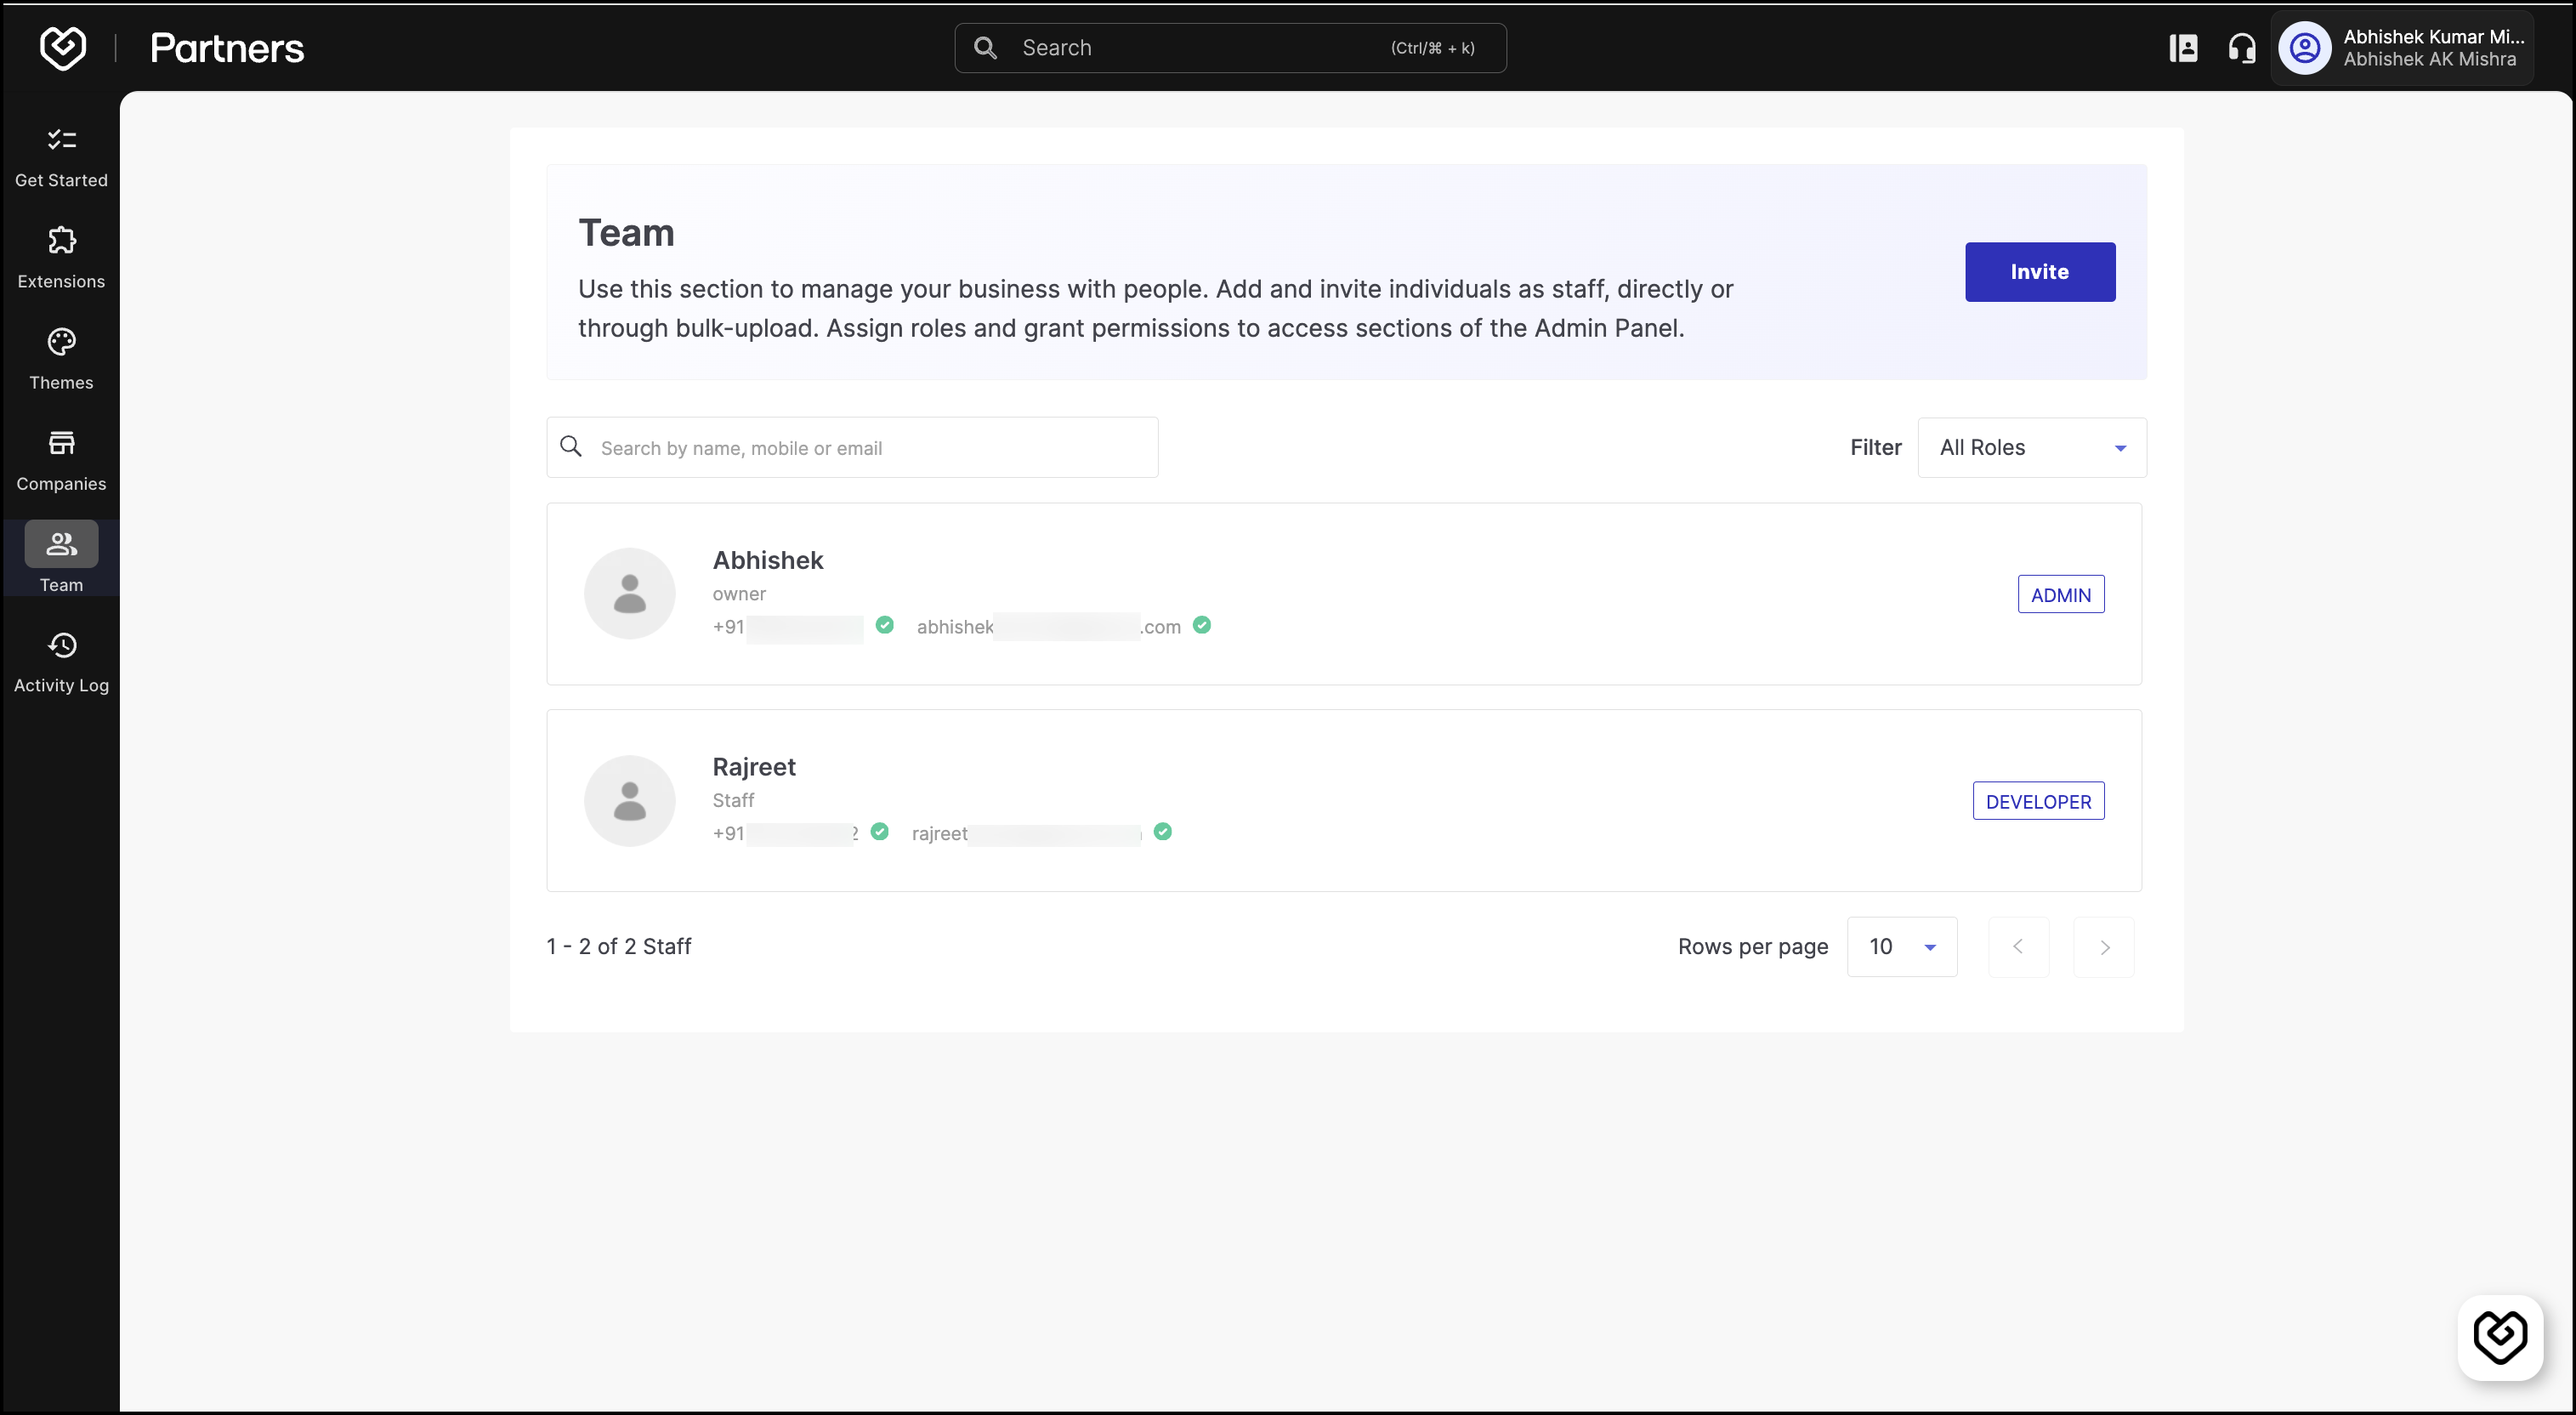
Invite Team Members
To add staff to your organization:
- Click Invite.
- Enter the mobile number or email address of the person you want to invite. To invite multiple individuals at once, separate each entry with a comma.
- Click Send Invite to send individual invitations, or click Invite All to send all at once.
Manage Access
You can update the access level of an existing team member:
- Click on the member’s name.
- Change their role or modify permissions as required.
- Save the changes to update their access.
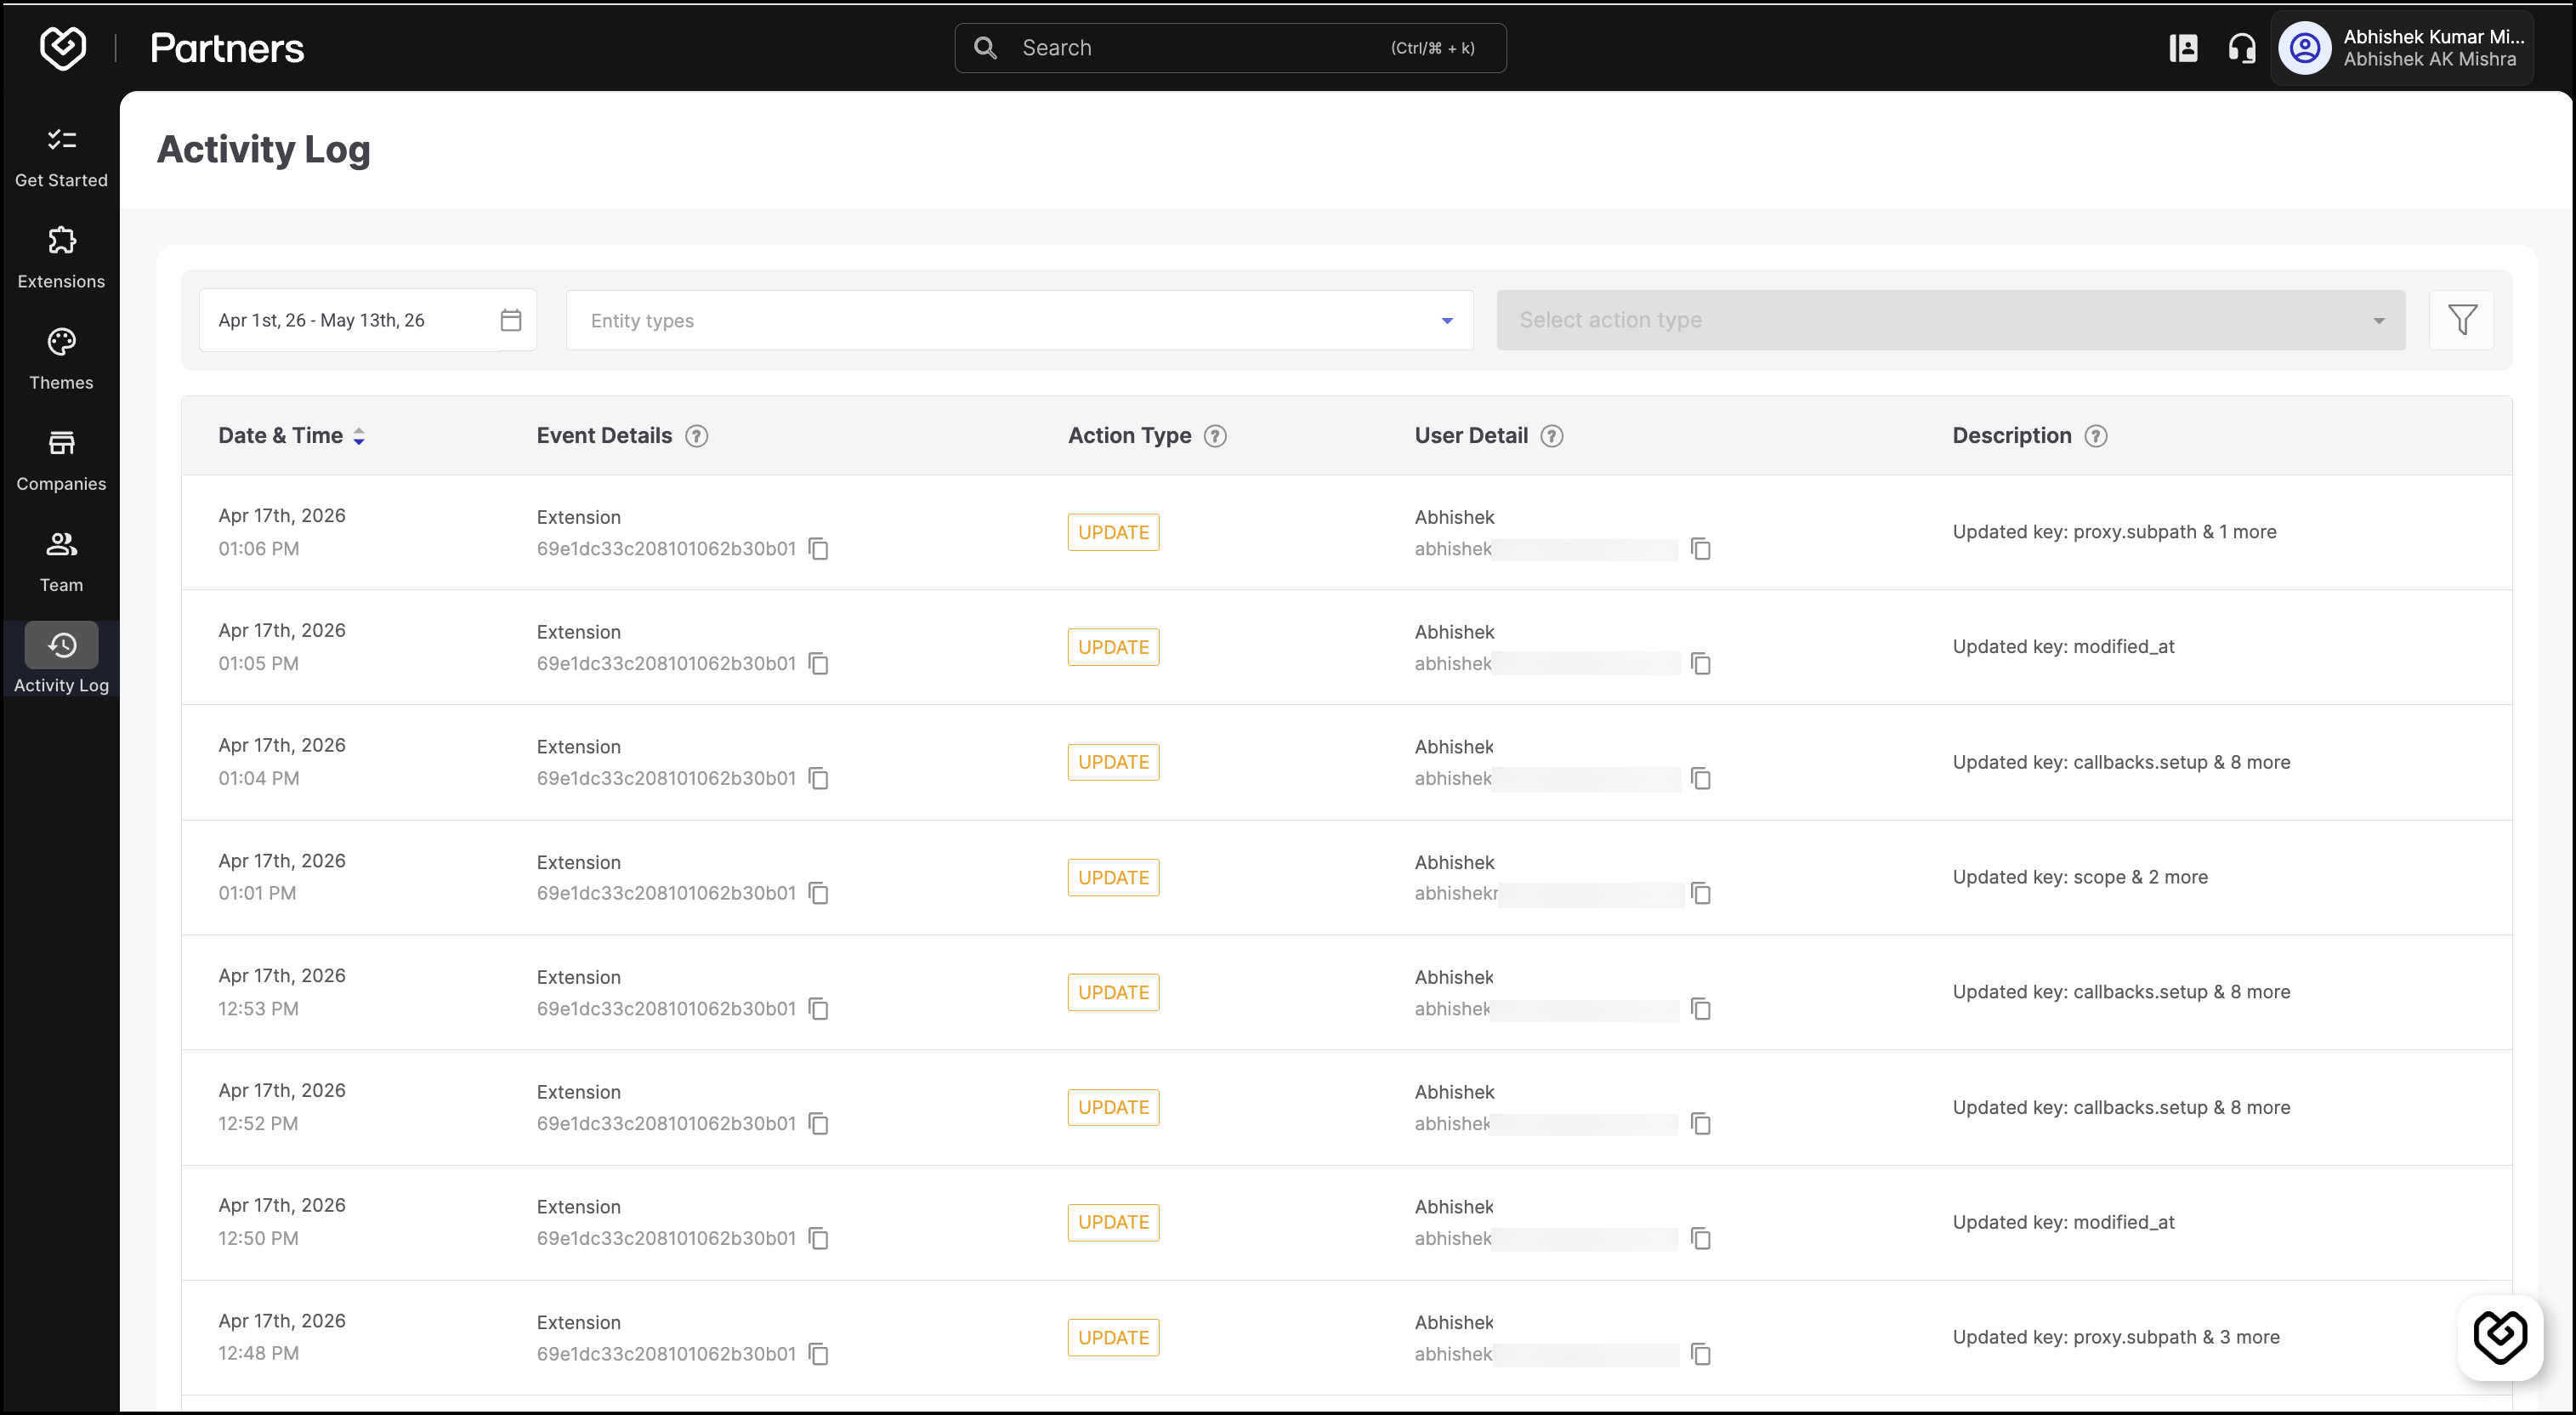
6. Activity Log
The Activity Log page in Fynd Partners helps you track changes made in your partner account. It records important actions performed by users, such as updates to extensions, themes, and companies.
Use this page to review who made a change, when the change was made, what resource was updated, and which fields were affected.
Navigation Bar
7. Ask the Expert
Schedule a call with the developer experience team for advanced support and expert guidance. For more information, see the Partners Solution Call section.
8. Customer Support
Customer Support helps you manage and resolve queries you may encounter while using Fynd Commerce. It includes a ticketing system where you can create tickets to resolve your queries. Refer to the Developer Support page for more details.
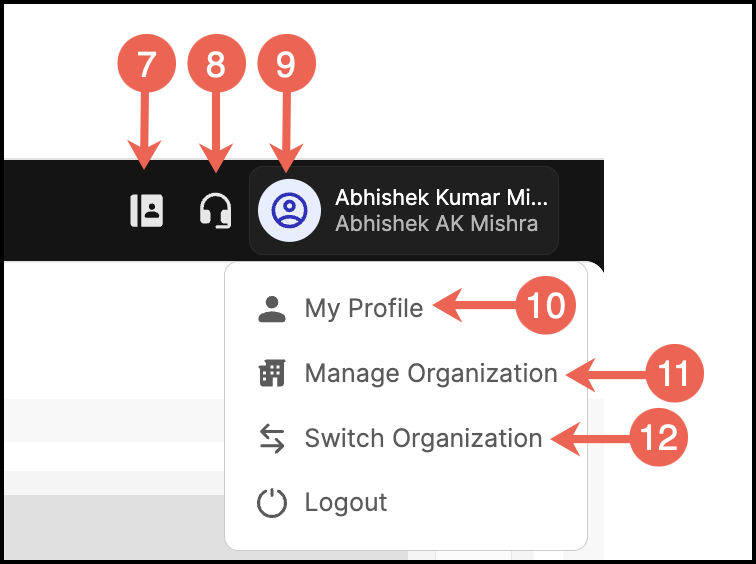
9. User Menu
Click the user icon to open the dropdown.
10. My Profile
This option allows you to update your personal account information. This section is useful for keeping your contact details up to date. From here, you can edit your name, email, and mobile number.
11. Manage Organization
The Manage Organization option lets you view and manage details related to your partner organization in Fynd Partners.
Follow these steps to open the Manage Organization page:
- Log in to Fynd Partners.
- Click the profile icon in the upper-right corner.
- Select Manage Organization from the dropdown menu. By default, you will be redirected to the Organization Details page.
The Manage Organization page includes the following options:
| Option | Description |
|---|---|
| Organization Details | Displays the basic details of your organization, such as organization name, organization ID, country, state, and owner details. |
| Product Accounts | Allows you to view and manage product accounts linked to the organization. |
| Billing | Provides access to billing-related information for the organization. |
| Teams | Allows you to manage teams and members associated with the organization. |
| Plans | Displays plan-related information for the organization. |
| Usage | Shows usage-related details for the organization’s services or resources. |
12. Switch Organization
Fynd Partners allows you to switch between multiple organizations you have access to. Follow these steps to change your organization:
- Click on your profile icon in the upper-right corner of the dashboard.
- From the dropdown menu, click
 Switch organization. A list of organizations will appear. These include the organizations you've created and organizations where you've been granted access.
 - Select the desired organization to switch your workspace accordingly.