Getting Started with Extensions
This page provides all the steps needed to create your first extension. It covers the following tasks:
- Prerequisites
- 1. Install FDK CLI
- 2. Generate a Boilerplate
- 3. Populate Test Data
- 4. Preview Your Extension
Prerequisites
Before getting started, you'll need the following:
- Git↗
- Node.js v20↗ or later
- Create accounts on Fynd Console and Fynd Partners.
Steps
1. Install FDK CLI
The FDK CLI simplifies theme and extension development using commands for creating, testing, and deploying projects. For more details, refer to the GitHub documentation↗.
-
Run the following command in your terminal to install FDK CLI:
npm install -g @gofynd/fdk-clitipYou can run
fdk --versionto check whether FDK CLI was installed successfully.
2. Generate a Boilerplate
-
Run the following command to log in to your Fynd Partners account:
fdk loginYour browser will open so you can select the account where you want to create the extension.
noteFor FDK CLI 8.0.6 or earlier, developers must enable Apps on Device in the browser to log in successfully to their Fynd Partners account.
-
In the browser, select the account for which you want to create the extension.
tipAfter you log in, you can run
fdk userin your terminal to verify that you are logged in. -
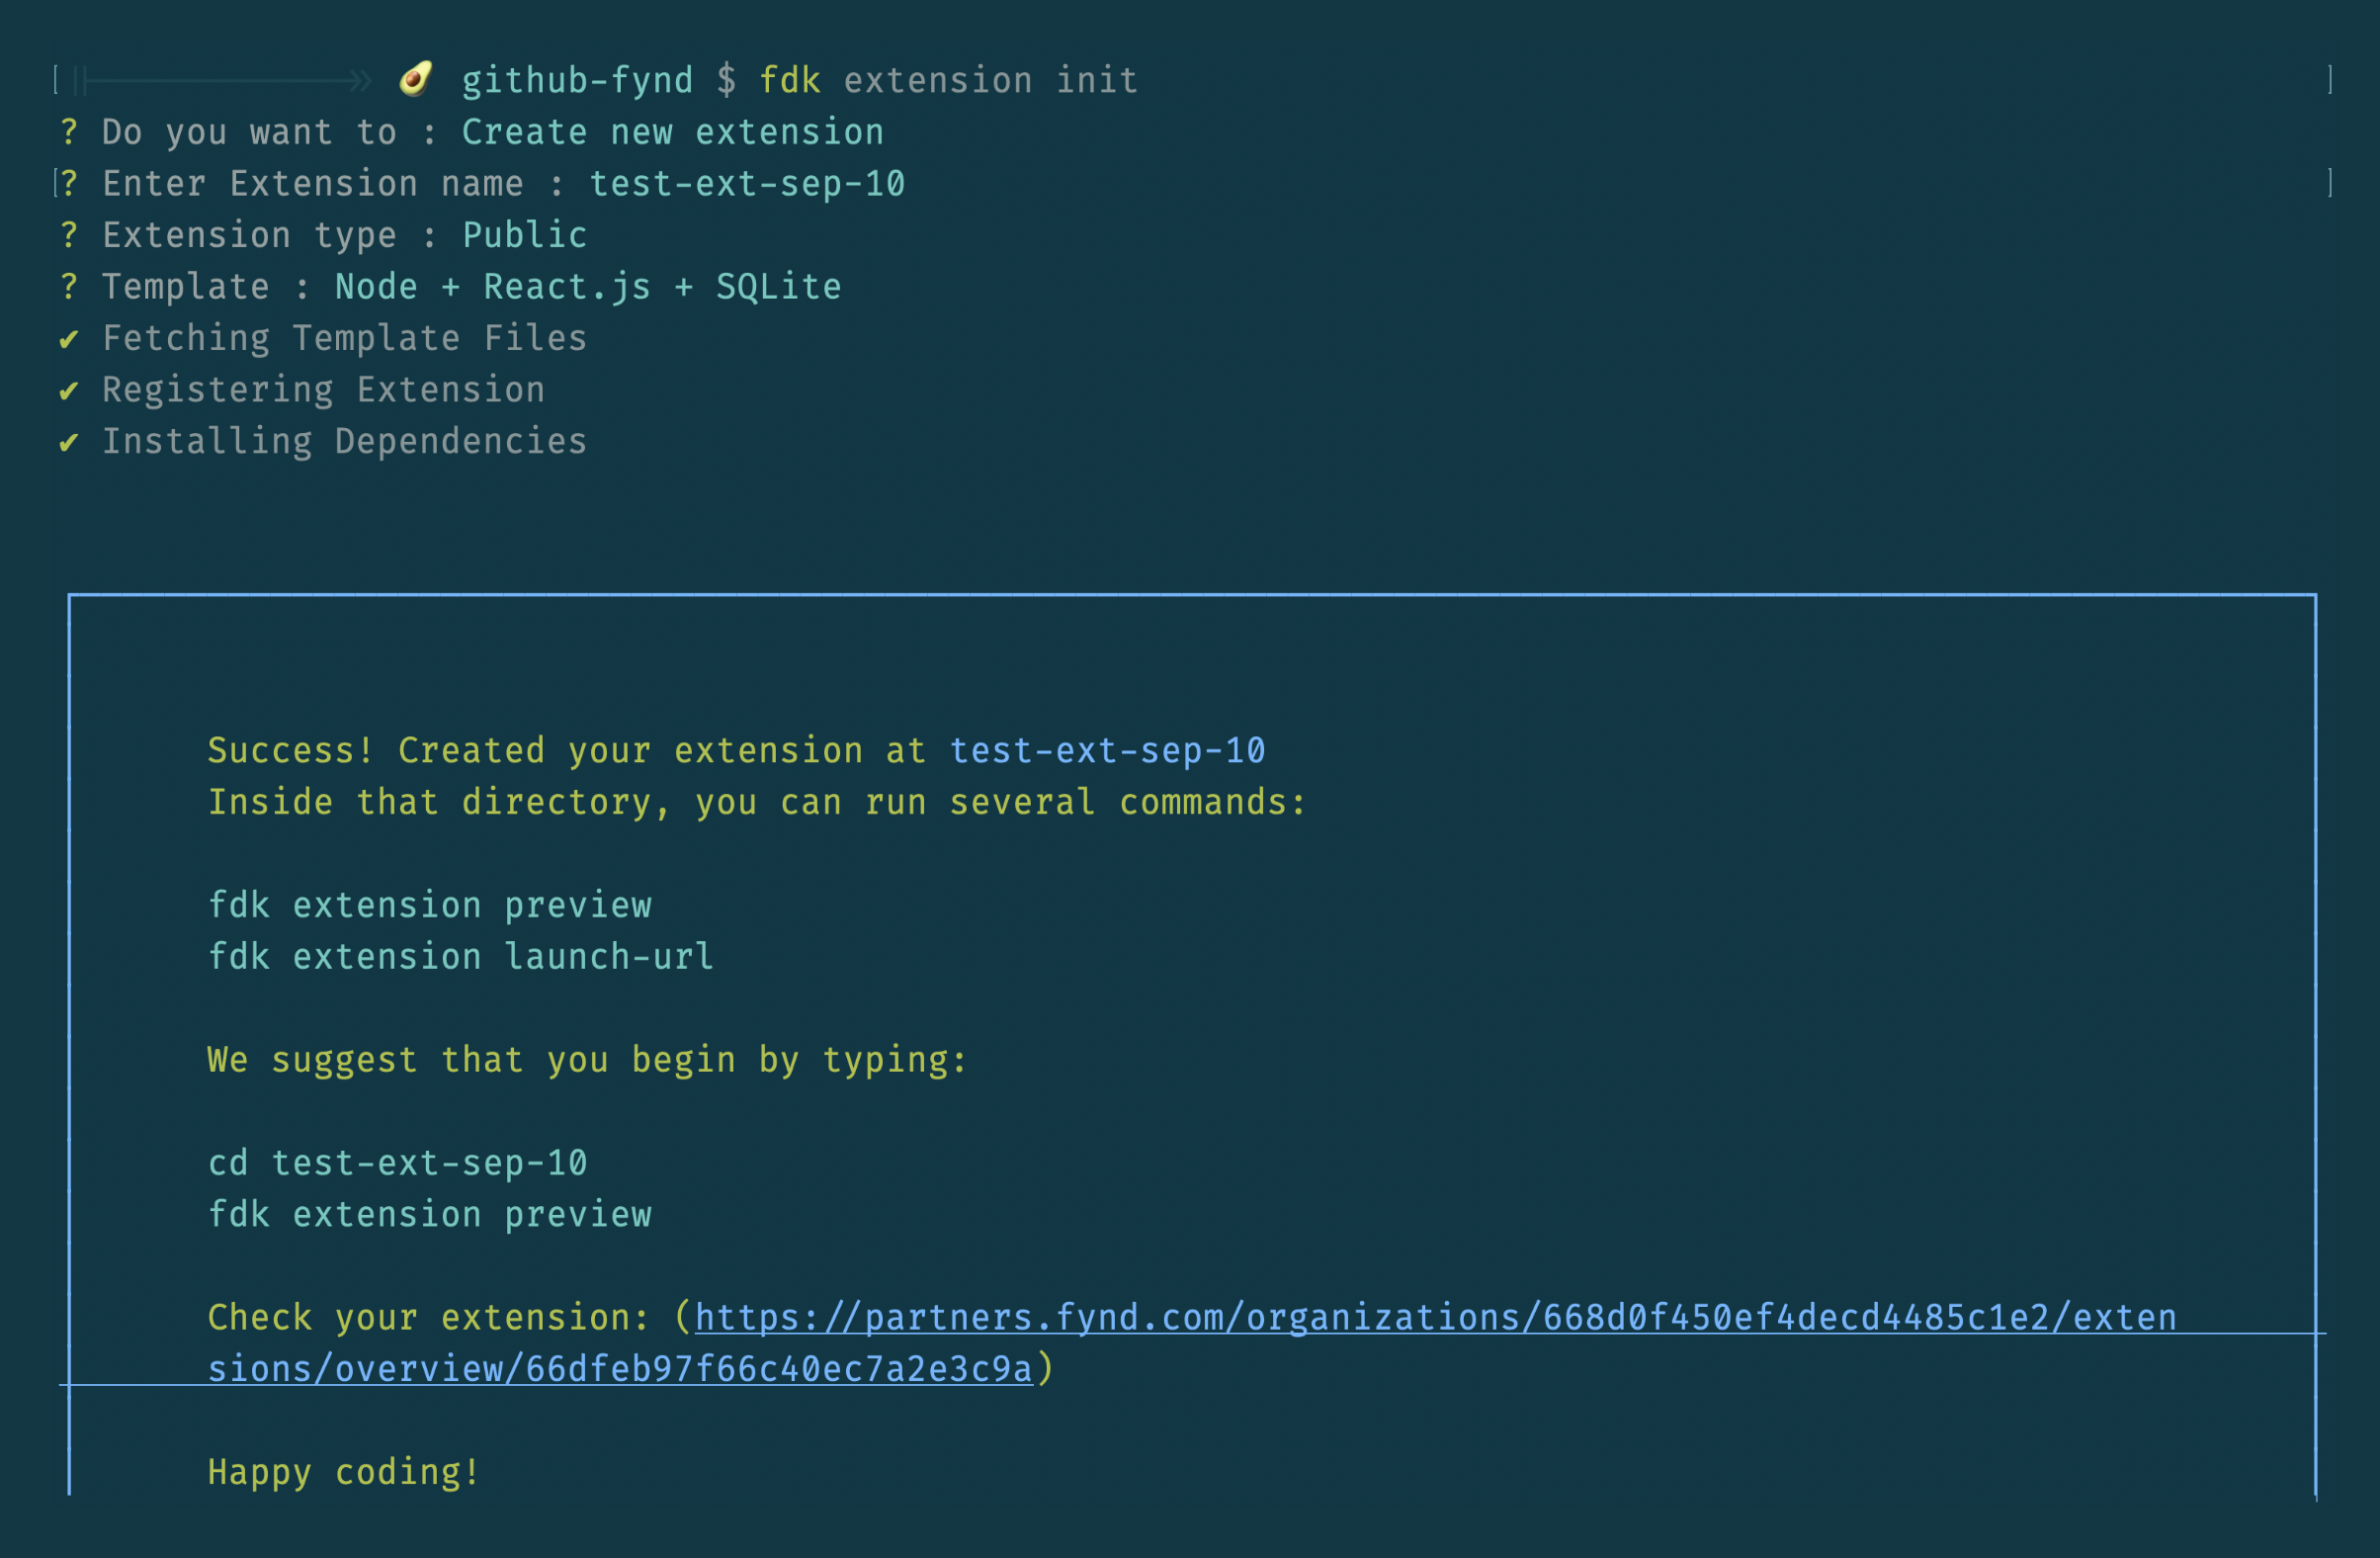
Go back to your terminal and run the following command to initialise a new extension:
fdk extension init -
Select Create new extension.
-
Enter a name for your extension.
-
Select the extension type as Private.
-
Select your preferred technology stack for the template.
We recommend building withNode + React.js + SQLite.
The fdk extension init command creates a folder in your local system and downloads the boilerplate for you to get started. This command also registers a "Company Level" extension in your Fynd Partners account. You can change all the extension details in the Partners panel.
The boilerplate contains your API credentials and takes care of authentication into Fynd Commerce for using the Platform API, Storefront API, and webhooks.
3. Populate Test Data
-
Run the following command to navigate to the extension directory:
cd "extension-name" -
Run the following command:
fdk populate -
Select your development company.
 note
noteThe
fdk populatecommand adds a predefined set of products to the selected development company. This can be done only once per development company. However, if preferred, you can also create the products manually.
4. Preview Your Extension
-
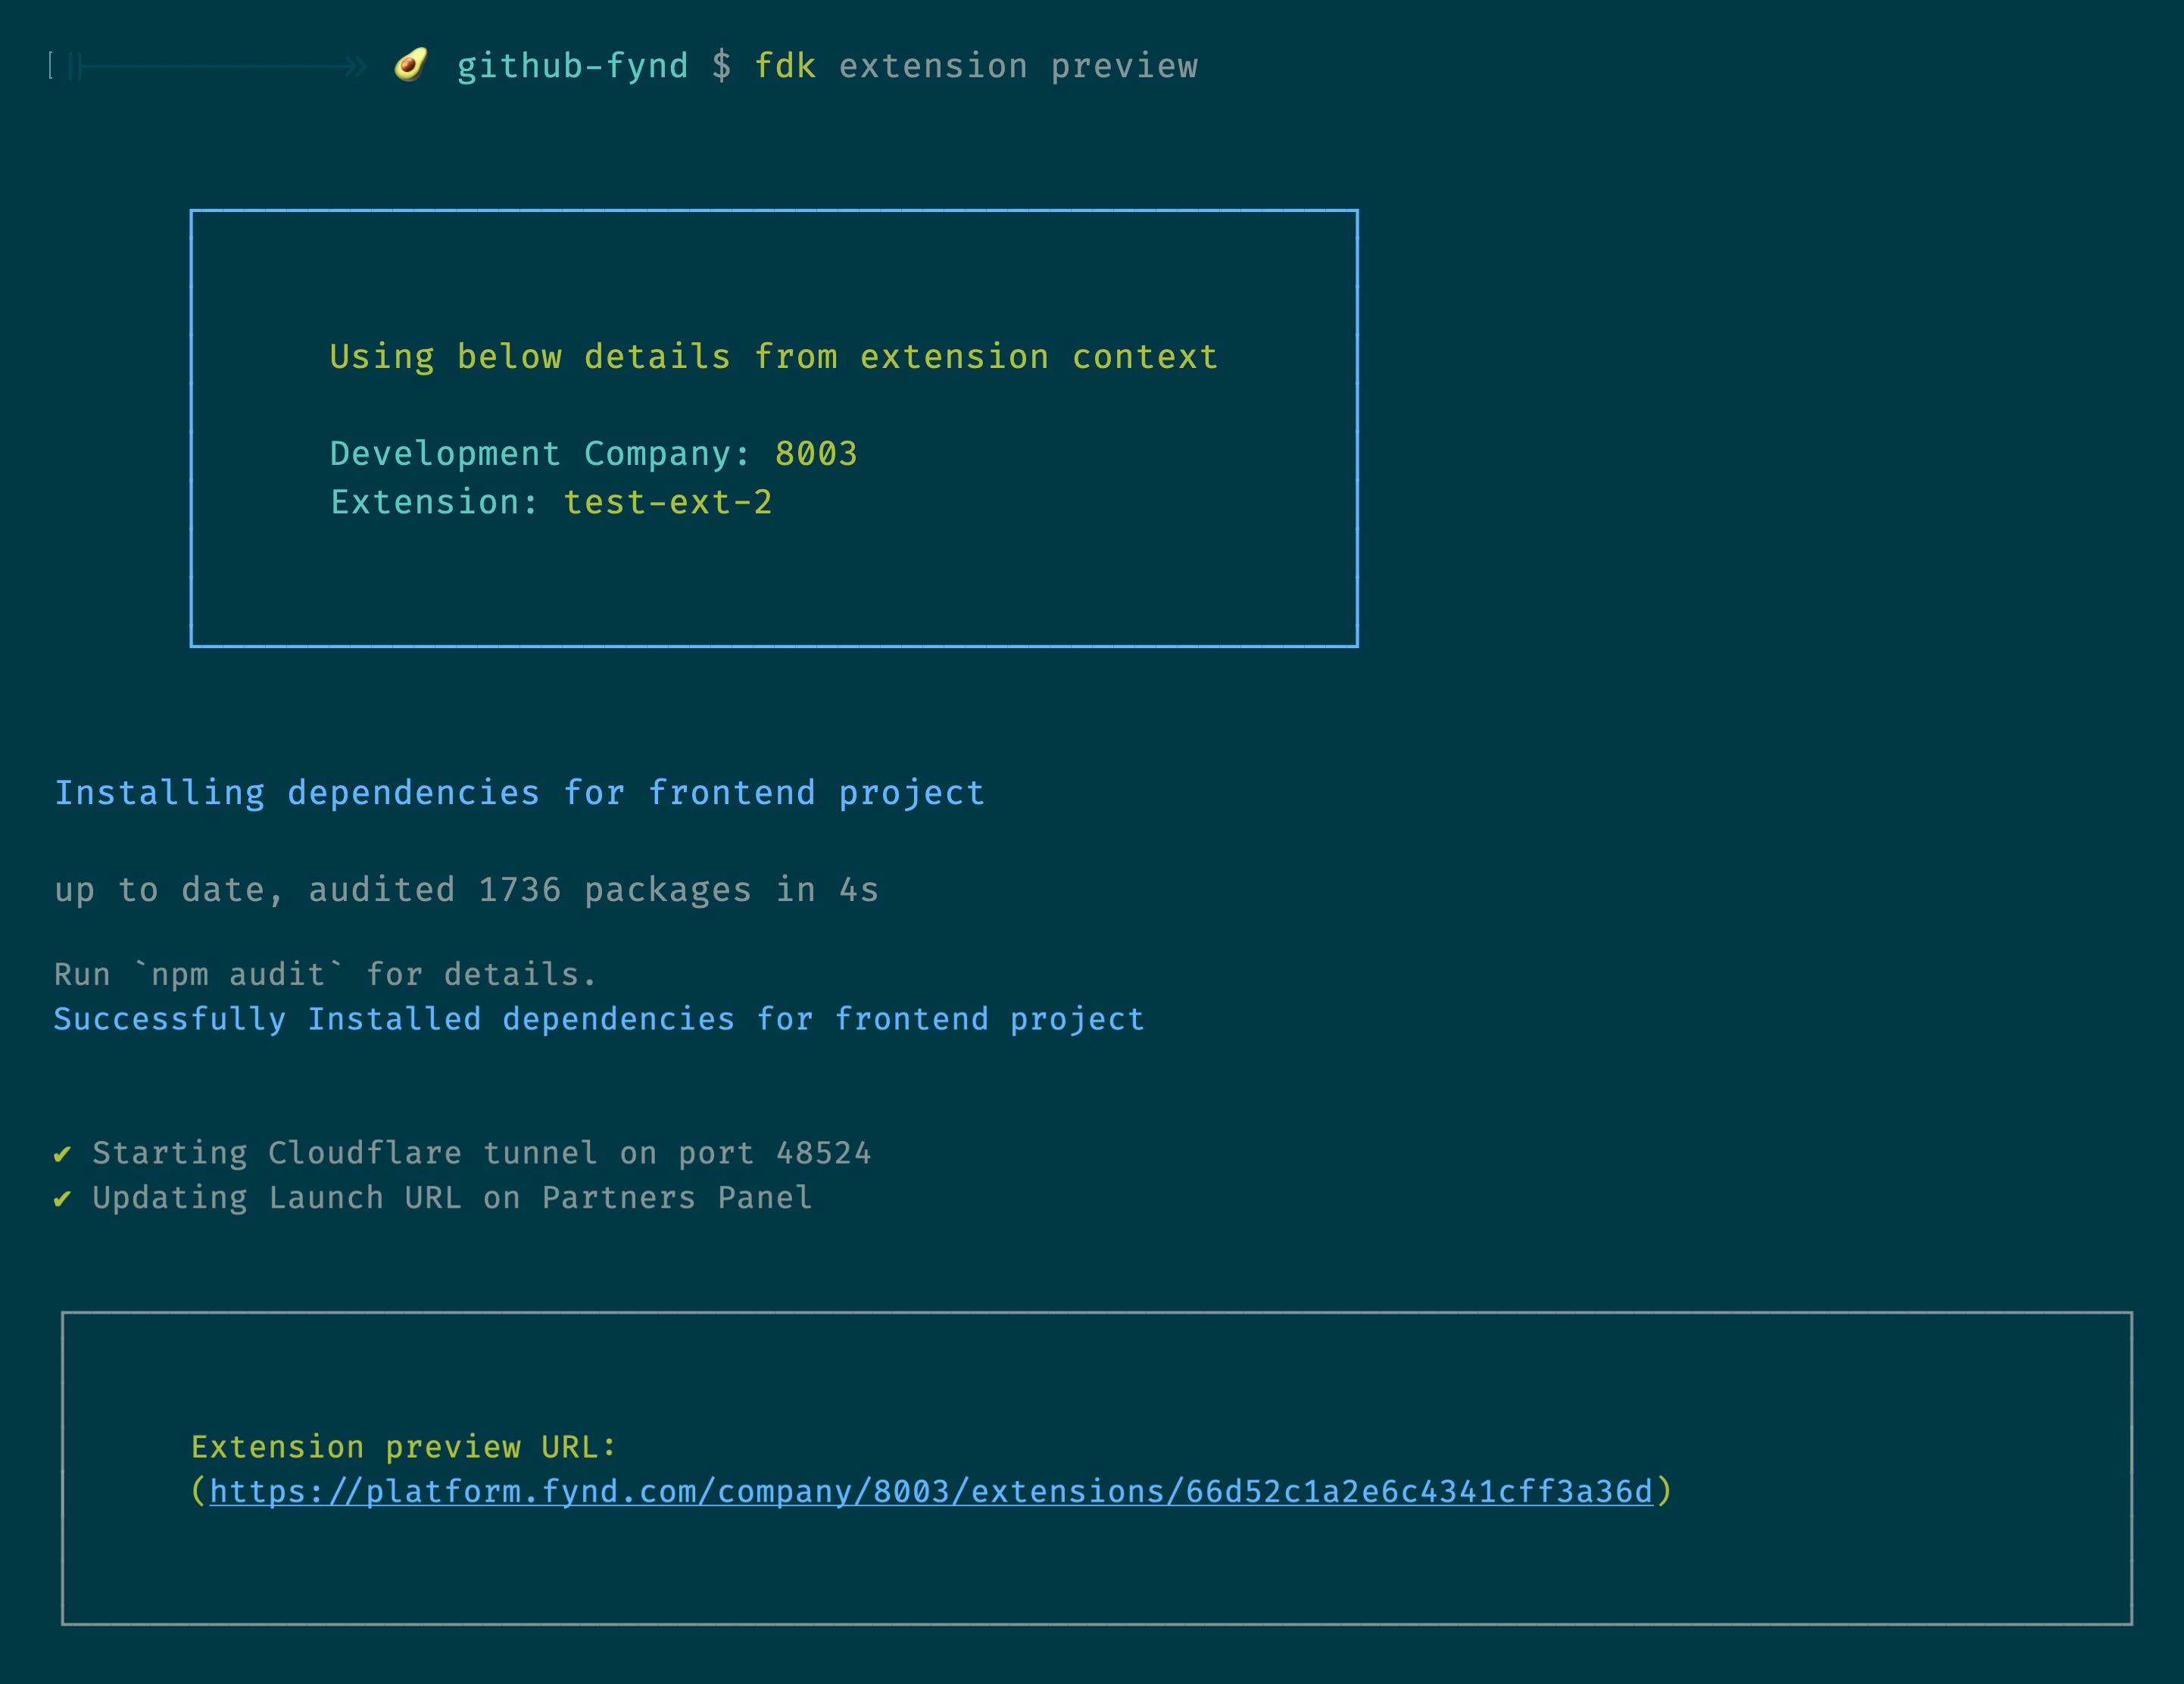
Run the following command:
fdk extension previewBy default, FDK uses a Cloudflare tunnel to expose your local extension for preview. If you prefer to use a different tunneling service, refer to Preview Extension with Custom Tunnel for steps.
-
Copy the preview URL from the terminal into the browser.
- Click Accept and Continue.
You've successfully created and previewed your first extension.
Preview Extension with Custom Tunnel
To enhance flexibility during local development, FDK supports a custom tunnel URL in the fdk extension preview command.
By default, FDK uses Cloudflare to expose your local extension. However, you might prefer to use another tunneling service for extension preview.
There are two ways to preview your extension using custom tunnel:
--custom-tunnelflag
fdk extension preview --custom-tunnel
When you run this command, the CLI will prompt you to enter a custom tunnel URL. This tunnel must be listening on the port number suggested by the CLI.
For example:
? Please enter the Tunnel URL that is listening on port 46456 : https://you-tunnel-url
If you do not provide a custom tunnel, the FDK will automatically use the default Cloudflare tunnel.
--tunnel-urland--portflag
fdk extension preview --tunnel-url https://your-tunnel-url --port <port-number>
This method bypasses the interactive prompt by directly specifying the tunnel URL and port number when running the command.
Next Steps
Explore the Extension Development Guide to understand how the boilerplate code works, learn about our Platform API, Storefront API, Webhooks, and Bindings.