Setup Fulfilment
To support in-store pickups flows for your POS and mPOS operations, you must configure the appropriate fulfillment options within your sales channel on the Fynd Commerce platform.
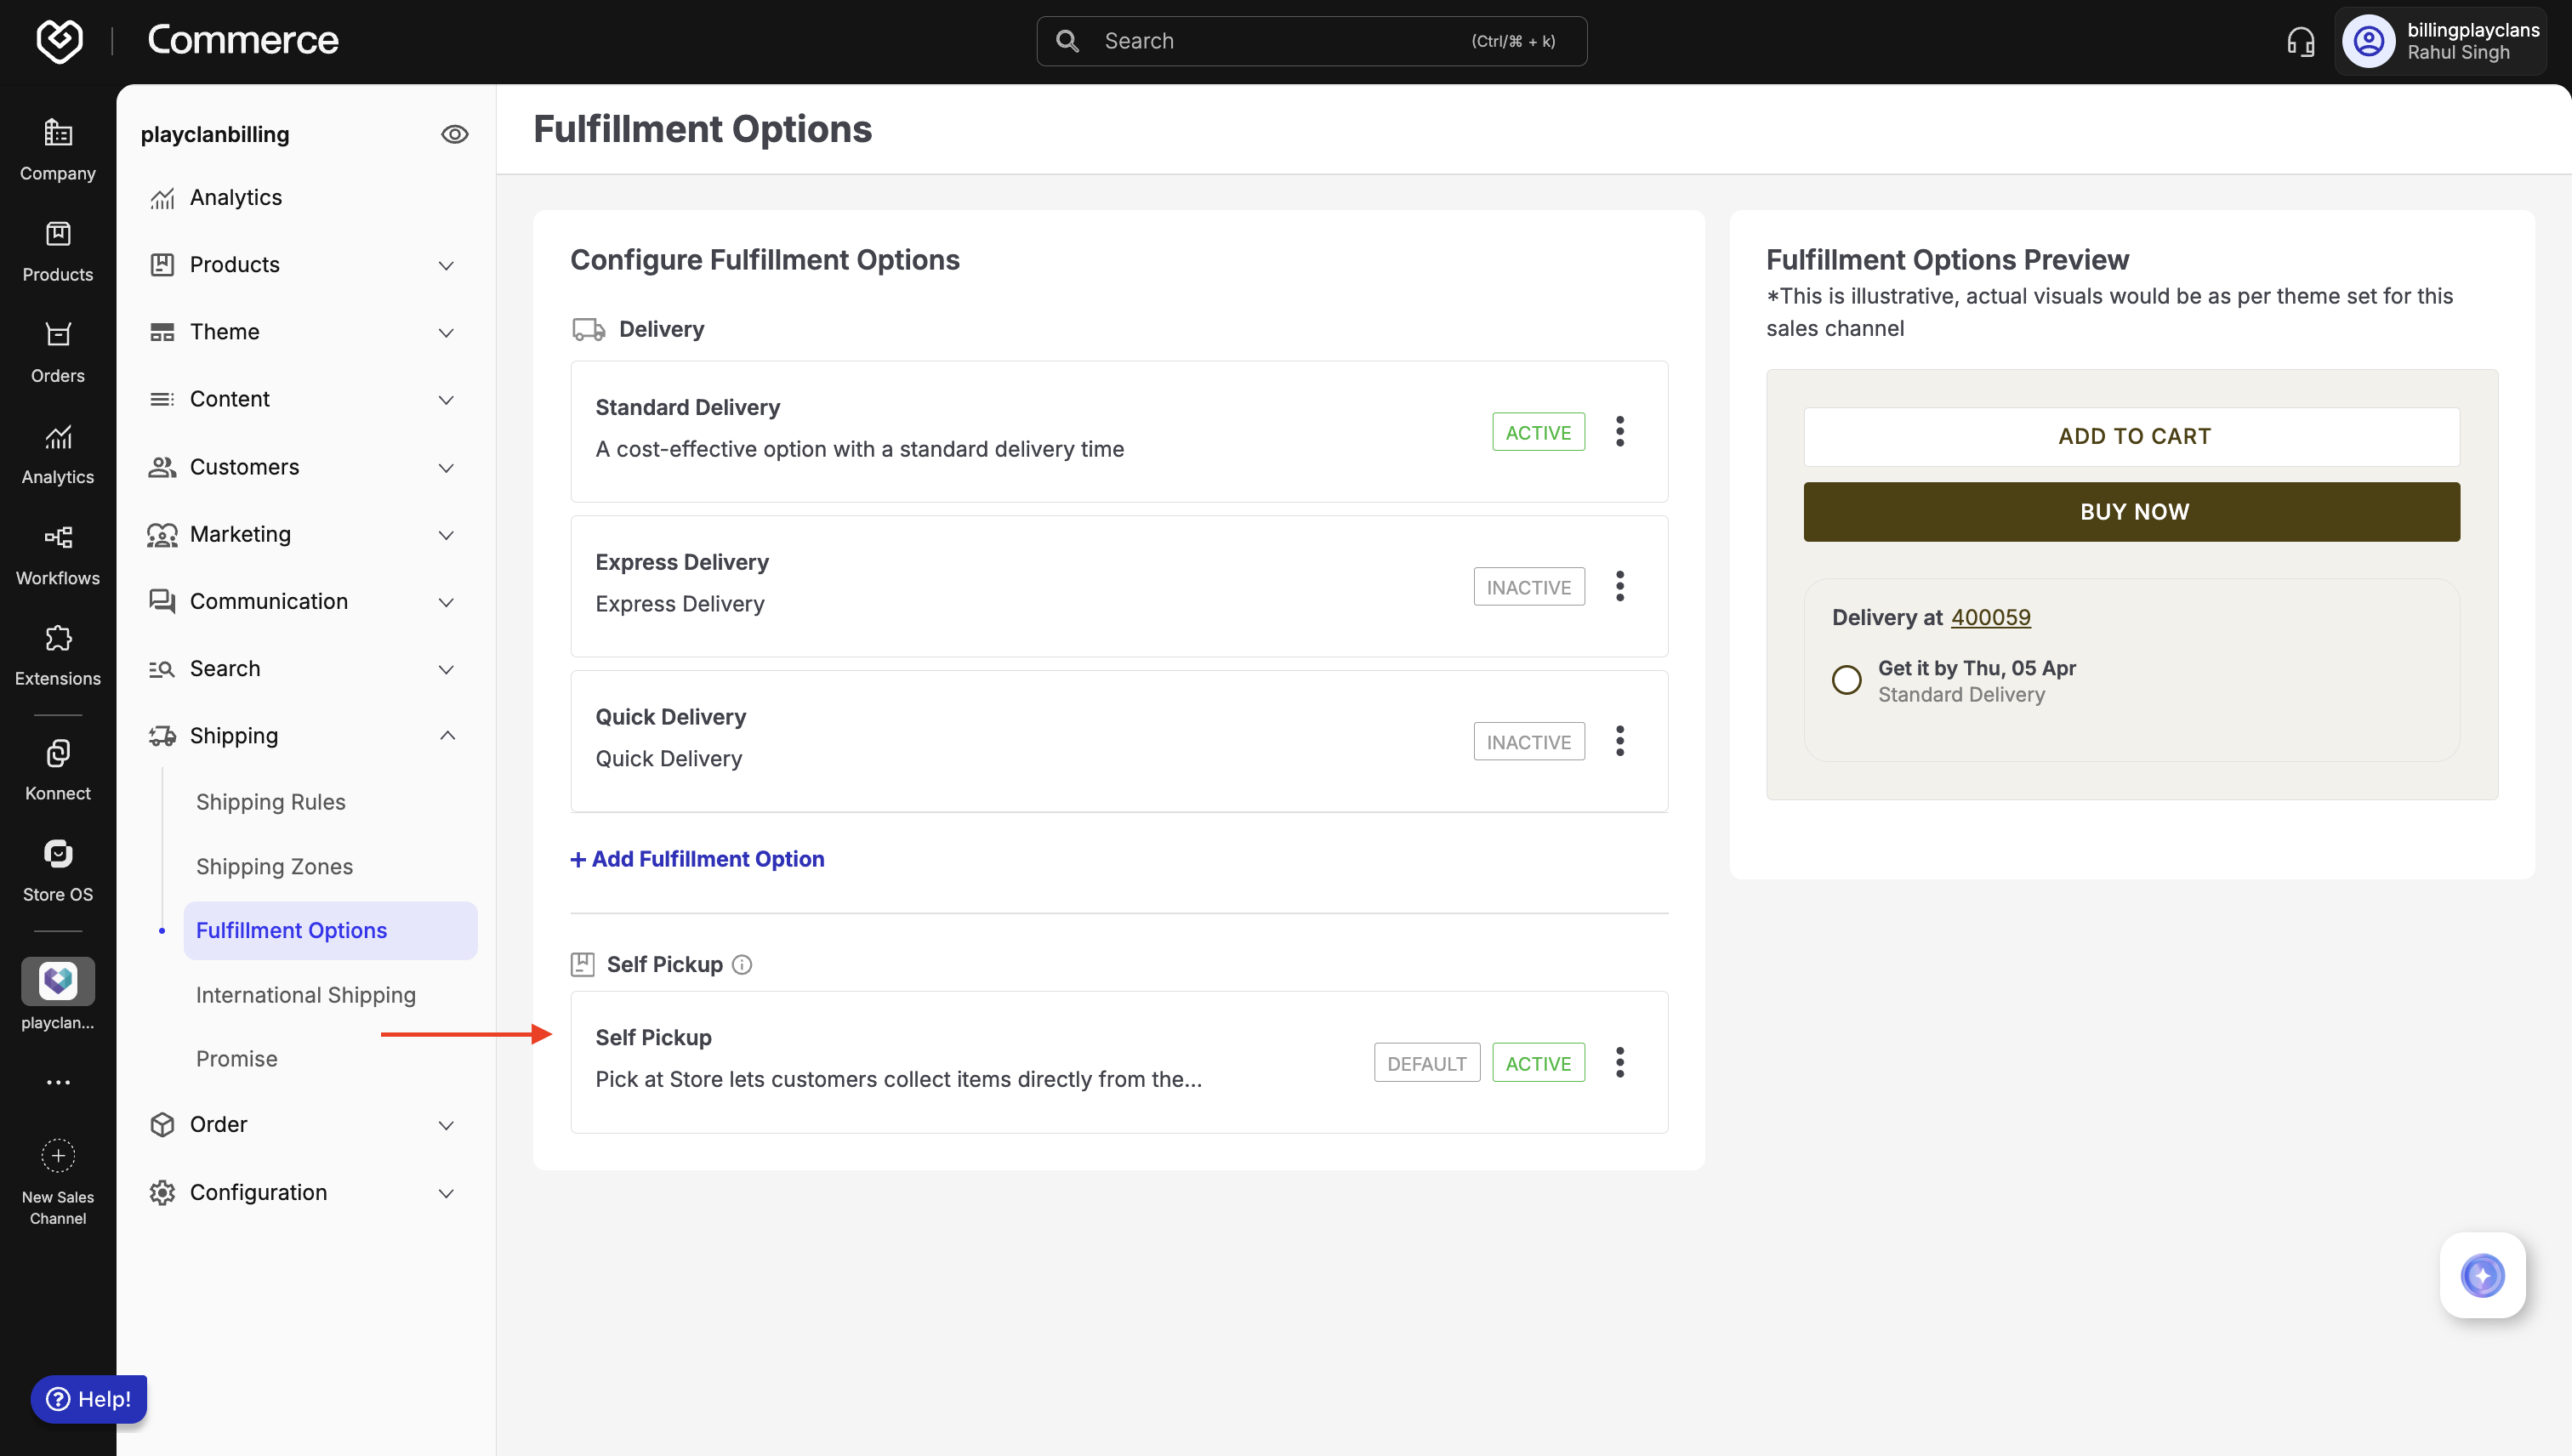
By default, a Standard Delivery option is enabled for all products, stores, and delivery partners. However, to allow in-store pickups via POS, you must explicitly enable Self Pickup and assign it to your POS sales channel.
Fulfillment Option Types
- Standard Delivery (enabled by default): Supports shipping via delivery partners.
- Self Pickup: Enables customers or store staff to pick up orders directly from physical stores. Required for POS.
Configure Self Pickup for POS
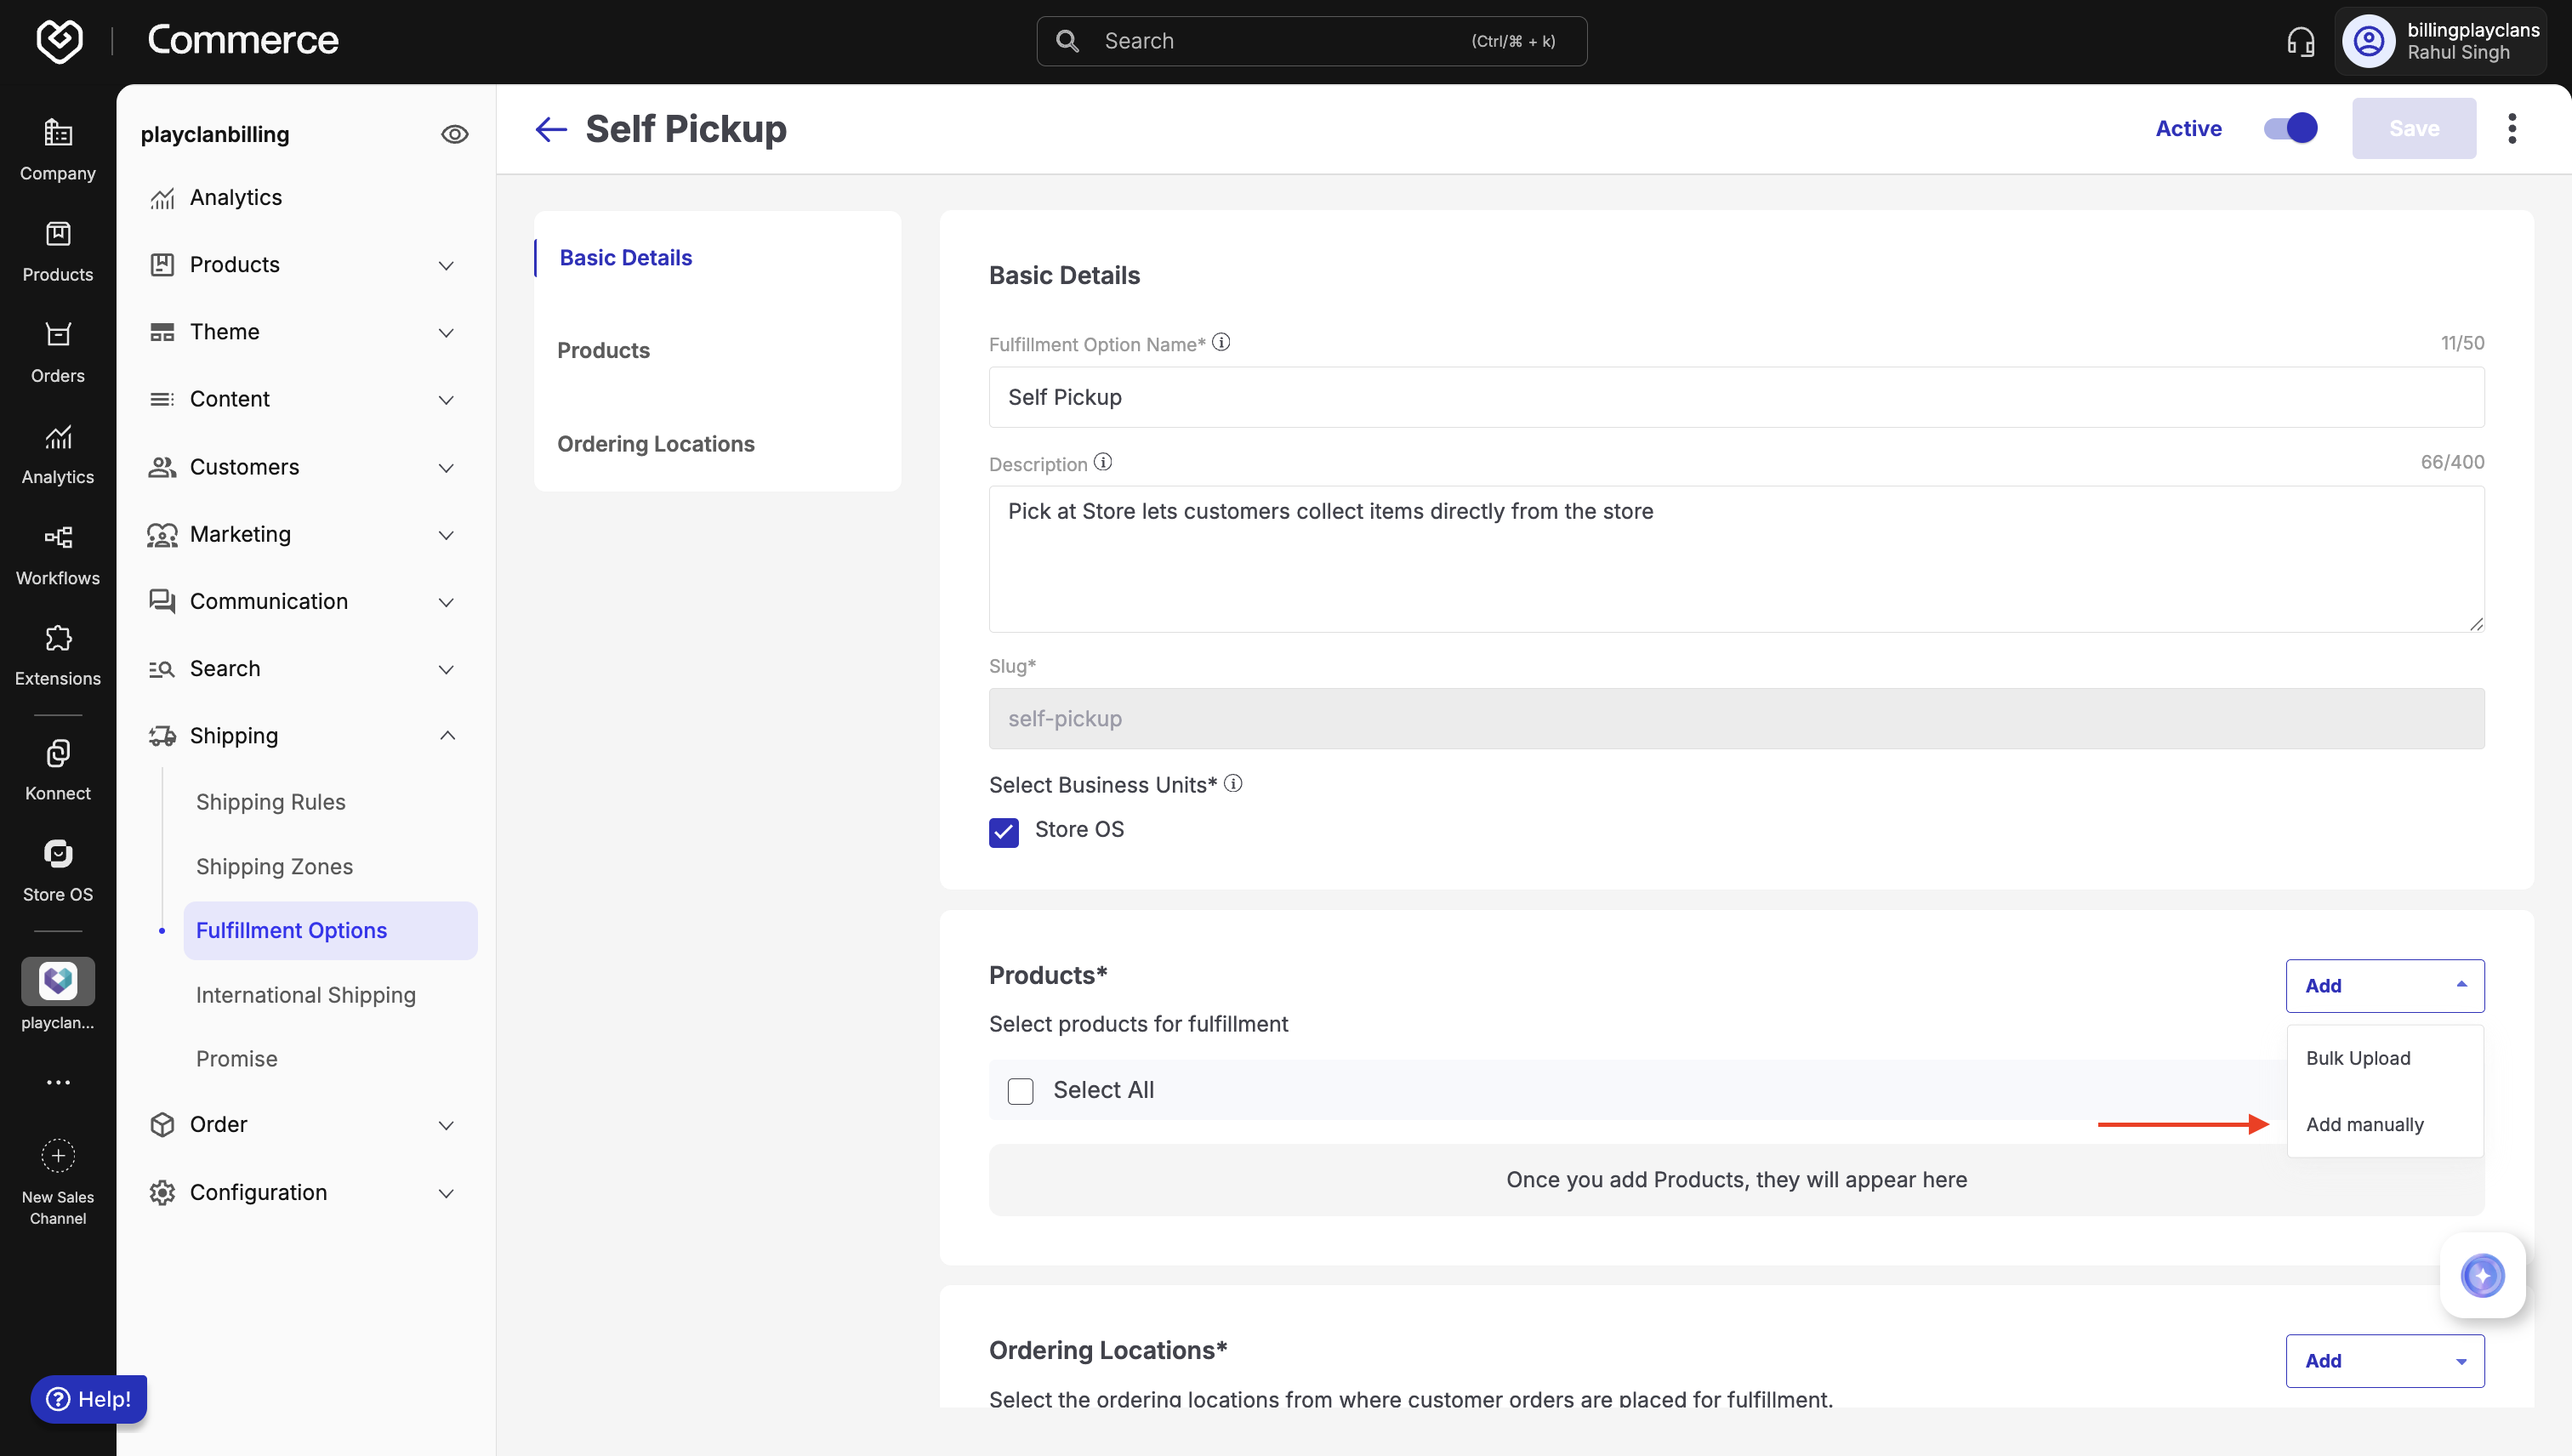
- Open Self Pickup option.
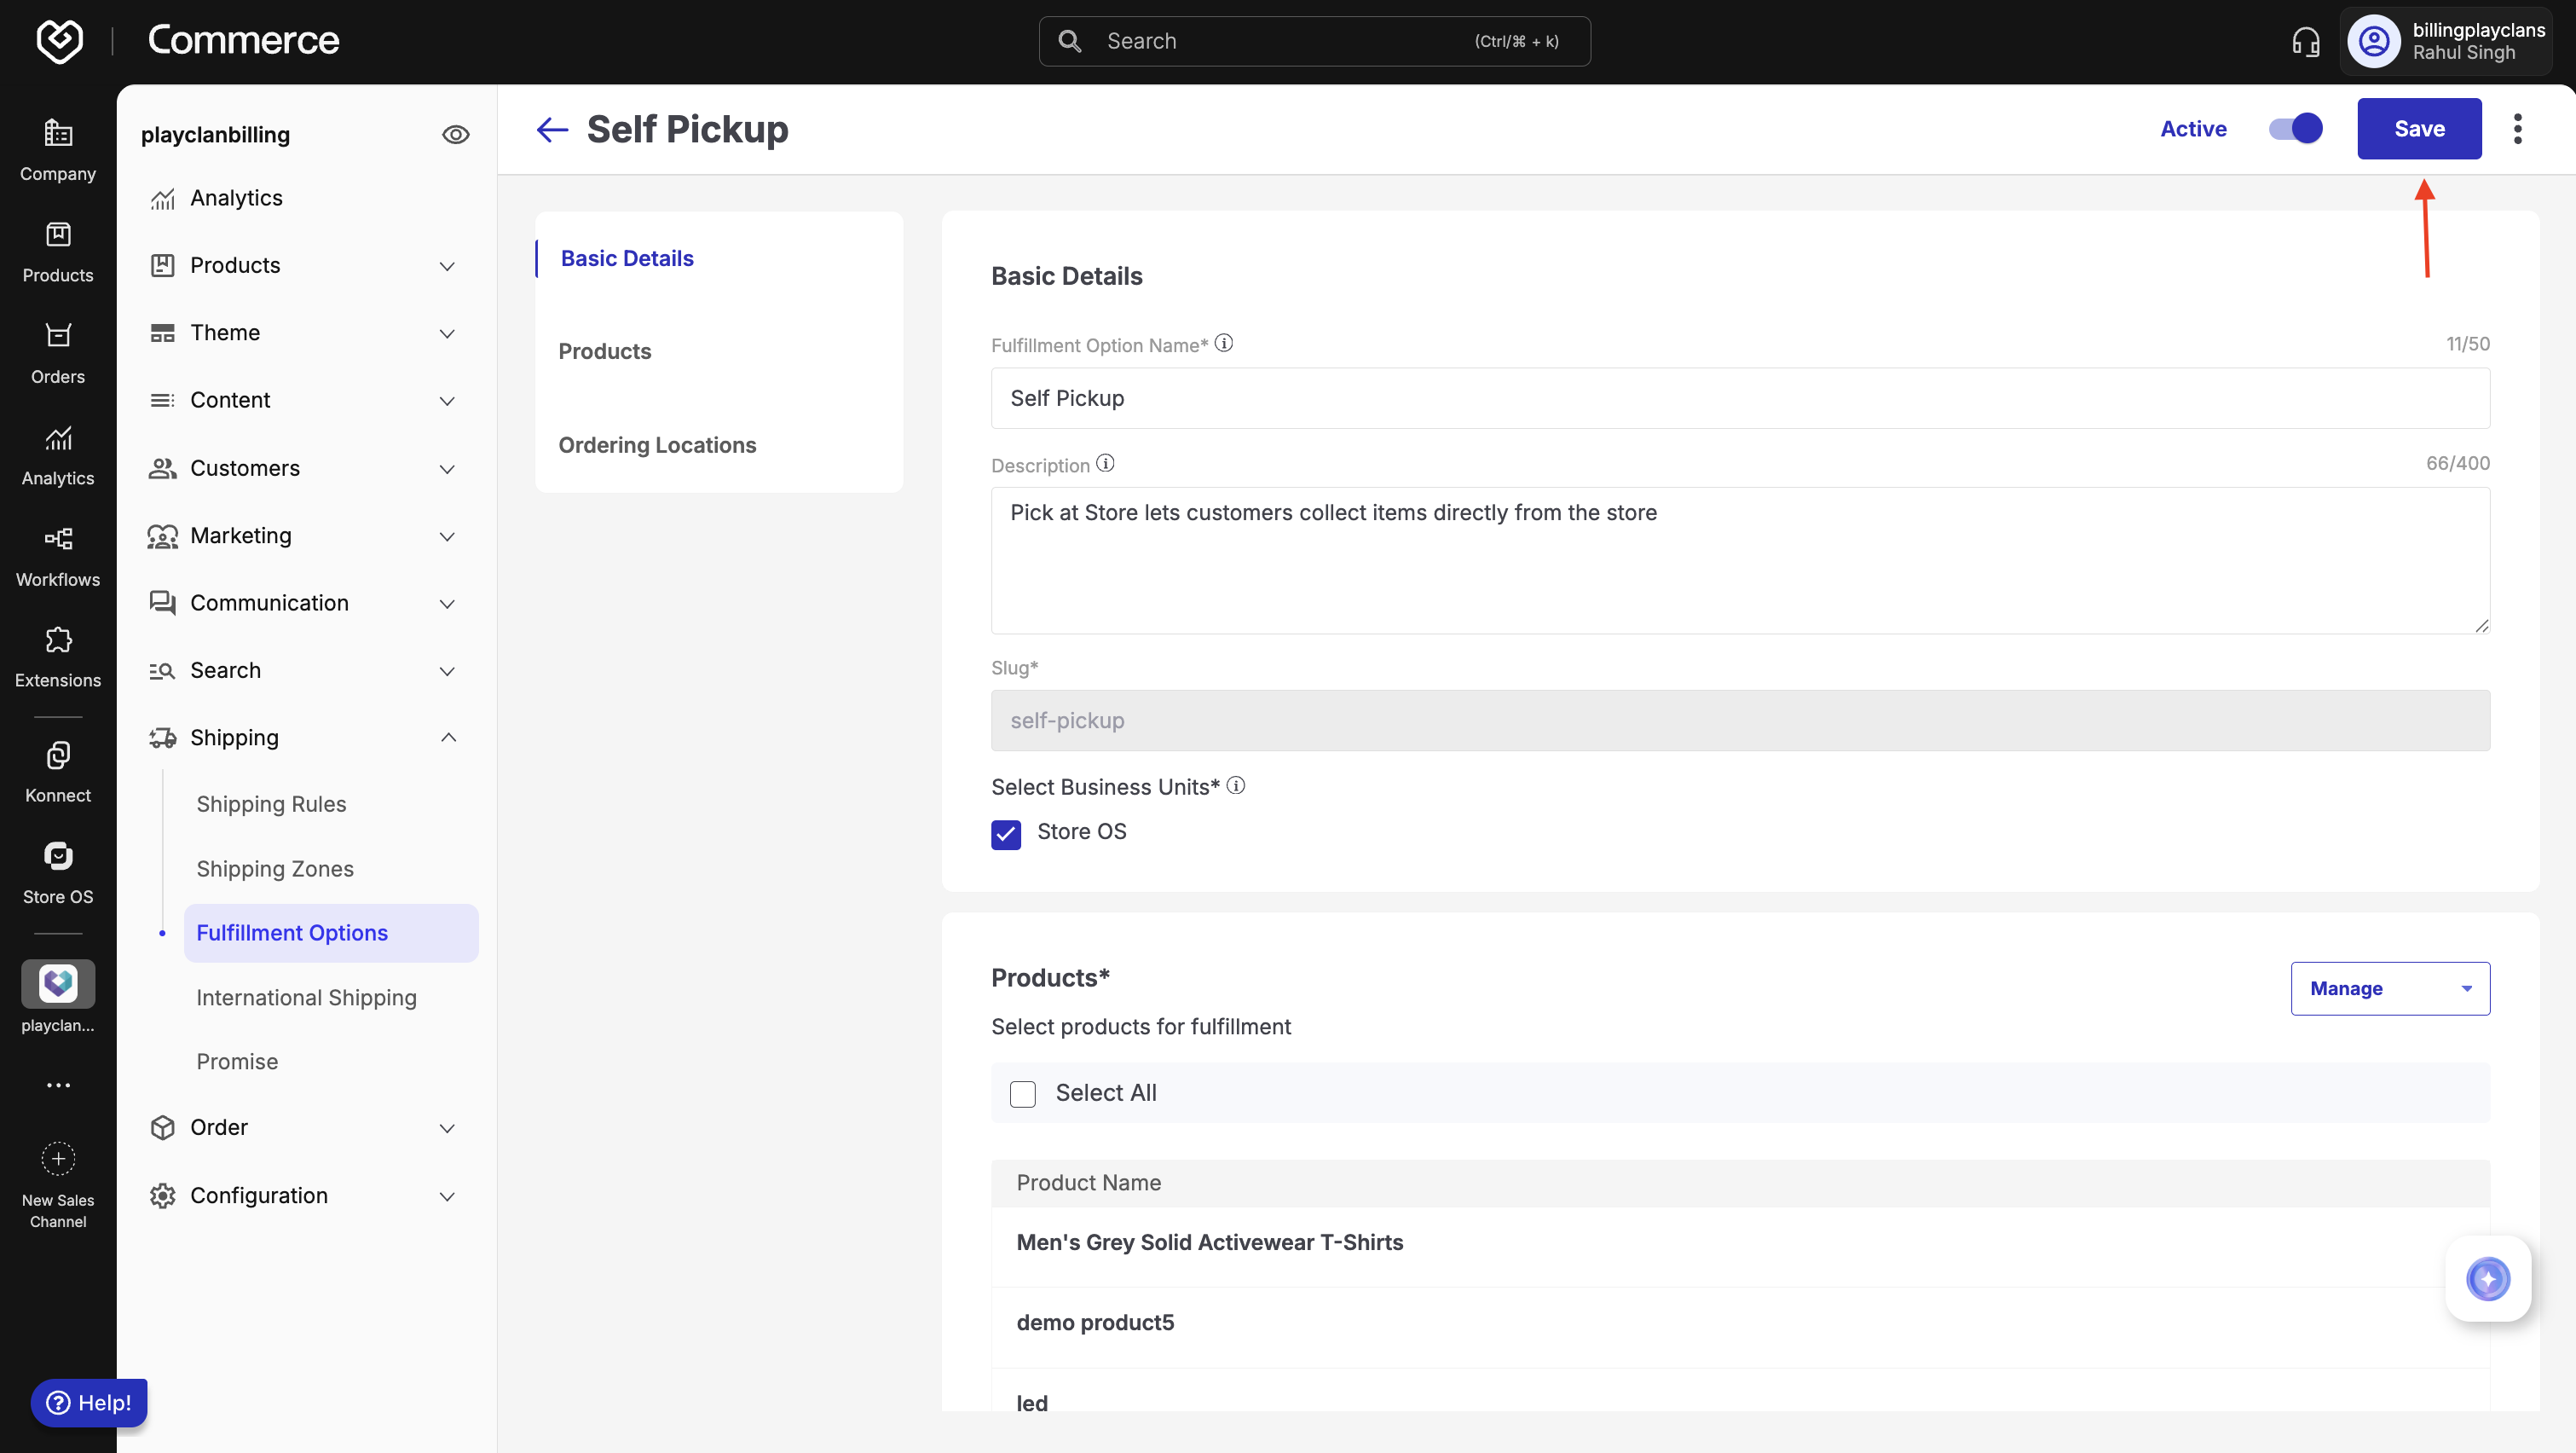
Under the Basic Details tab:
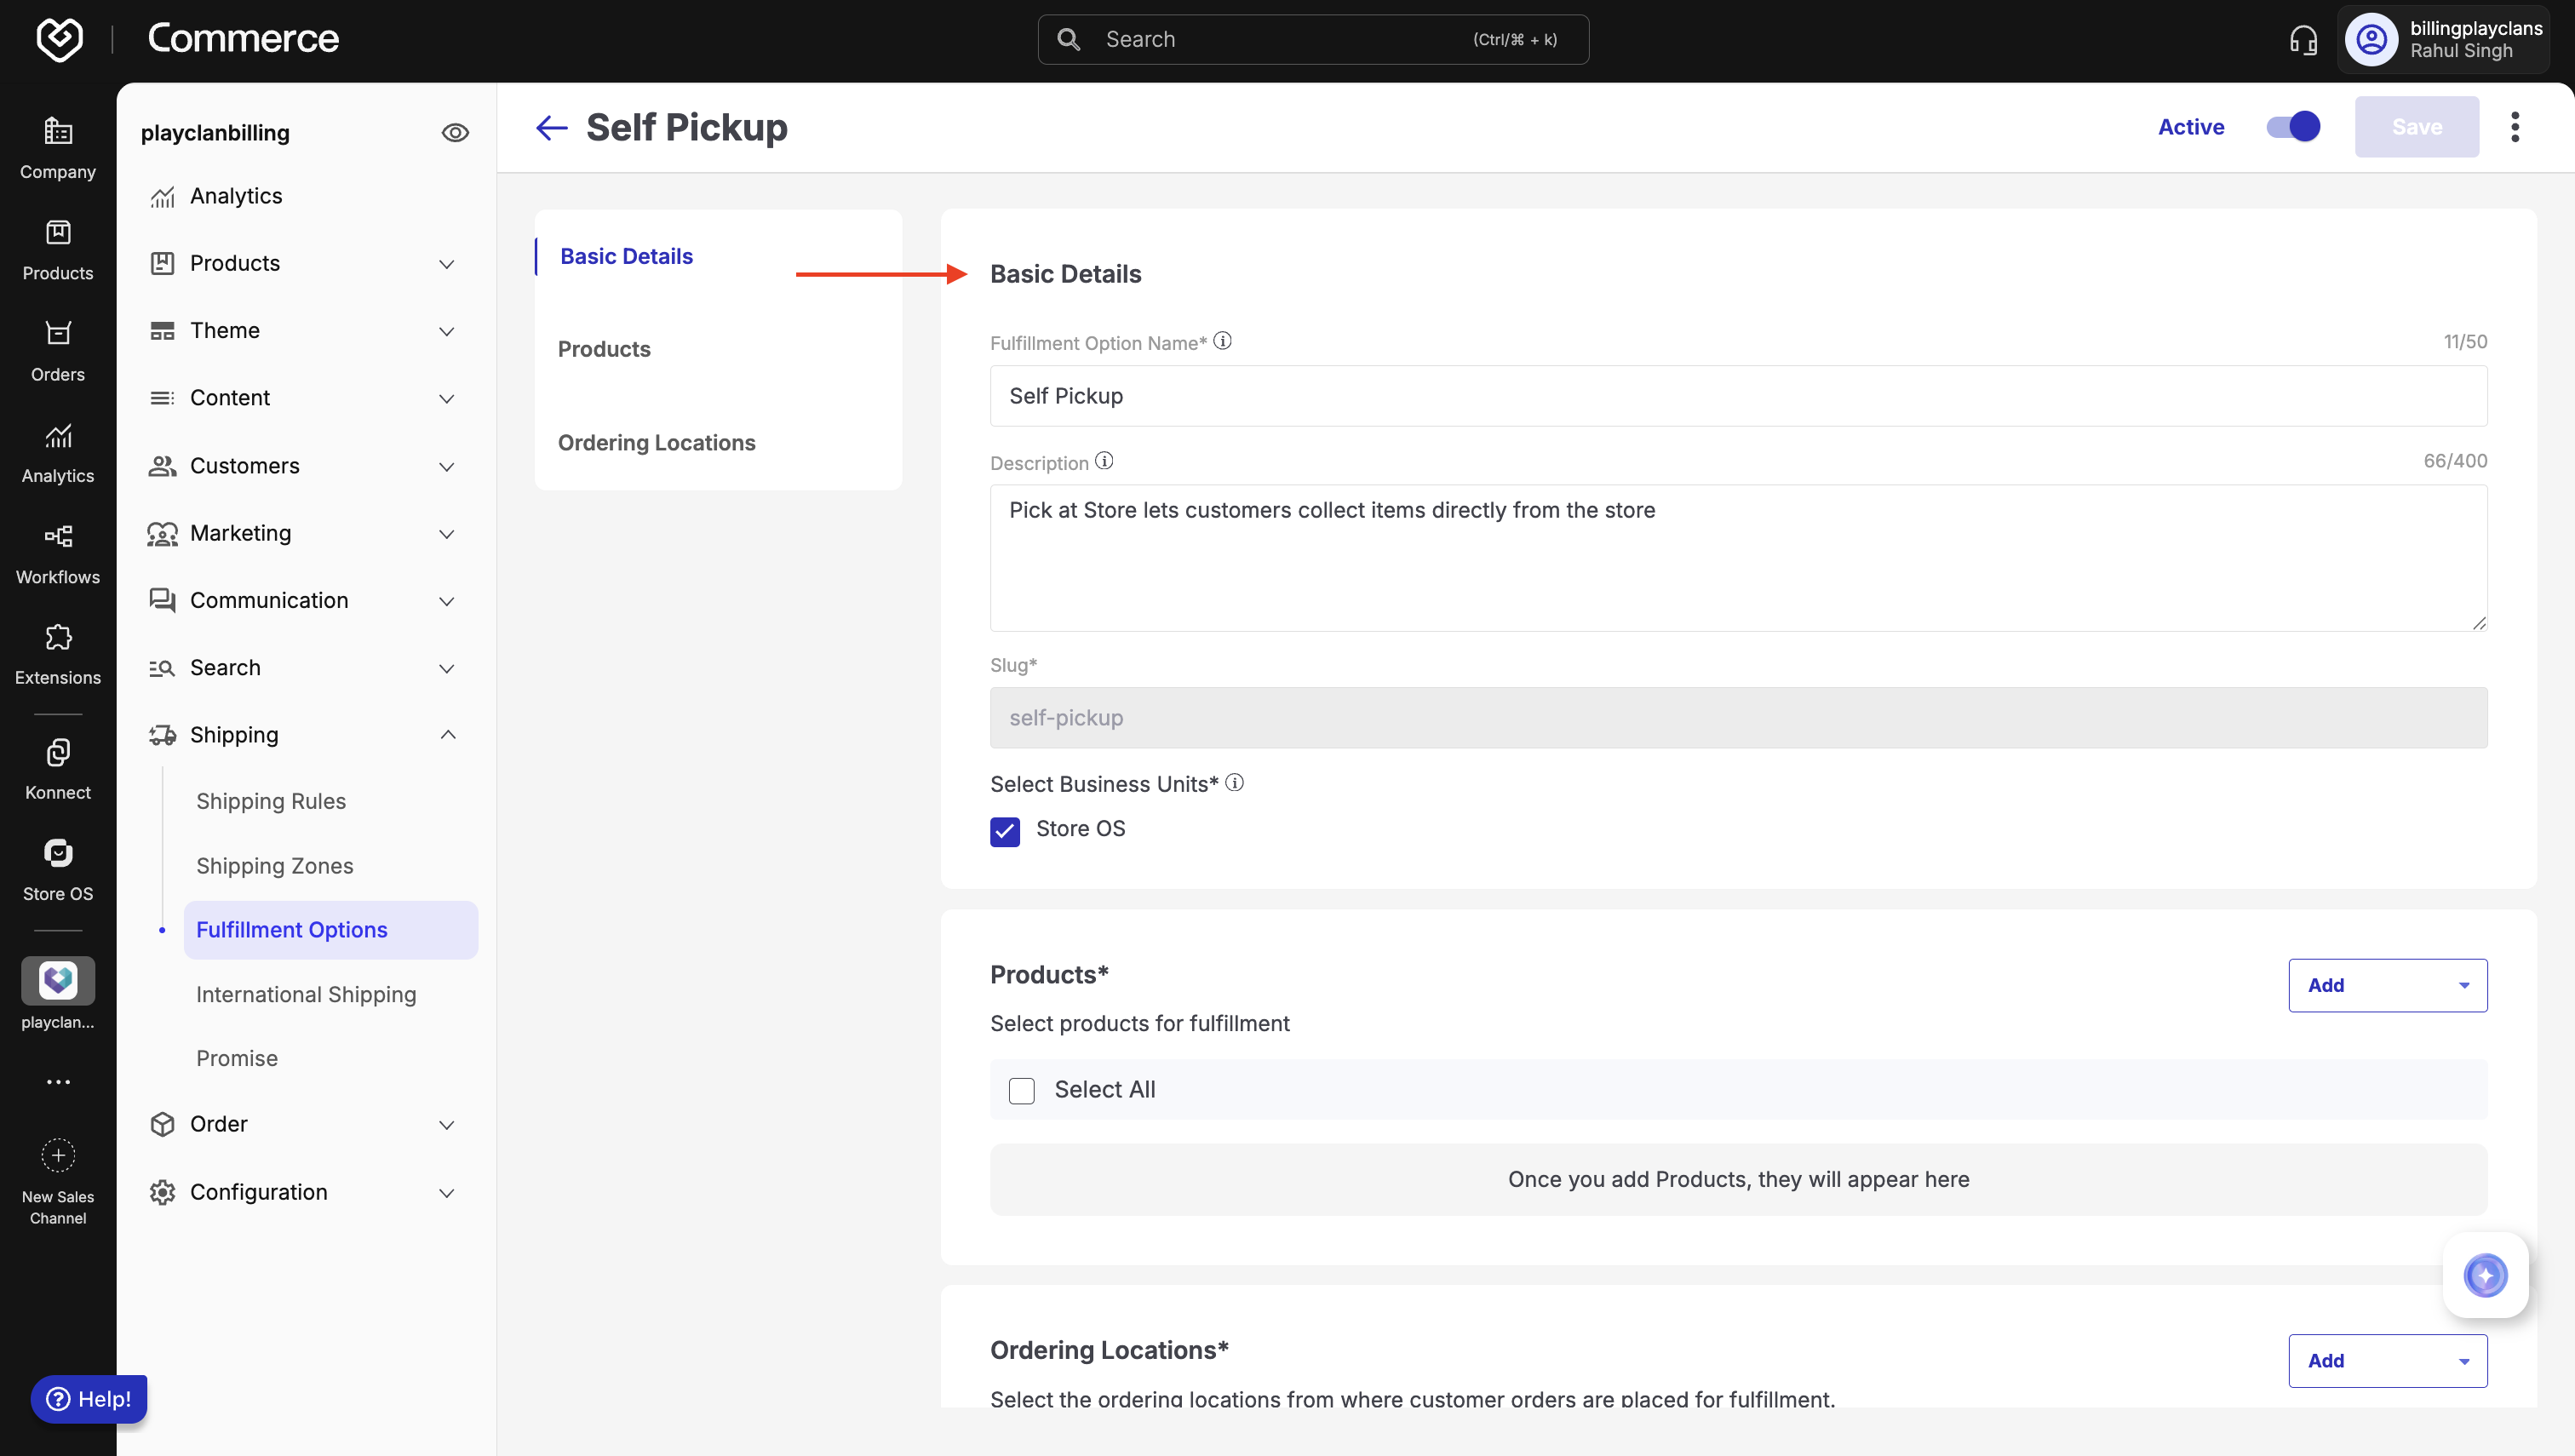
Figure 8b: Clicking save to apply changes - Enter a Fulfillment Option Name (e.g., Self Pickup at Store).
- Enter a short Description (e.g., Pickup your order directly from our store).
- Slug will auto-generate based on the name.
- For Business Units, keep Store OS selected (this makes it visible for in-store POS operations).
Assign Products to the Fulfillment Option
- Go to the Products section.
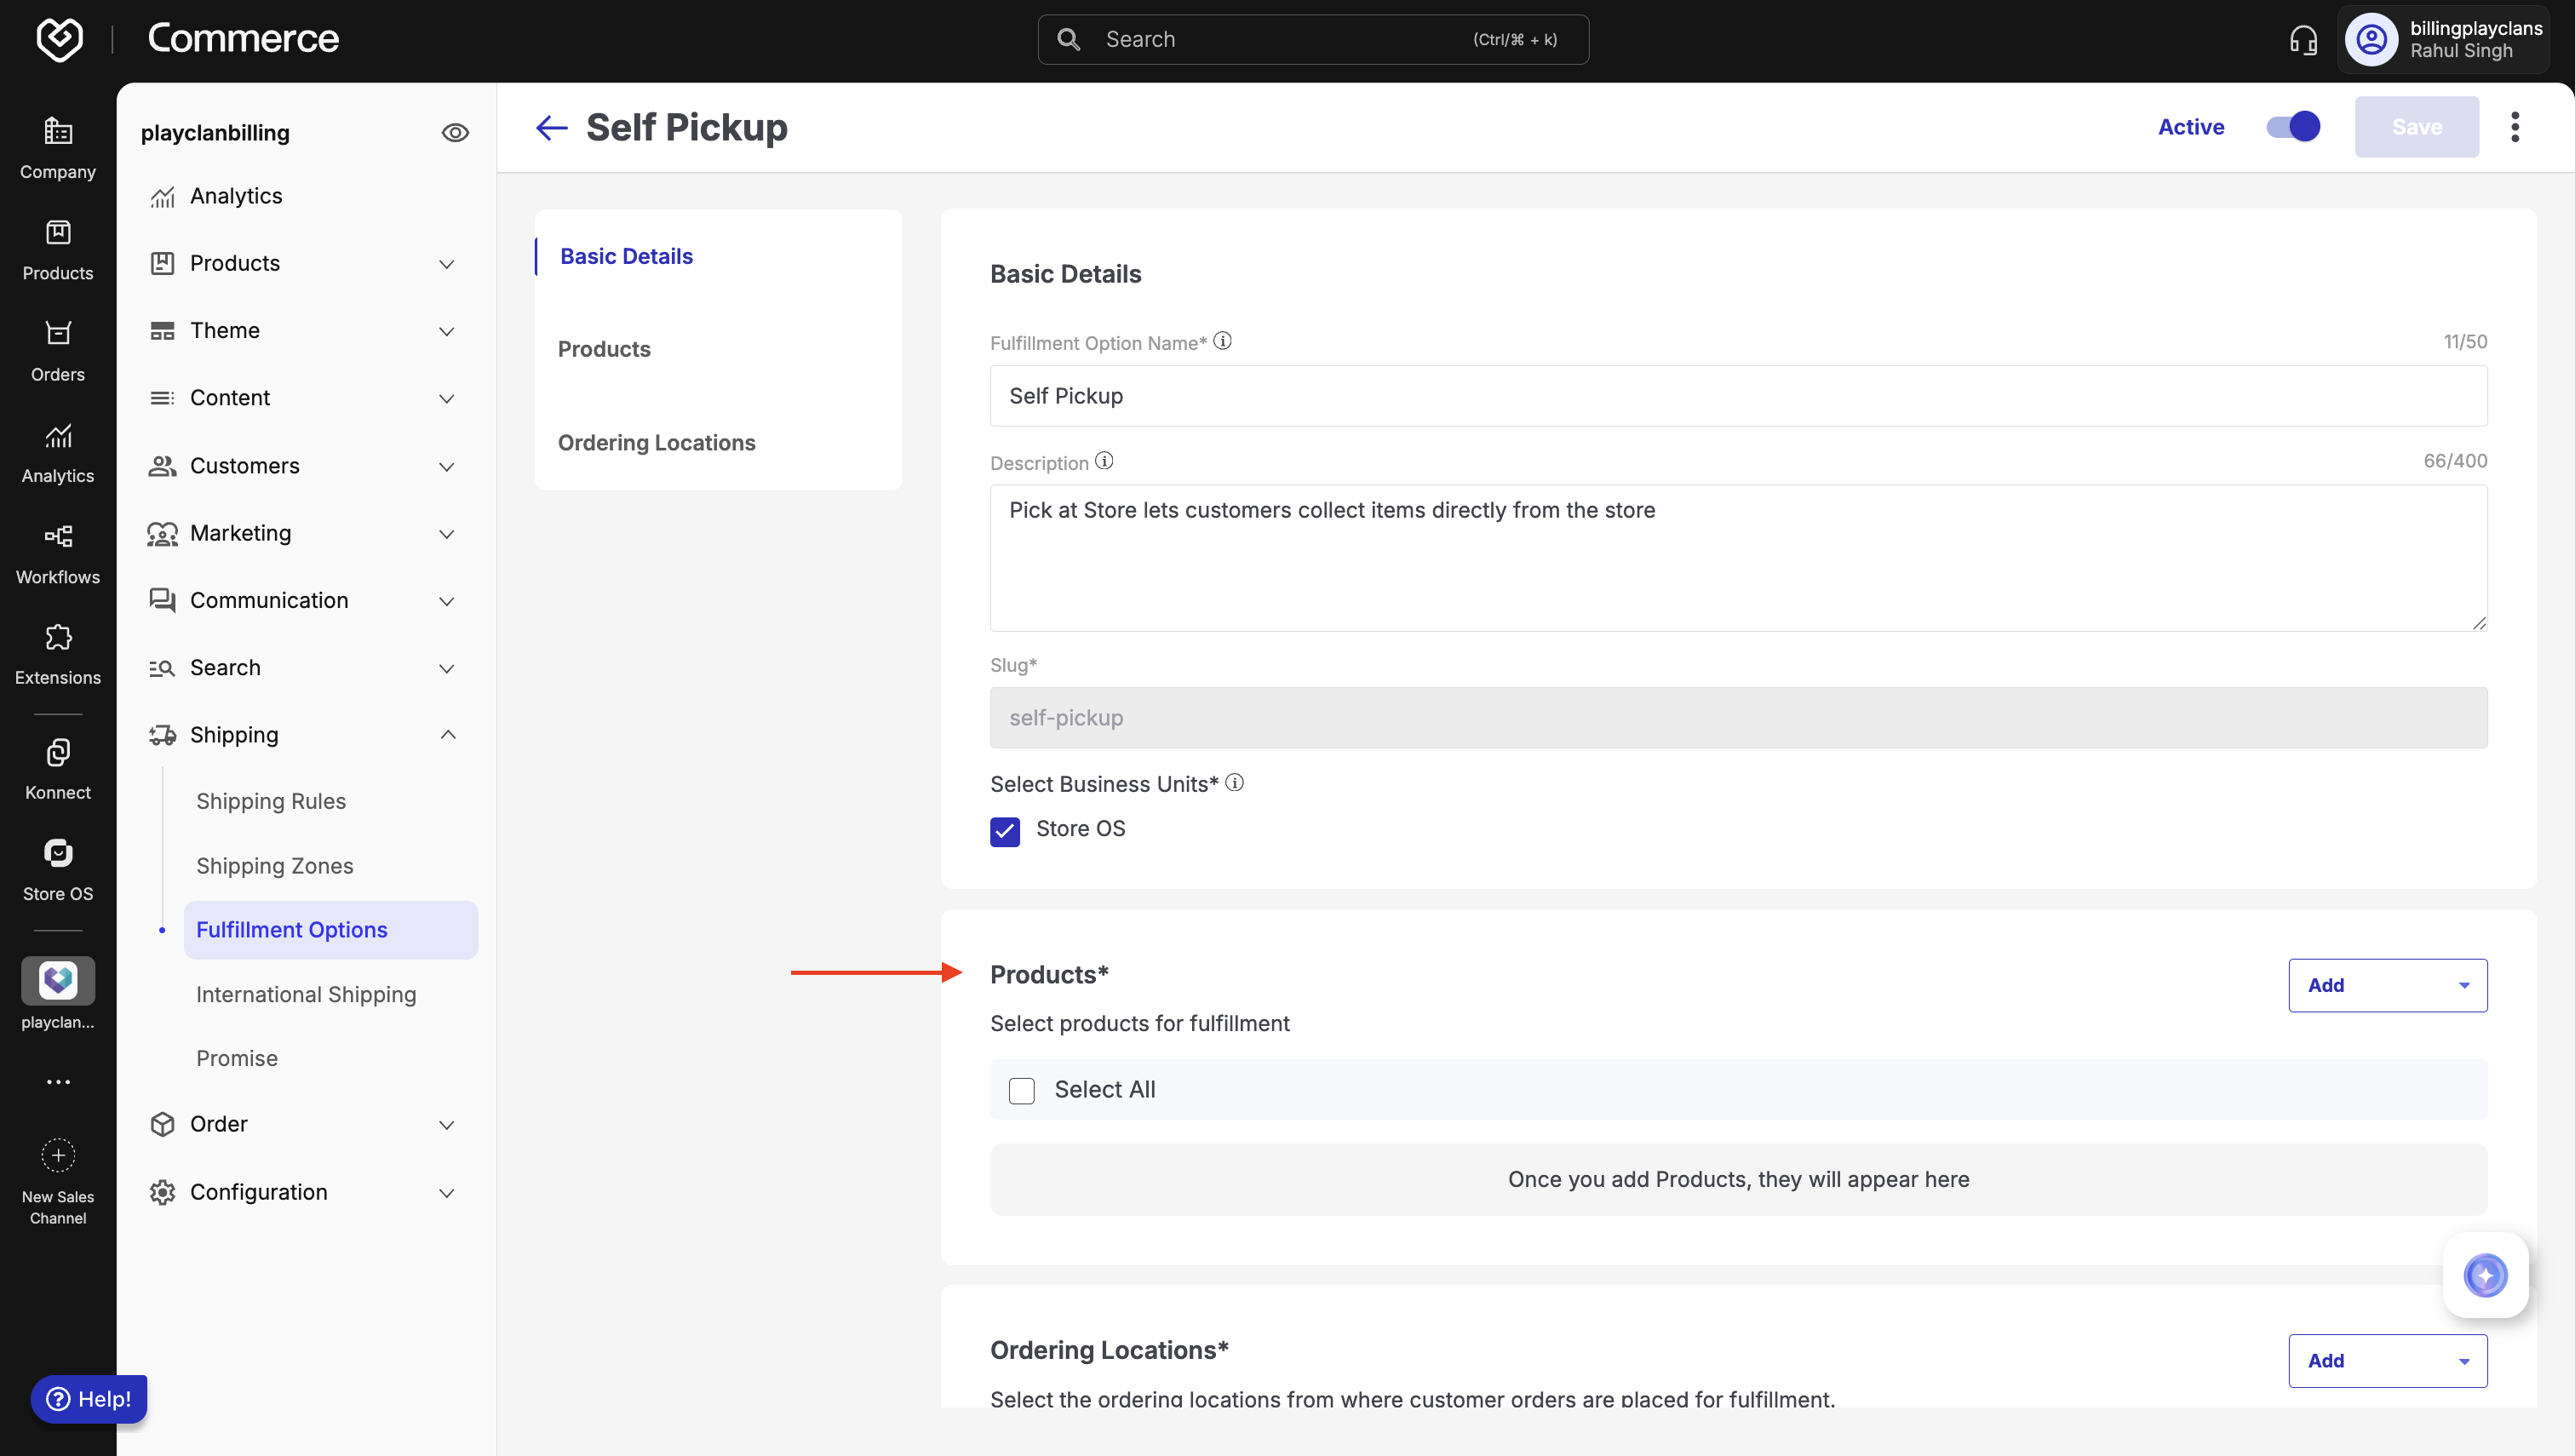
Click Add, and choose either:
- Add Manually: Search and select specific products.
- Bulk Upload: Upload a CSV of product identifiers.
We are adding products manually here.
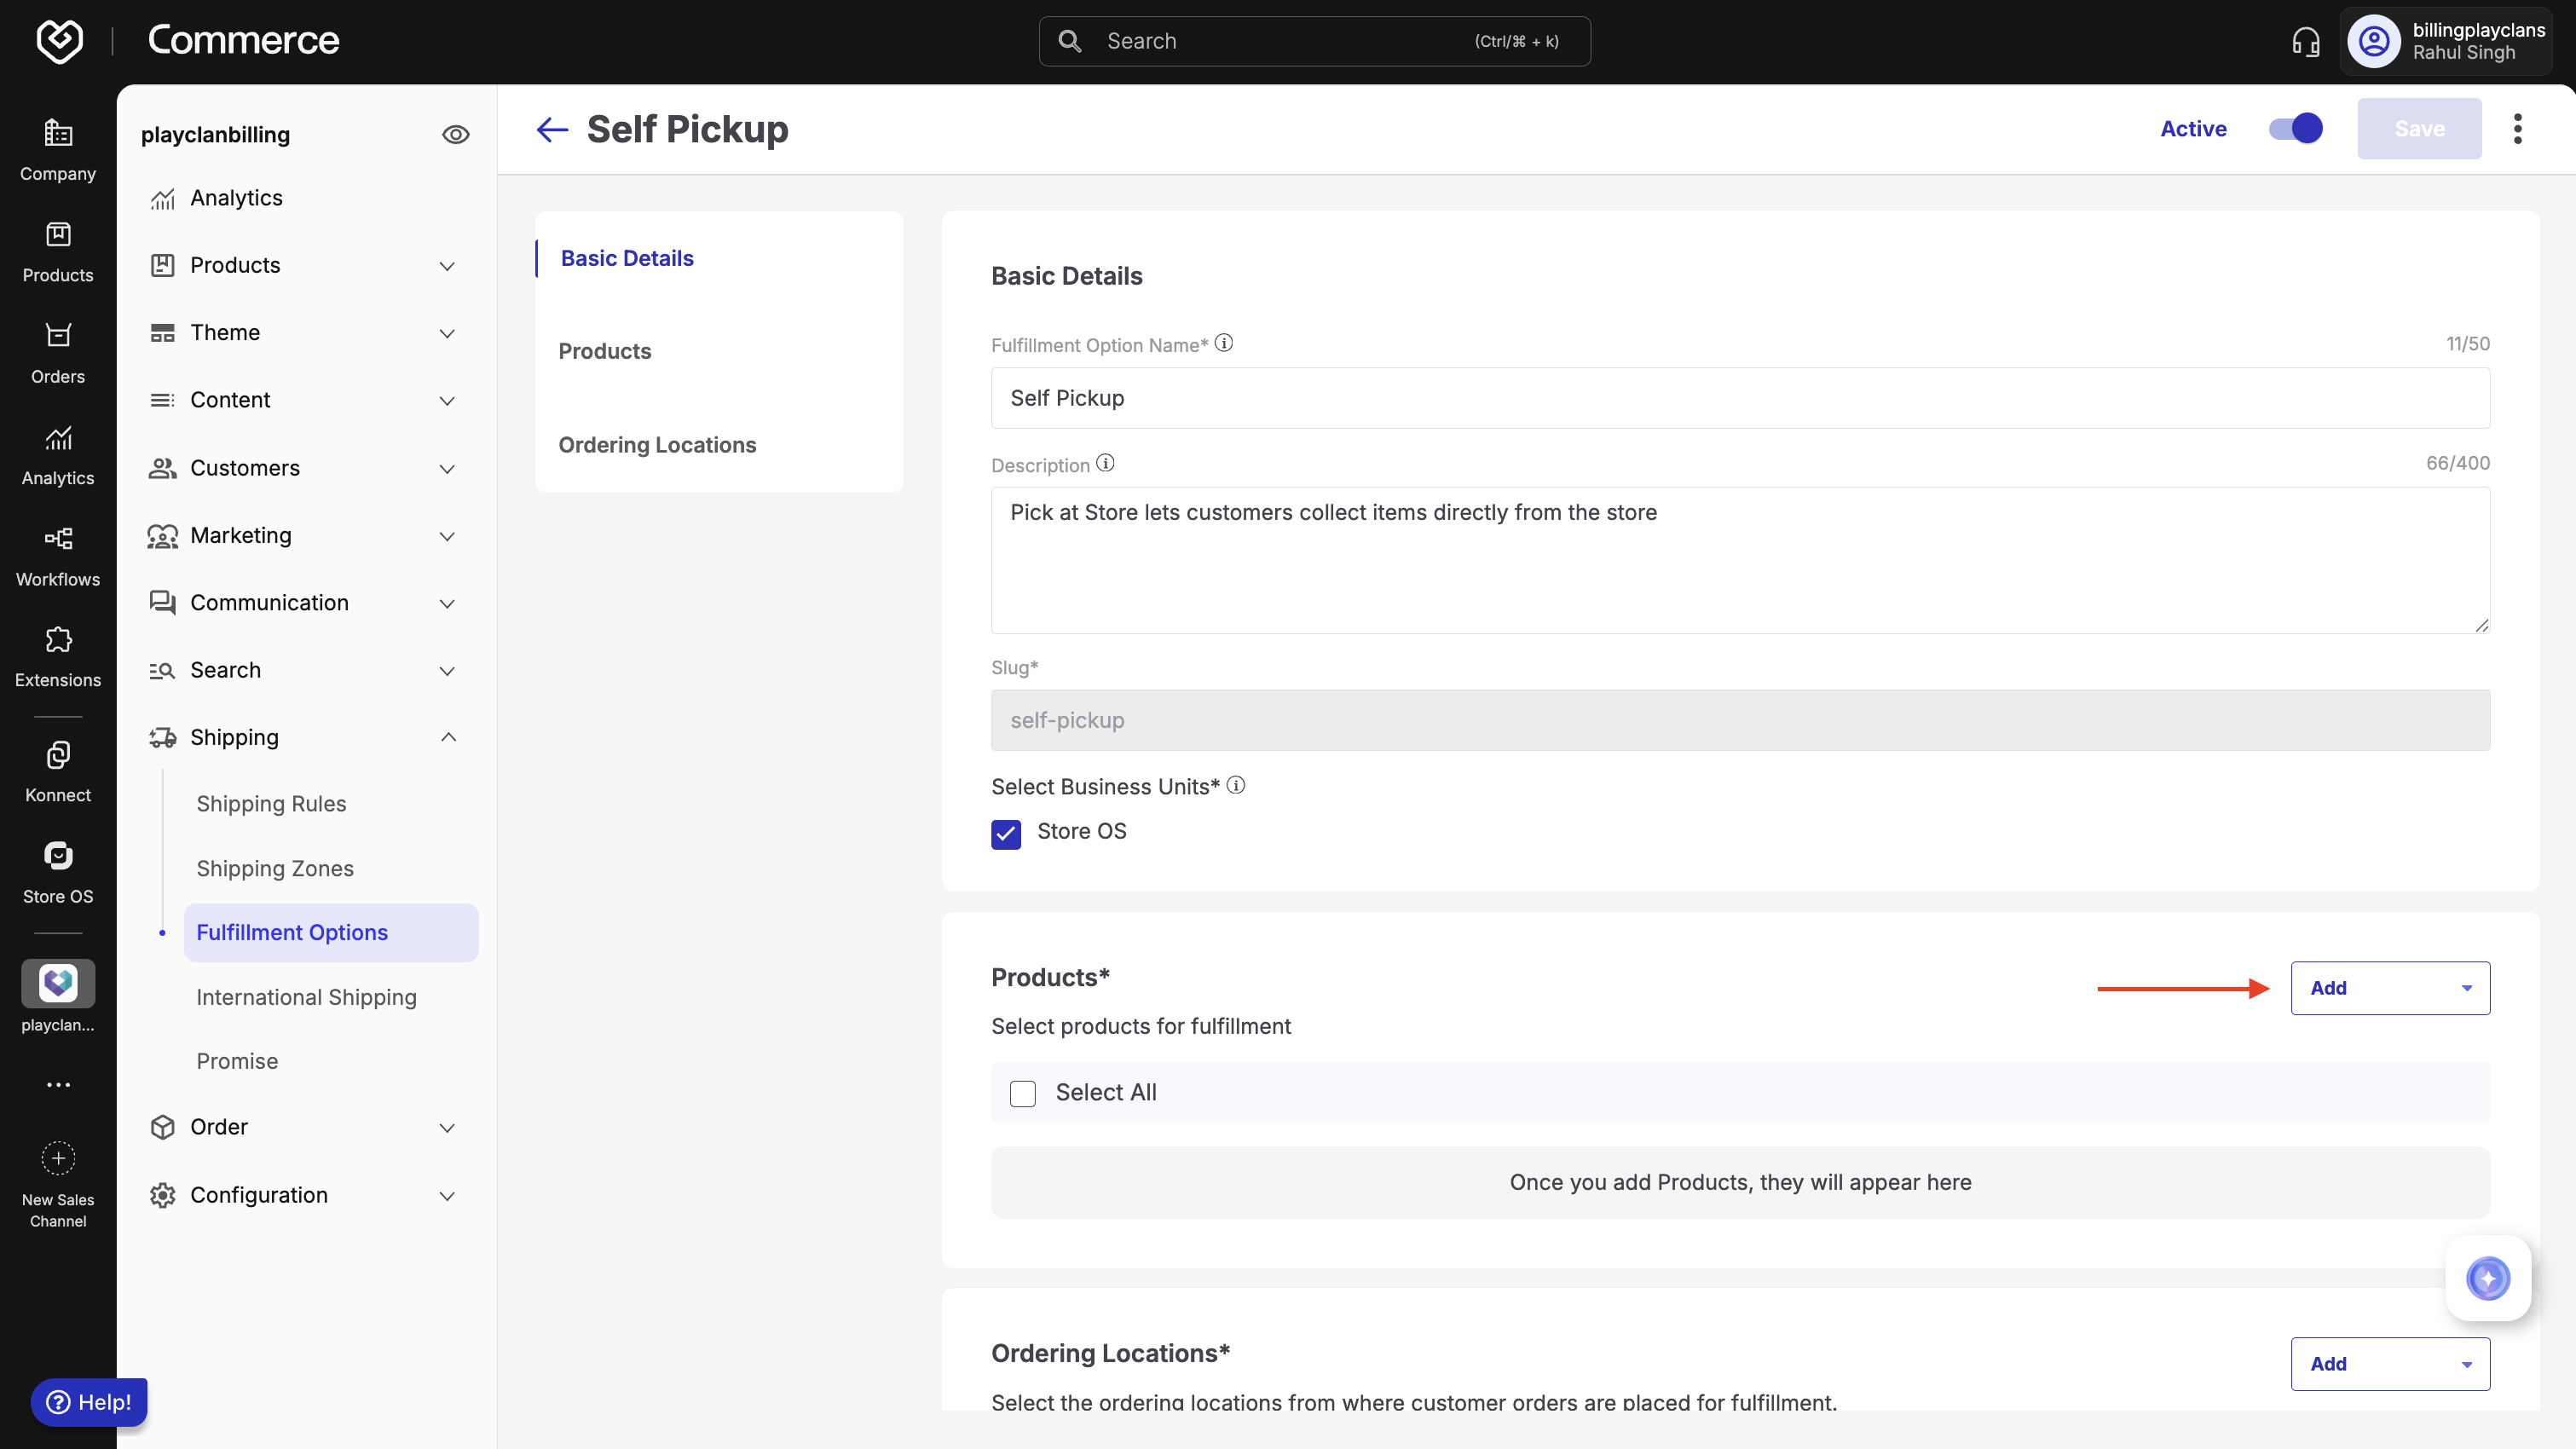
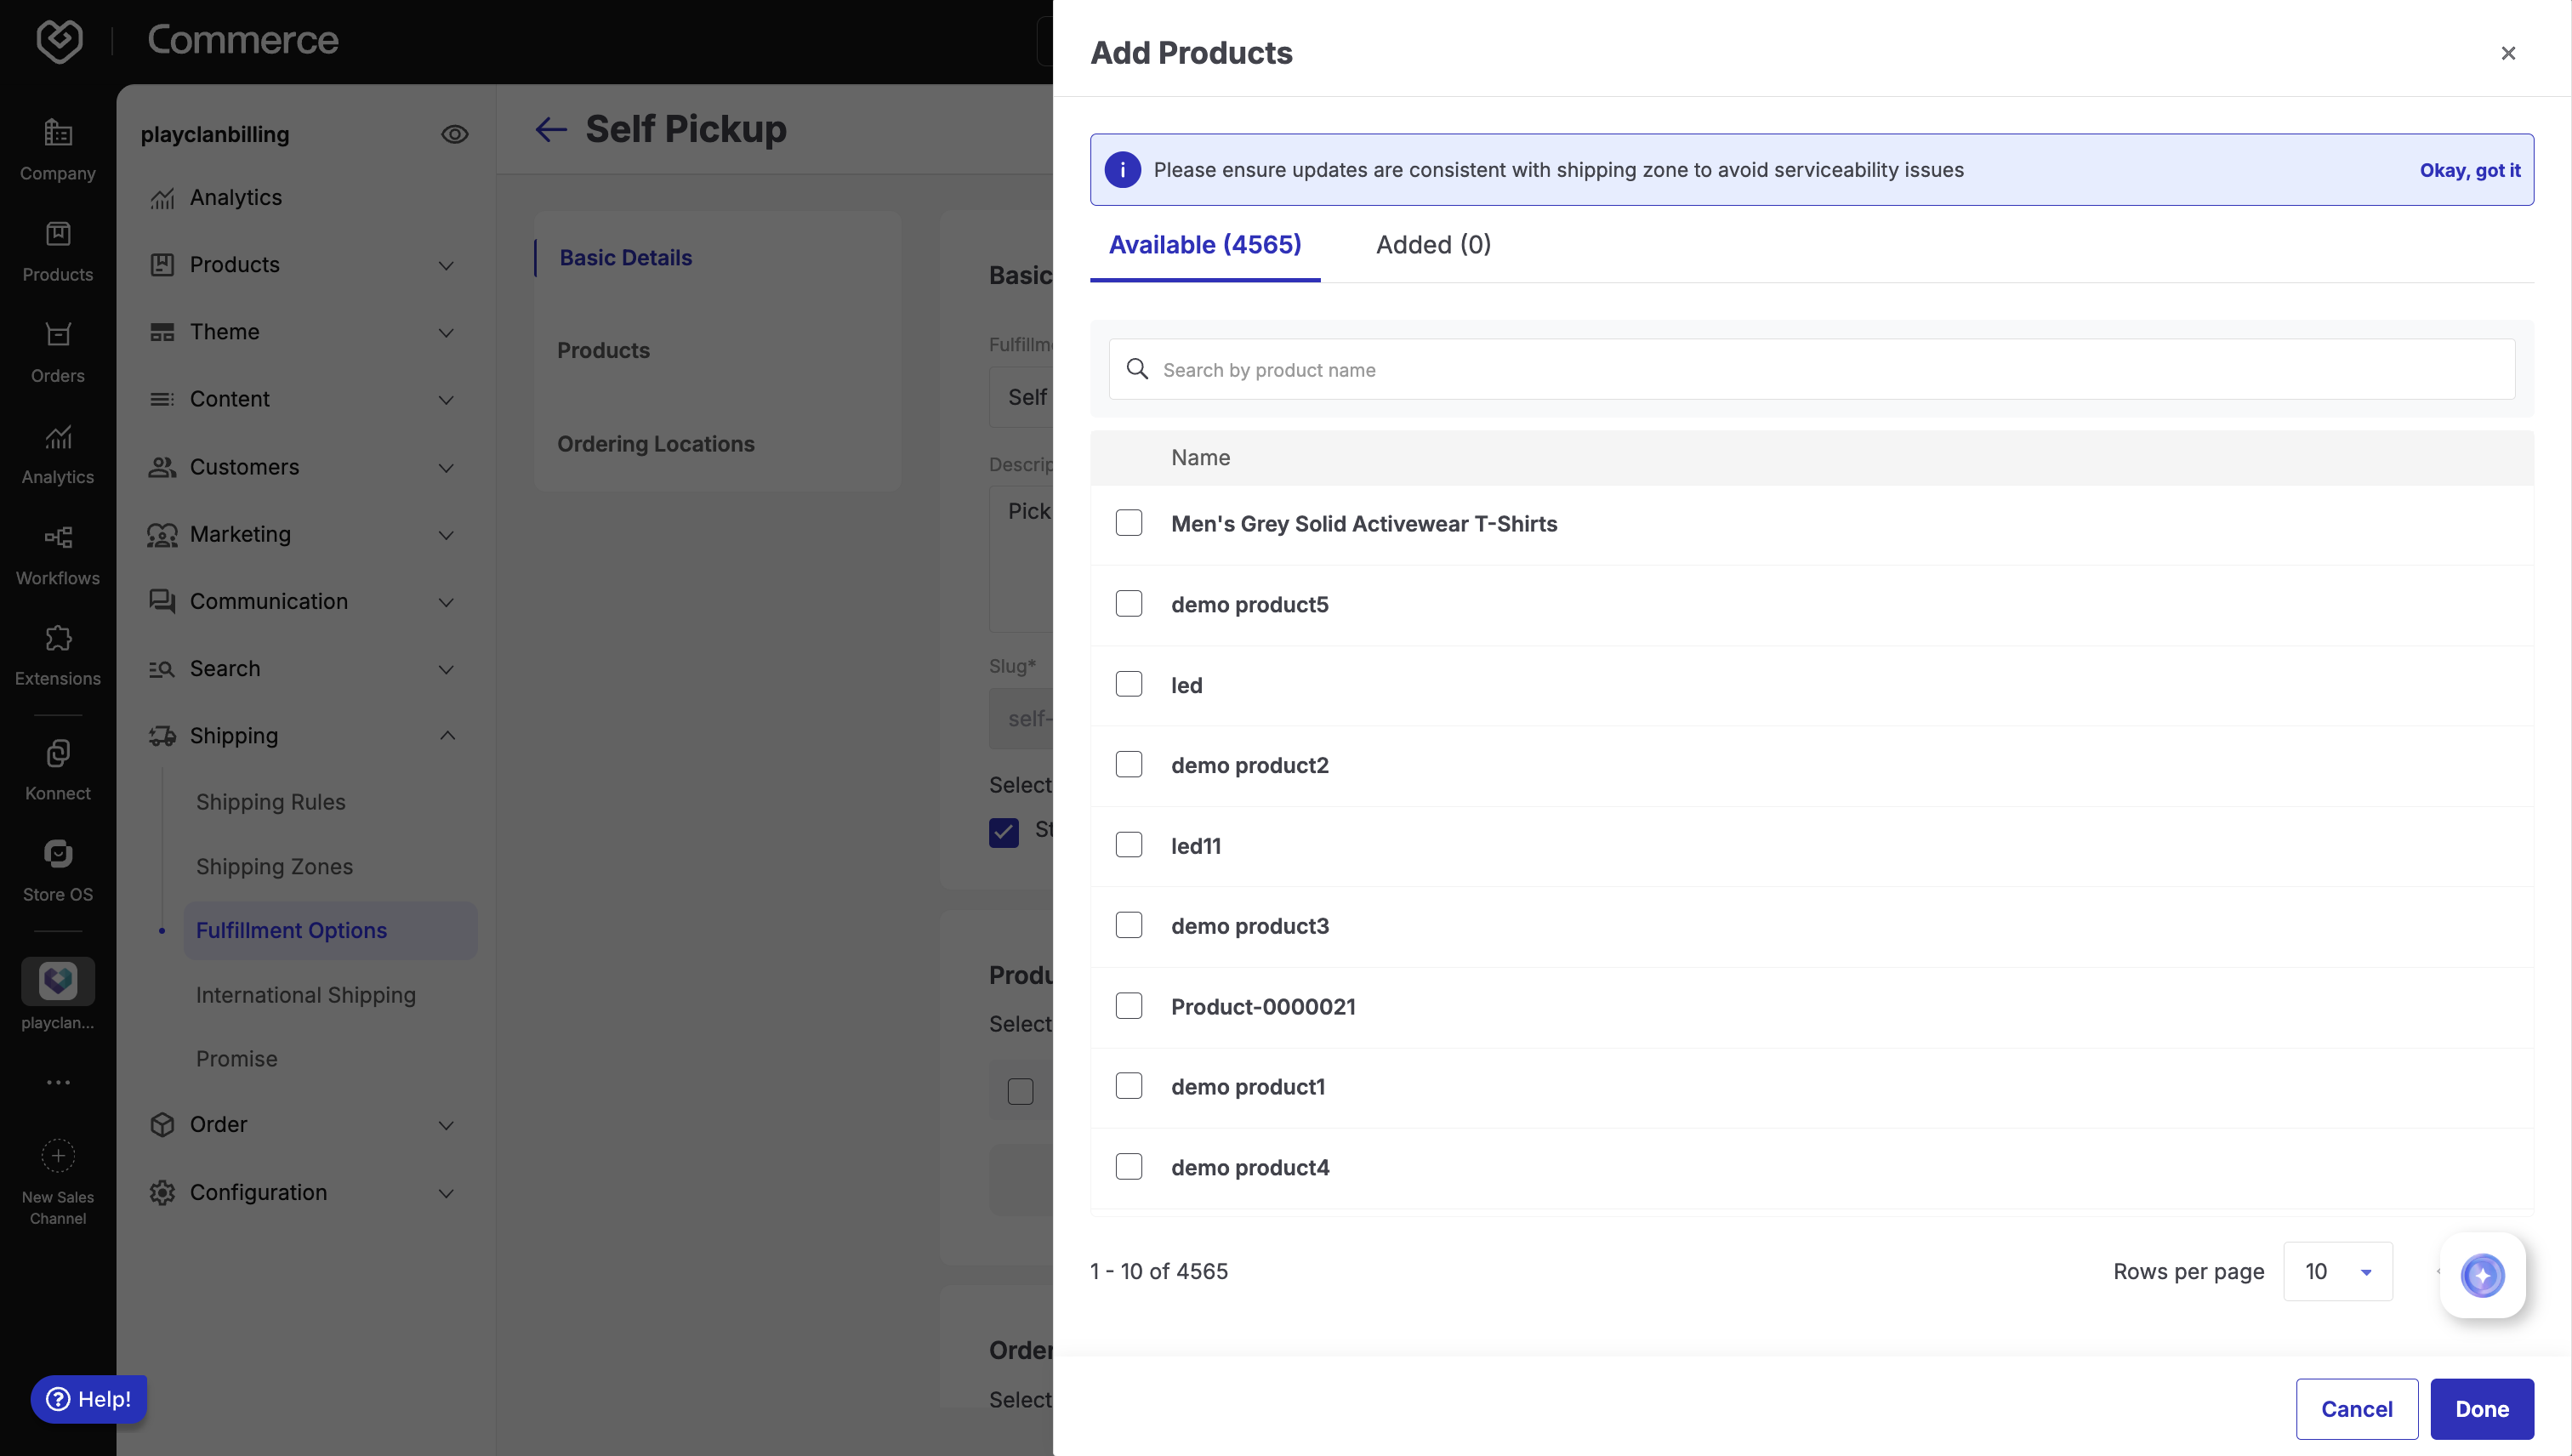
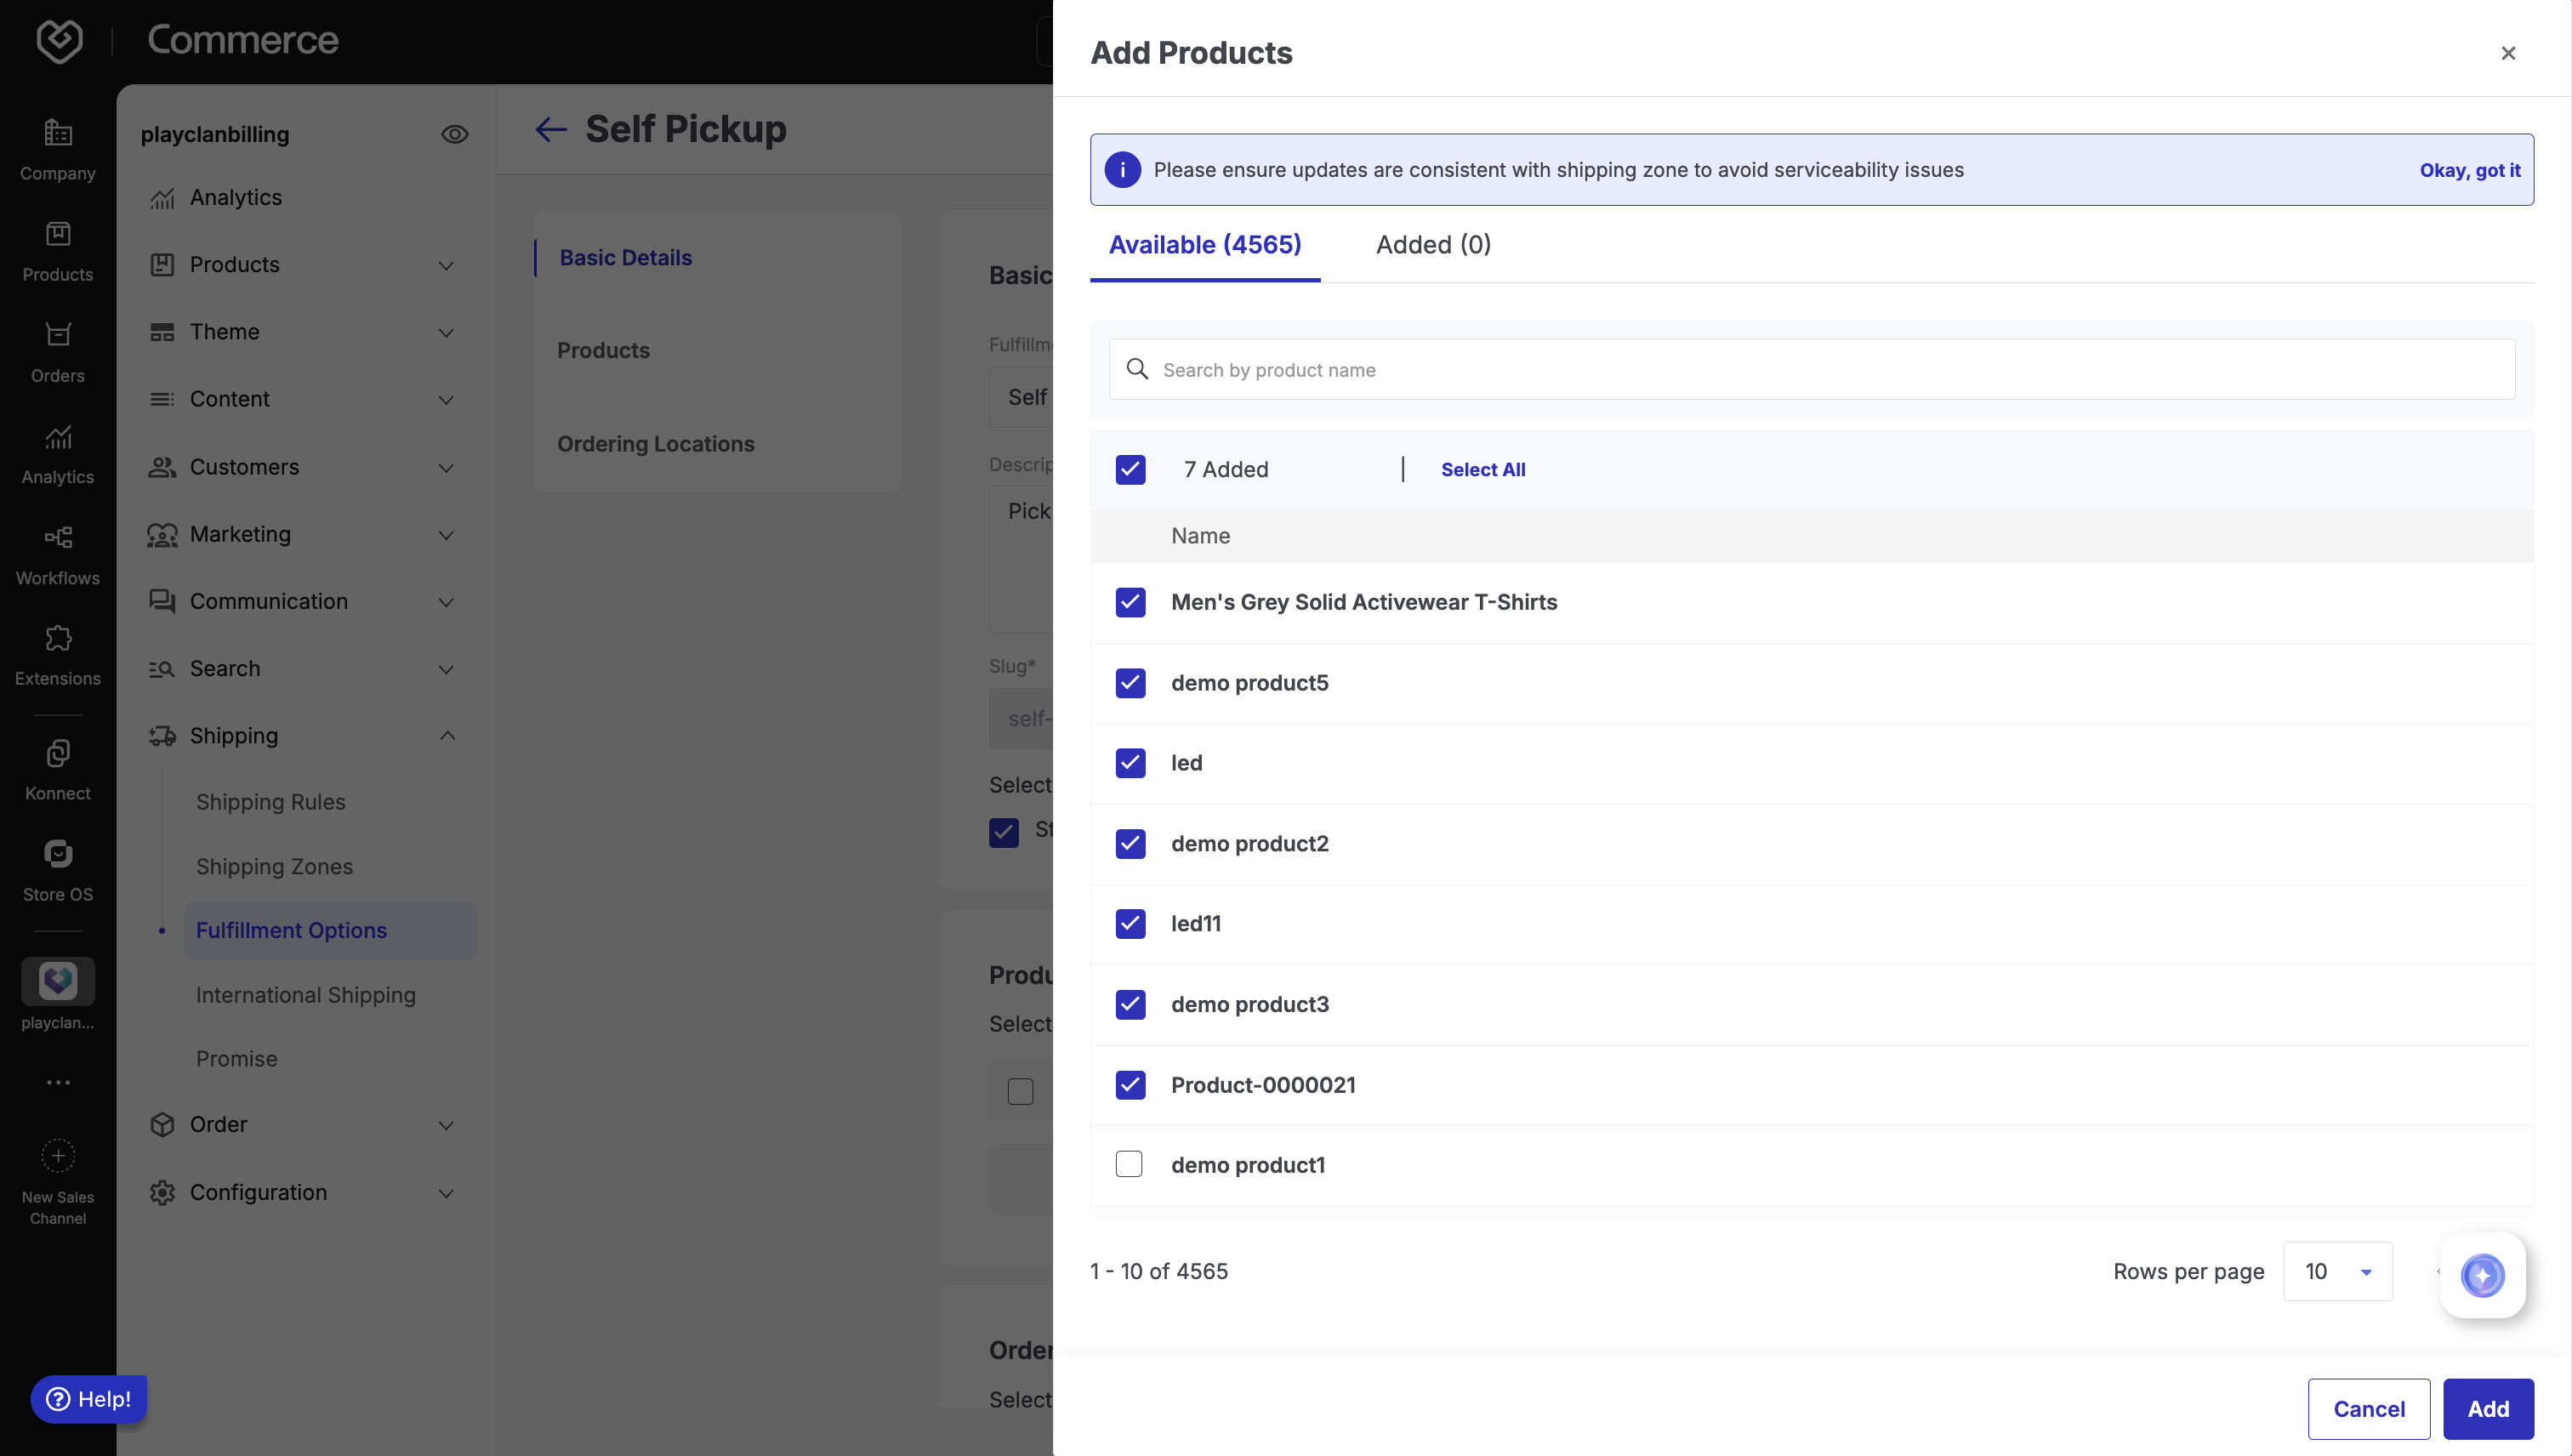
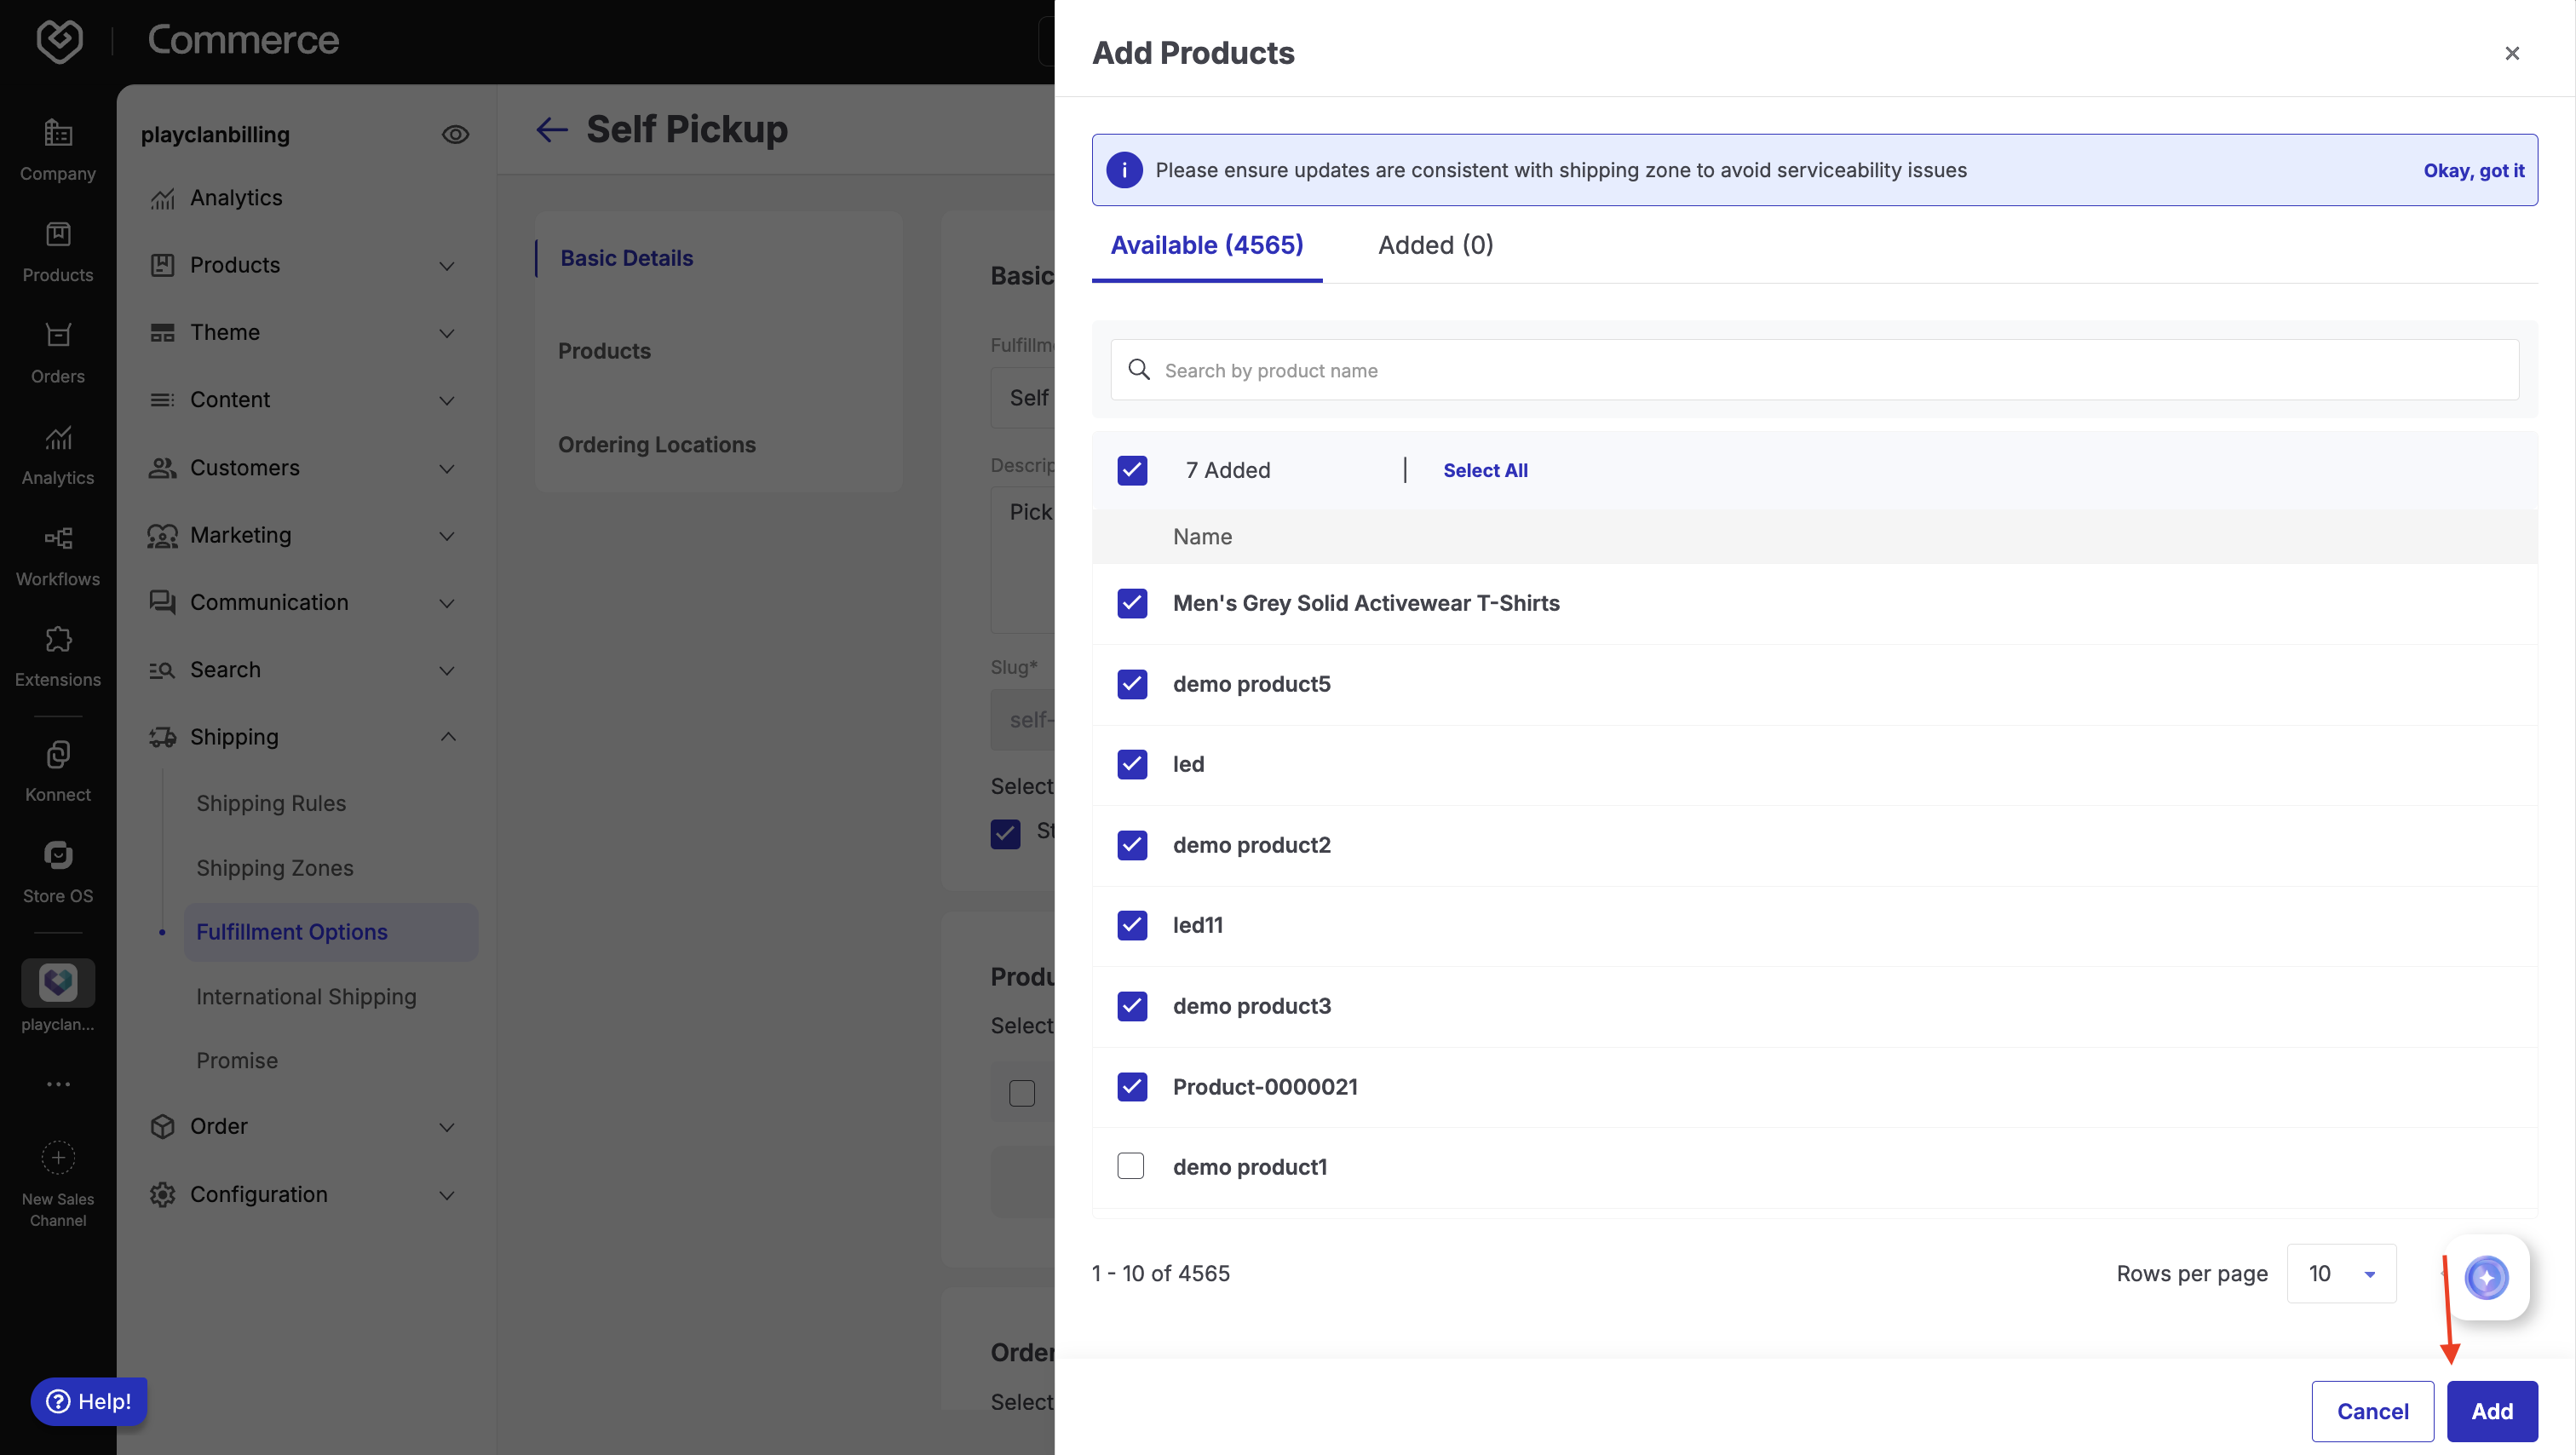
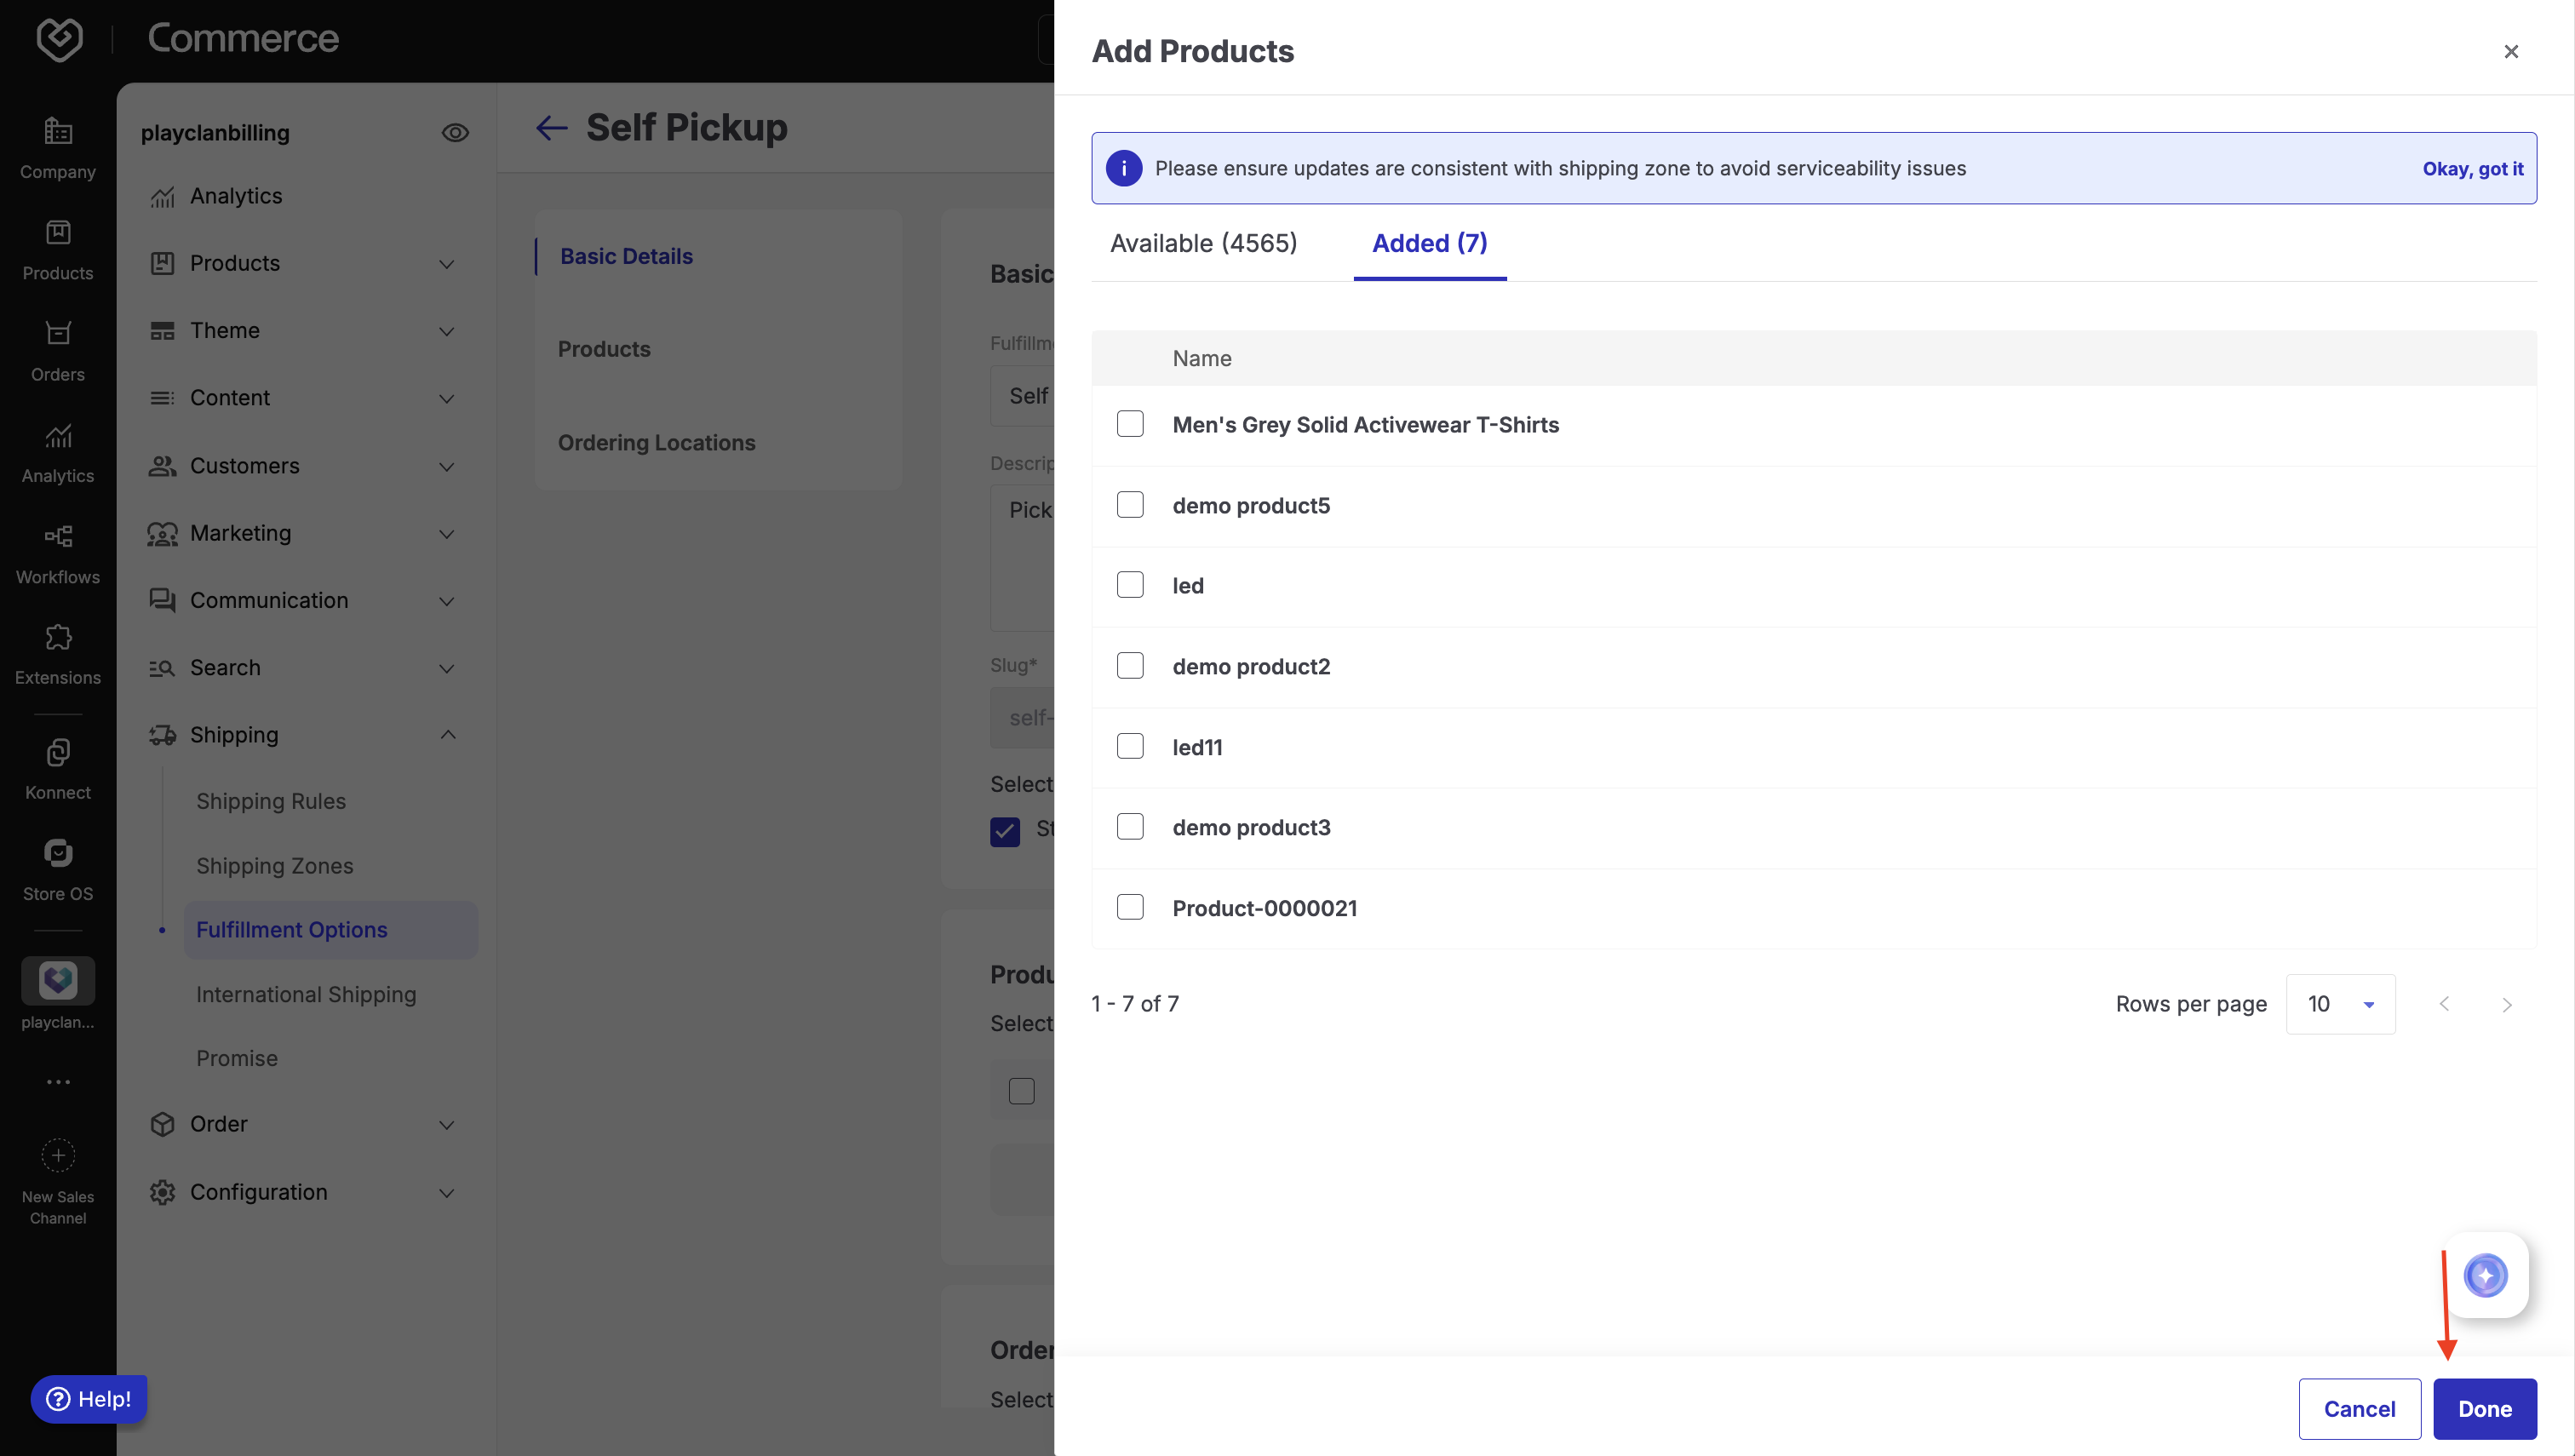

- Click Add once products are selected and then click Done to confirm the selection.
Assign Ordering Locations (Stores)
- Navigate to the Ordering Locations section.
Click Add, and choose from:
- Add Manually
- Bulk Upload
We are adding ordering locations manually here.
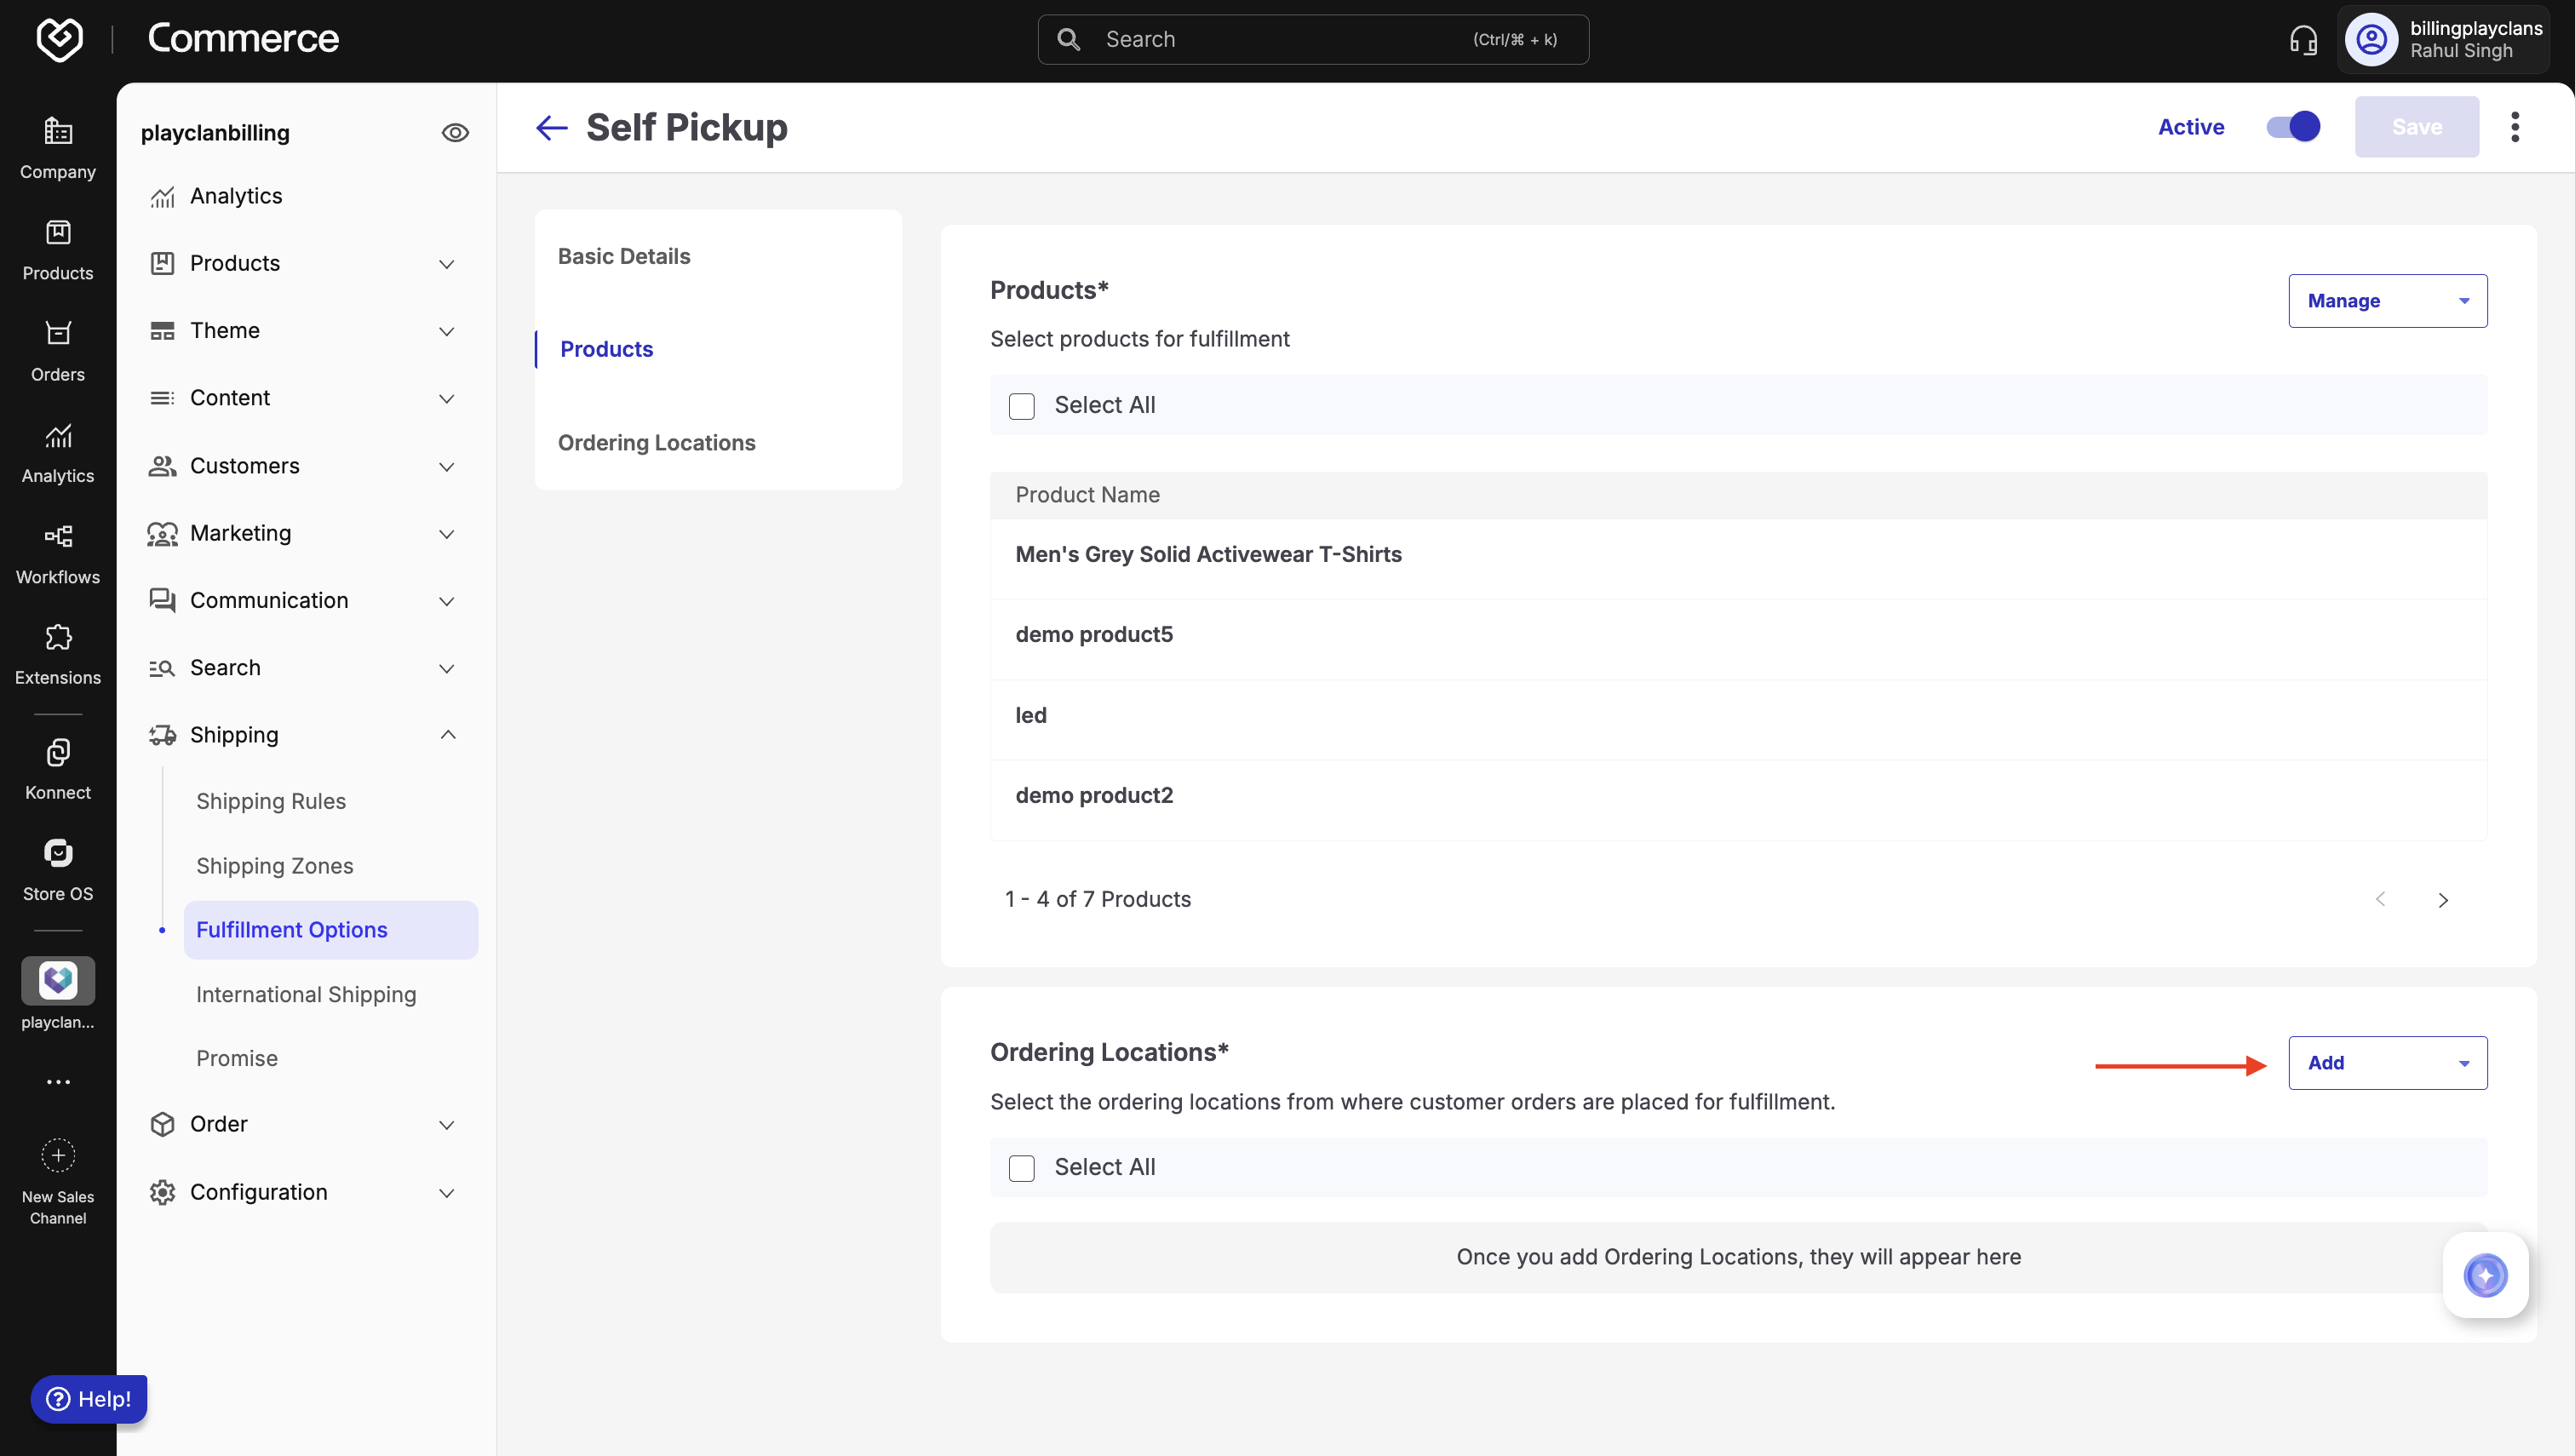
- Select the desired ordering locations (physical stores) where this fulfillment flow will be available.
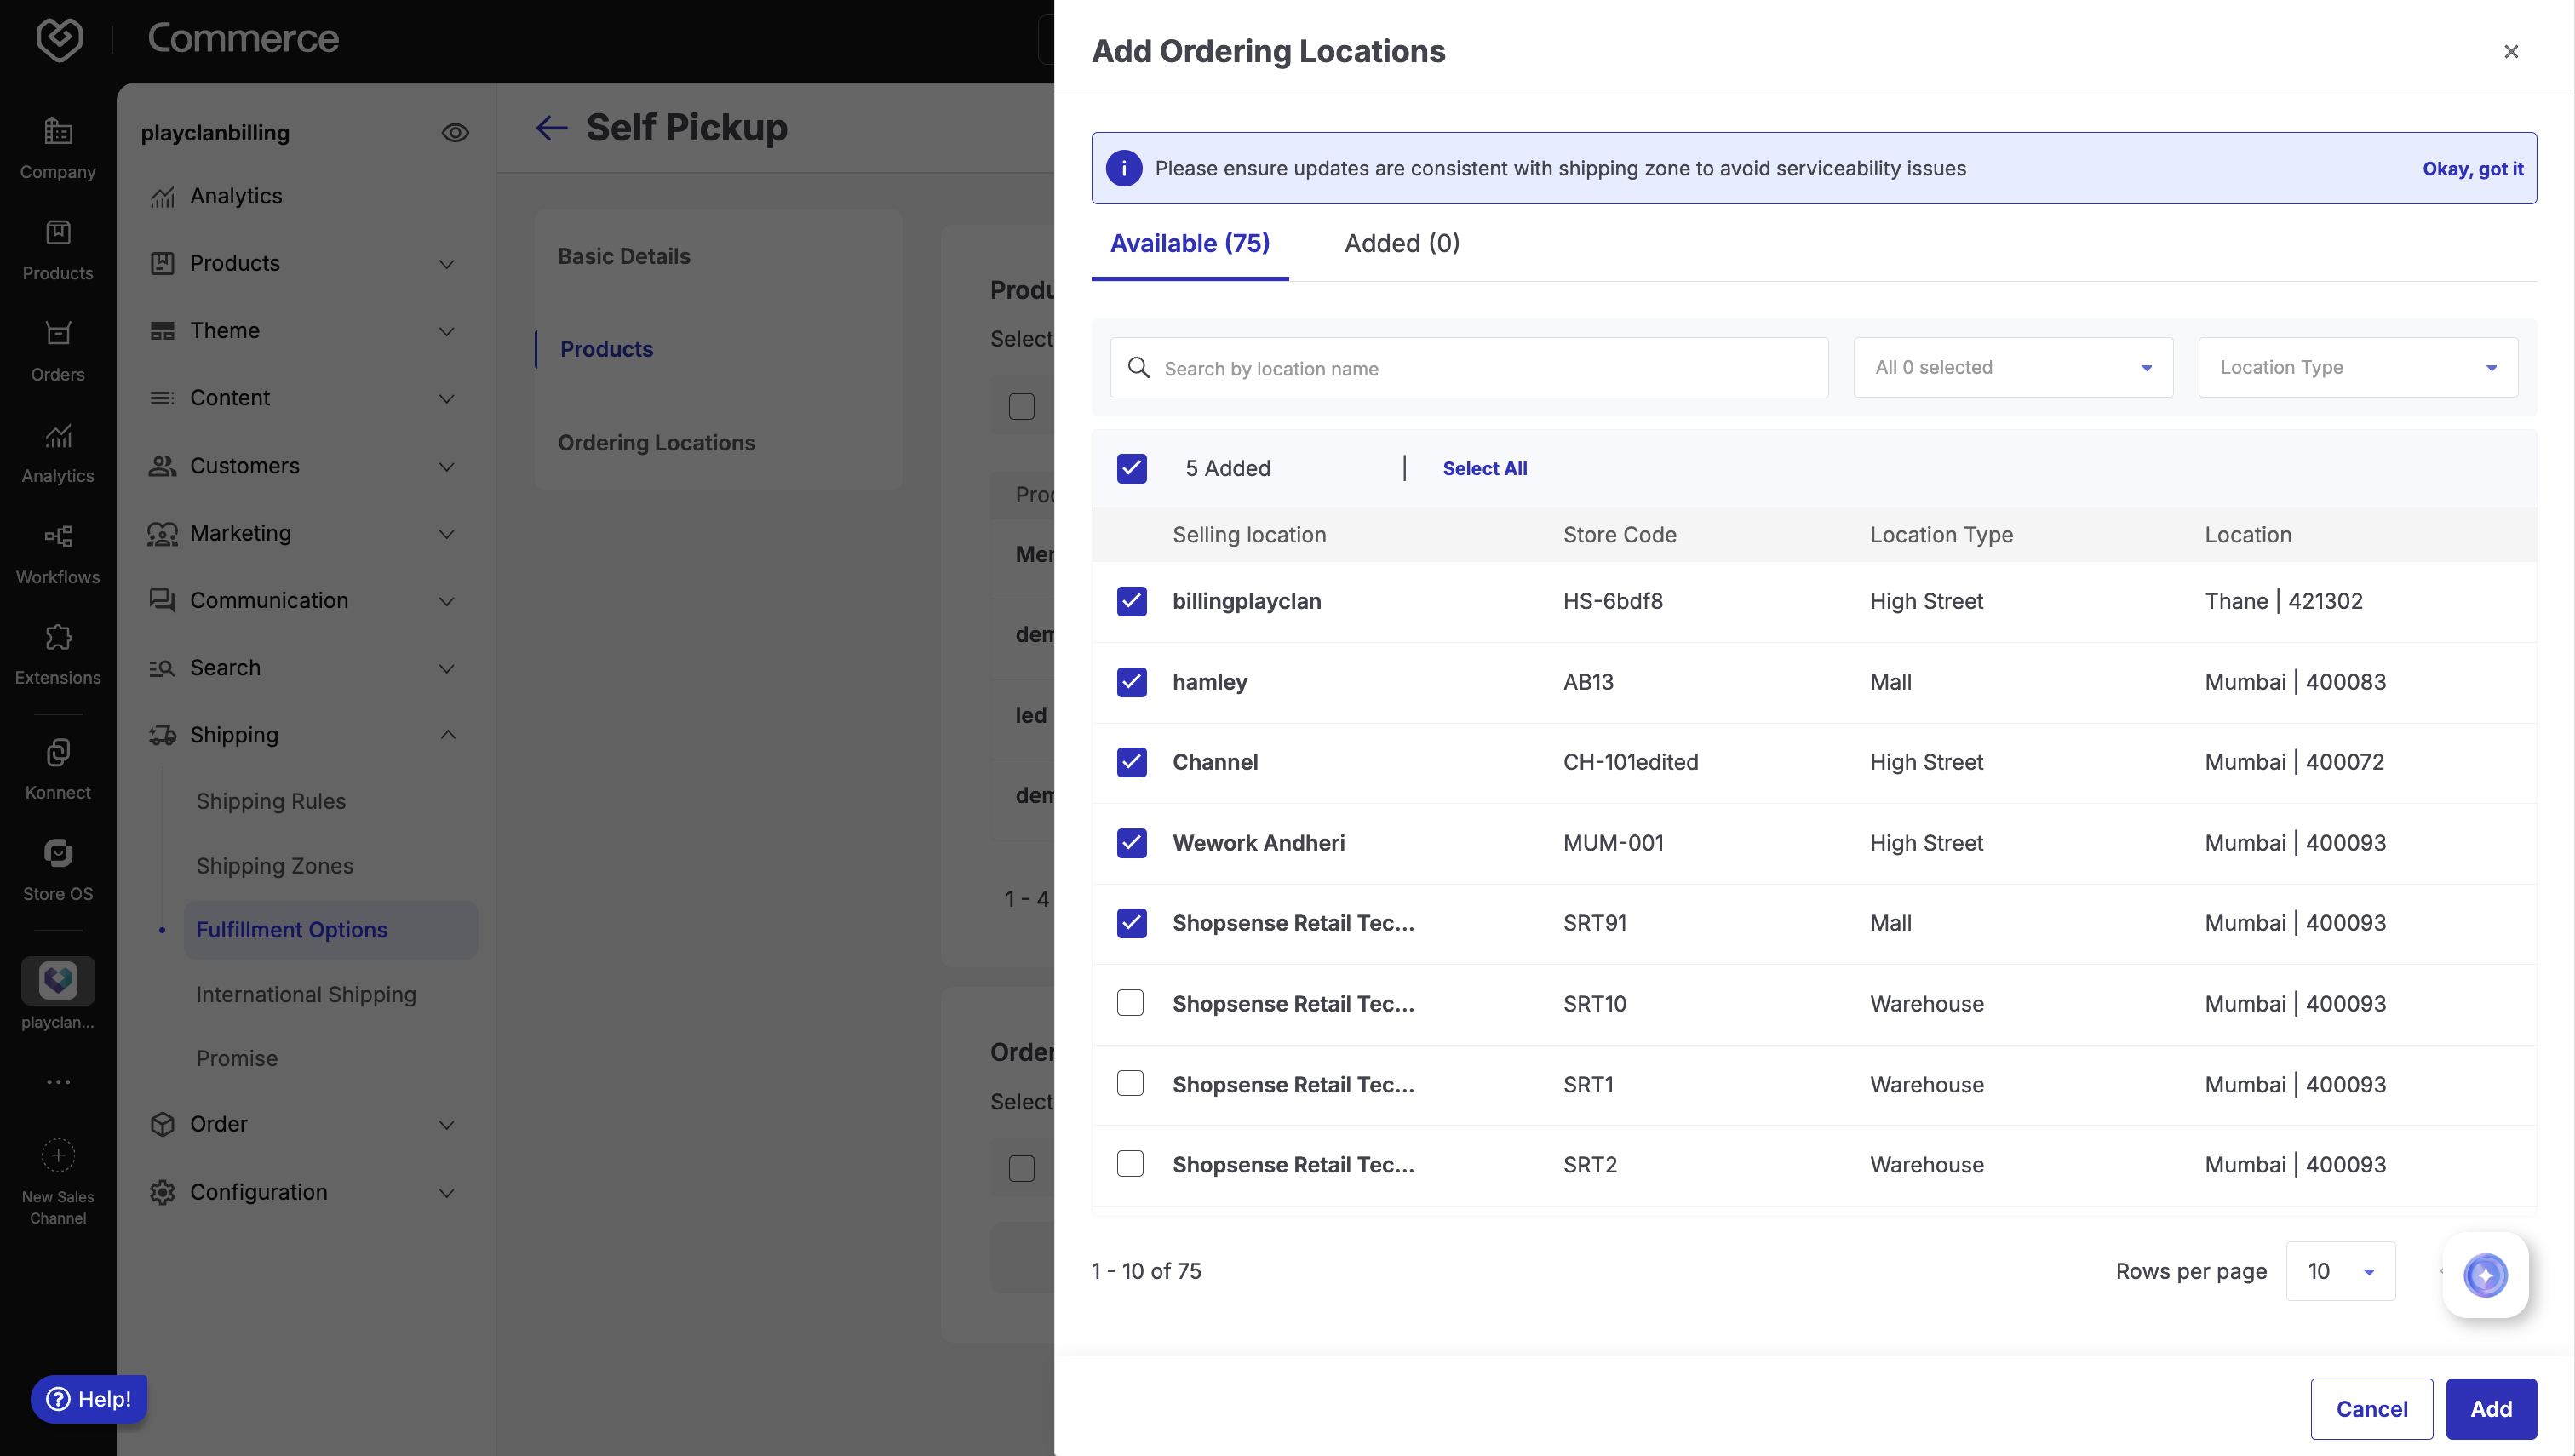
- Click Add once products are selected and then click Done to confirm the selection.
Activate and Save
- Toggle the Inactive/Active switch in the top-right corner to activate the fulfillment option.

(Optional) Click the three-dot menu to set this as the Default option for applicable products/stores.
Click Save to apply your changes.
For Products and Locations, you can upload in bulk:
In the relevant section (Products or Ordering Locations), click Add > Bulk Upload.
Click Download Sample to download the CSV template.
Fill the file with required data:
- For products: Type, Item Code, Brand Name
- For locations: Store Code
Click Upload File, select your CSV, and complete the import.
Click Done to confirm.
Deactivate Self Pickup
To disable the Self Pickup option:
- Go to Self Pickup.
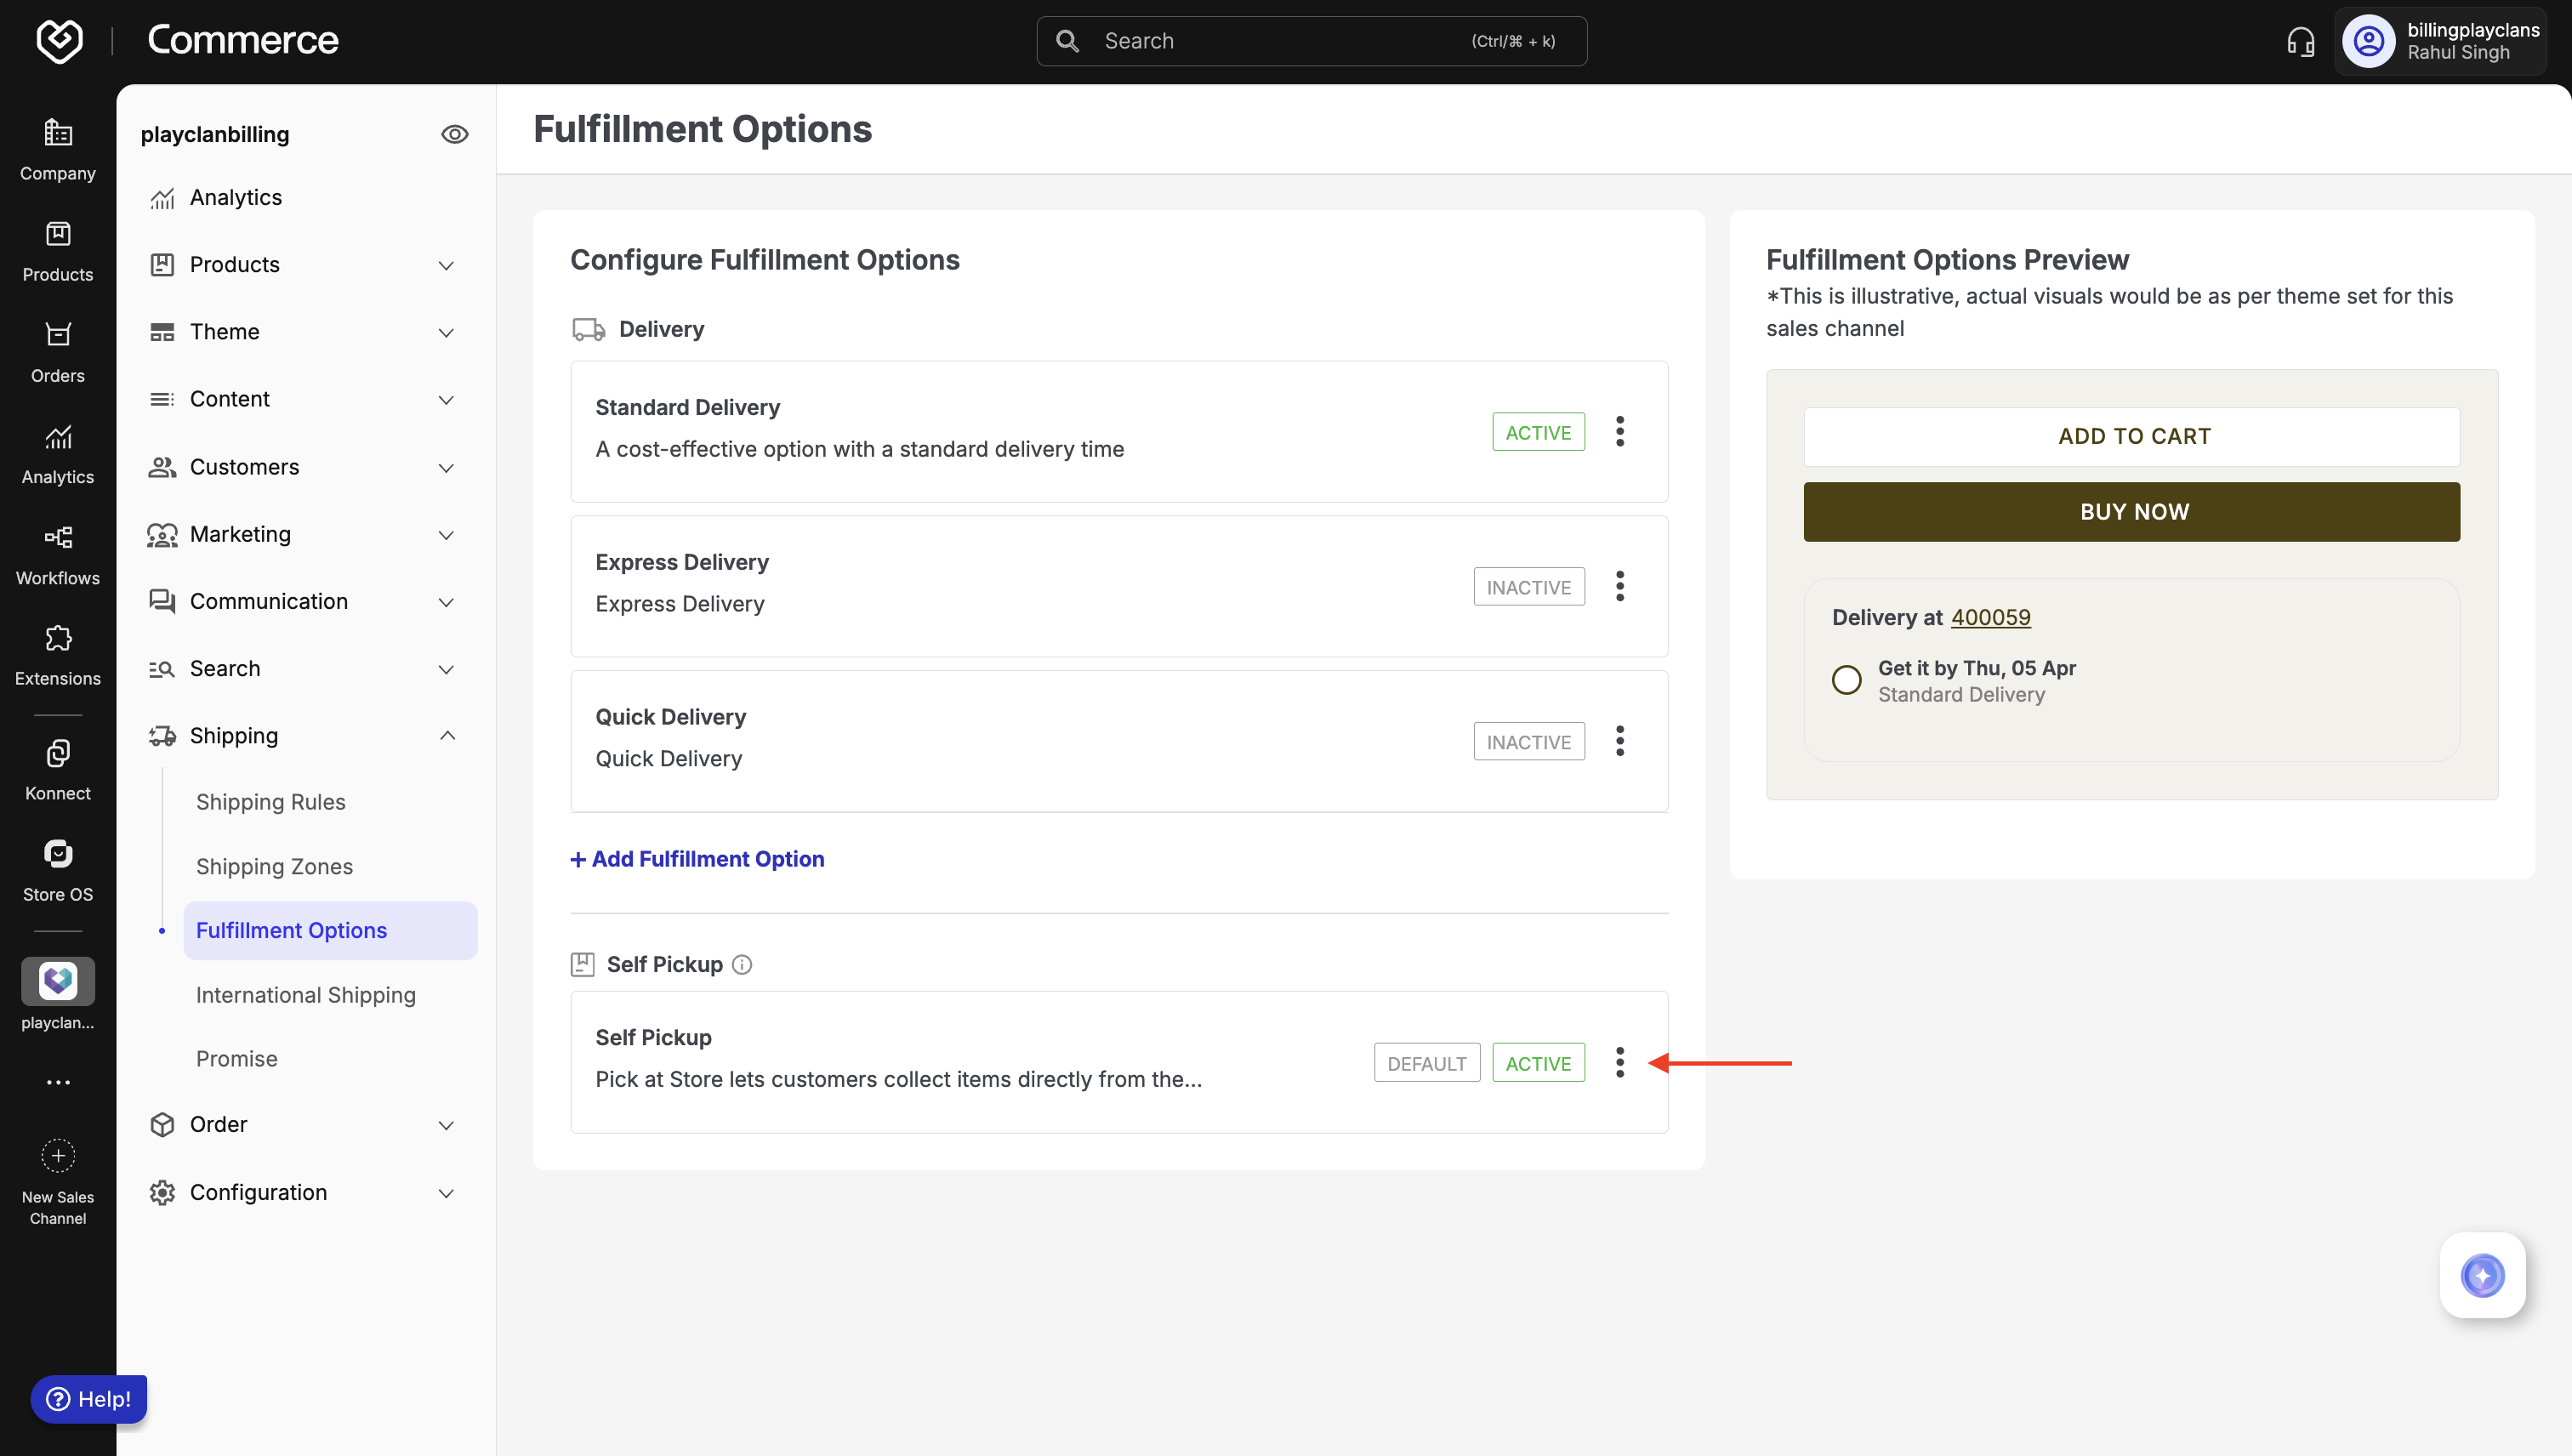
- Click the three-dot menu beside the option you want to disable.
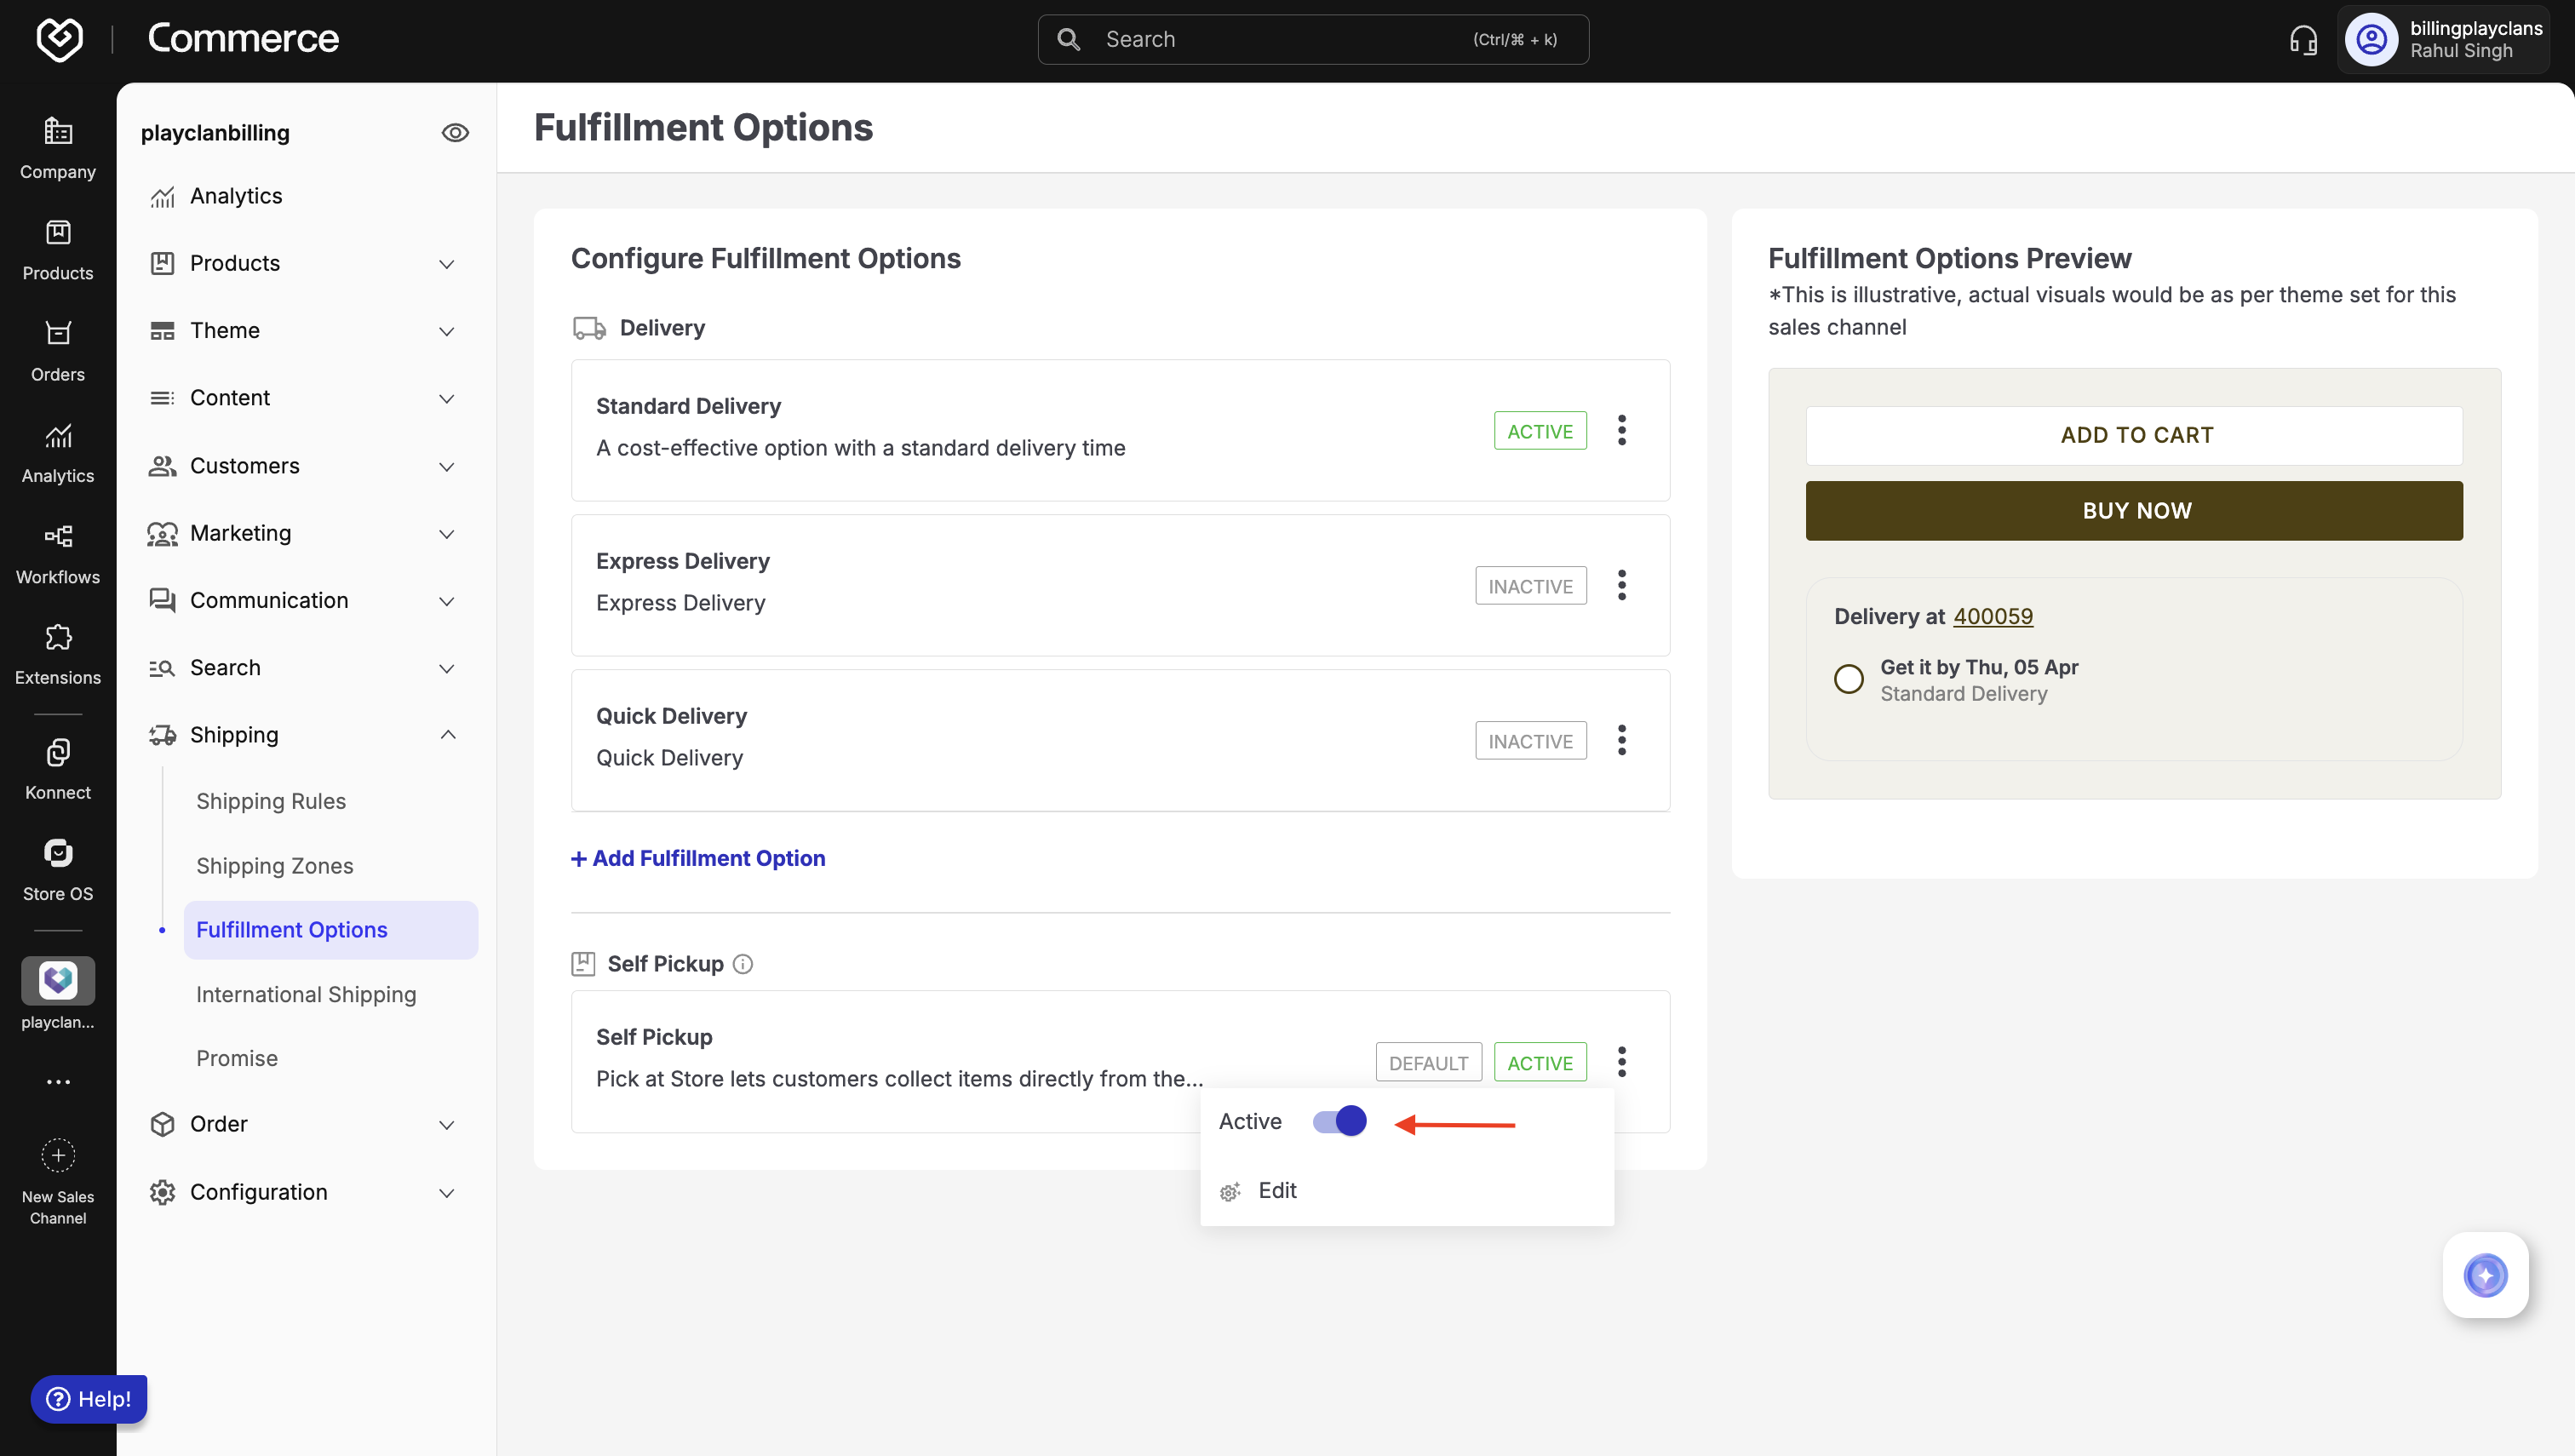
- Toggle off the Active switch directly, or open the Self Pickup configuration and disable it from the top-right corner.