Size Guide
Introduction
Inevitably, you'll always find some variance in the sizing standards used by manufacturers. For e.g. a brand could be selling 'size 7' shoes, which might be 'size 8' for another brand. To avoid any inconvenience, a size guide becomes vital for customers to judge a product before purchasing.
Some popular examples:
- US, UK, EU and AU sizes for shoes, shirts, trousers and other apparels.
- Suitable size of backpacks, sports and game accessories for different age groups.
Creating A Size Guide
Step 1: Click Create Size Guide.
Step 2: Fill all the required fields.
![]()
![]()
Let's understand all the fields shown in fig. 2 and fig. 3
- Name - Give a name to the size guide which will help you to identify it from the rest, for e.g. 'Newton Lifestyle's Size Chart'. The same name will be shown in the size guide drop-down box while adding it to the eligible products.
- Title - Give a title to the size guide to display to your users, for e.g. 'Backpack Size by Age'.
- Subtitle - Enter any extra information that is not part of 'Title', which will further assist the user, for e.g. 'Height, Width and Depth Included'.
- Brand - Since all brands use their own size guide, select the brand for which you're specifically creating this size guide. Note: You can select only one brand, for e.g. 'Newnor'.
- Centimetre/Inches Option - Select whether the product measurements which you are about to enter is in centimetres or inches. You also have the flexibility to enter the dimensions in a particular metric (e.g. inches) and then choosing centimetres to automatically convert your product size from inches to cm and vice versa.
There's a checkbox above each column. Select the checkbox if the column data is in cm or inch. In this example, the 1st column is 'Age Group' and hence the checkbox above it is not selected.
- Add Column - Use this option if you want to add an extra column (header) to your size guide.
- Rows and Columns - This is a table that contains rows (data) and columns (headers) for indicating different sizes of a product.
- Add Row - Use this option if you want to add an extra row (data) to your size guide.
- Description - A markdown editor for adding any extra piece of information along with your size guide, for e.g. additional links or disclaimer.
- Upload Image - With the help of this, you can add images to your size guide which will assist the user to judge the correct size.
![]()
![]()
![]()
![]()
![]()
Step 3: Save your size guide.
![]()
Your size guide is saved successfully and added to the list of existing size guides.
![]()
Attaching The Size Guide To Your Products
Since you have created a size guide for your brand (e.g. Newnor), it's time to attach your size guide to the products belonging to that brand. There are 3 ways of attaching a size guide:
Through UI
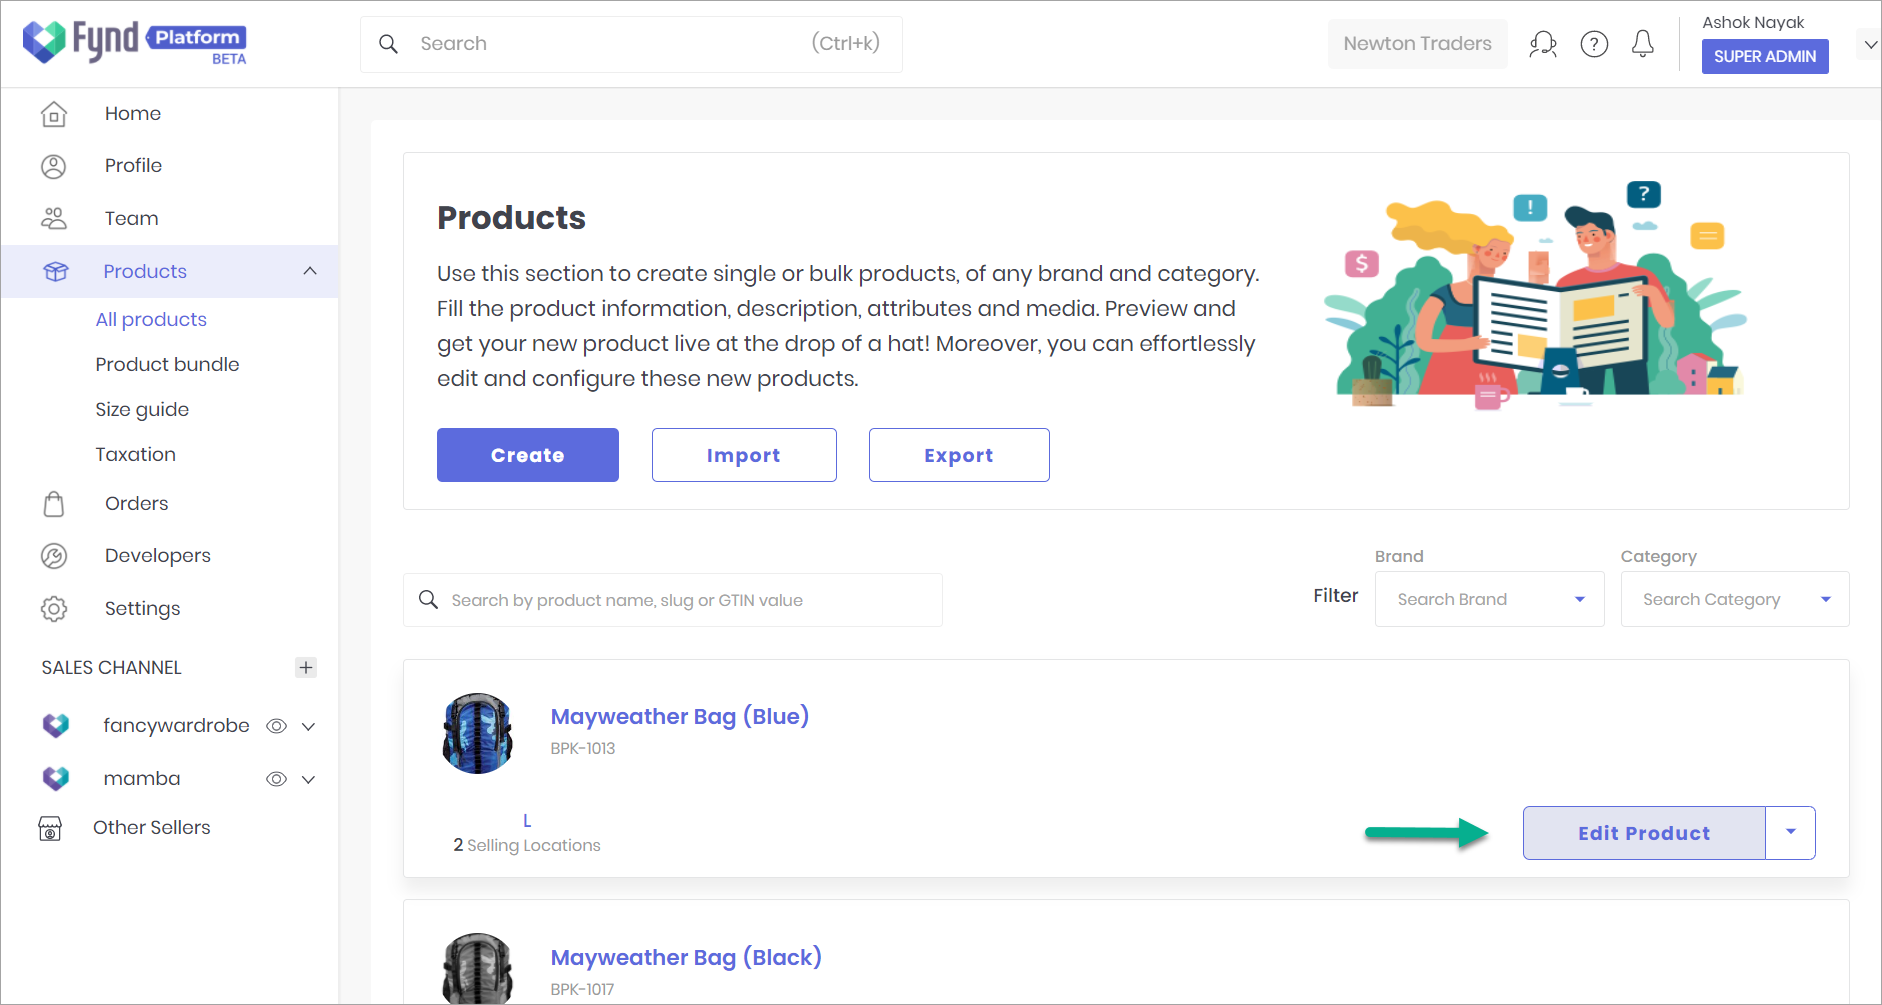
Go to All Products.

Figure 11: Products - All Products
Choose the brand from the drop-down. This will help you to view all the products of that brand.

Figure 12: Filter Products By Brand
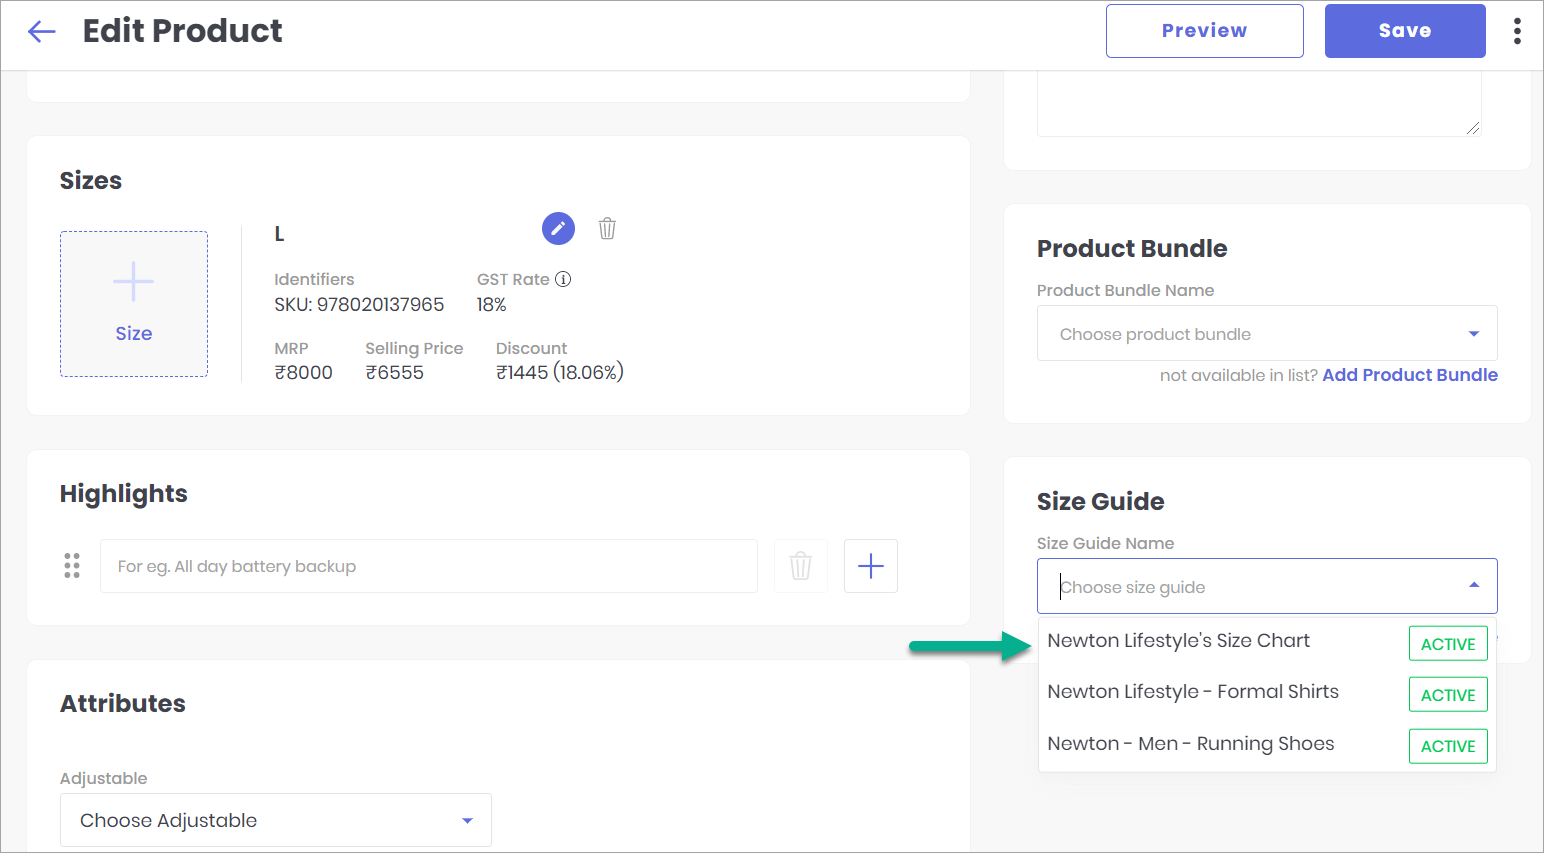
Edit the products manually, attach the size guide from the drop-down and click Save.

Figure 13a: Edit Product 
Figure 13b: Edit Product
Through Import Products
If you haven't created a product yet, use the Import Product feature to download a sample excel file, fill all the product attributes, choose your size-guide from the drop-down and upload the excel file.
![]()
If you aren't familiar with this feature, click How To Import Products to know more.
Through Partial Update
This is applicable if you already have products and you want to attach a size guide to them. In the excel sheet, add a column header named 'Size Guide', enter the 'Title' of your size guide and upload the excel file.
![]()
If you aren't familiar with this feature, click How To Update Existing Products to know more.
Deactivating A Size Guide
If you do not wish to use a particular size guide, you may deactivate it. The size guide will become inactive and will no longer appear on product pages that uses it. Moreover, you won't be able to attach the deactivated size guide to any product as seen in the above section.
From the list, click the size guide which you want to deactivate.

Figure 16: Choosing The Size Guide To Deactivate
Use the toggle button to disable the size guide.

Figure 17: Disabling The Size Guide
Click 'Yes'.

Figure 18: Confirmation Dialog
Save the size guide.

Figure 19: Saving The Size Guide
Size guide is successfully deactivated.

Figure 20: Inactive Size Guide