Return Processing
There is always a possibility that a customer might return a shipment due to any unforeseeable reason. In that case, the return is initiated and the returned product is delivered back to you.
This is the sequence: Return Initiated → Return in Transit → Return Delivered
Once the returned product reaches you, you need to accept the return and perform a quality check (QC) of the returned product. You need to specify how many have been returned in good condition (a.k.a Good QC) and how many have been returned in bad condition (a.k.a Bad QC). You can tag a reason against each quantity in Bad QC.
Please note that you can perform a QC only after the current stage is Return Delivered, until then your intervention is not needed in the OMS.
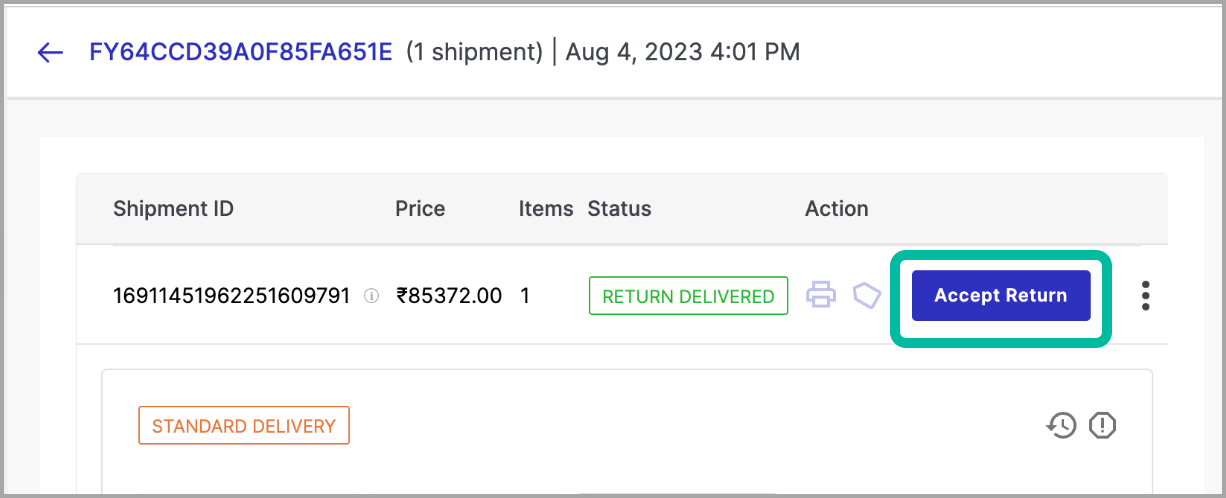
You have the option to manually approve the return request for a particular order if you wish to proceed with the return acceptance procedure. Click Accept Return from the Return Summary page.
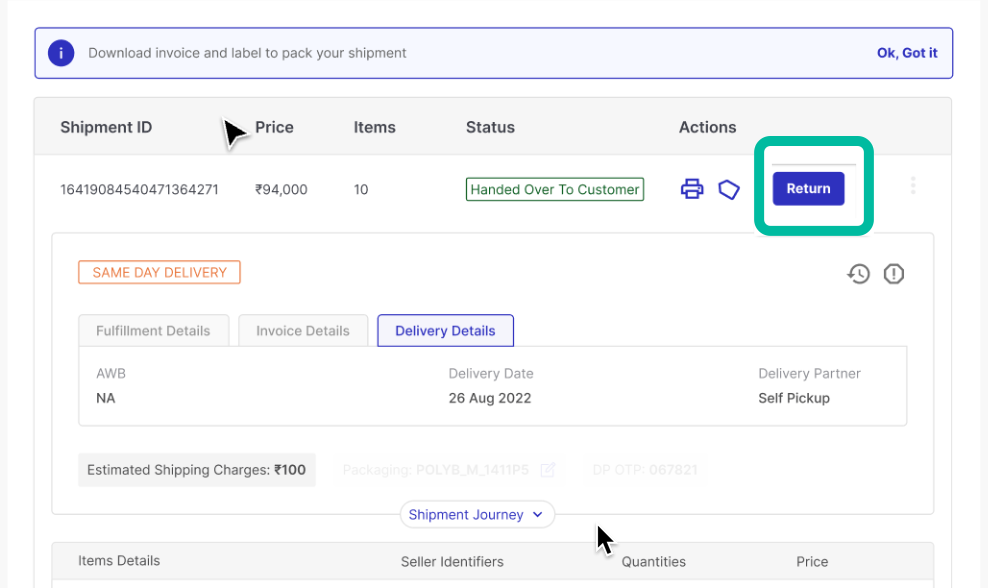
Accepting returns for items directly purchased from the store (Handed Over to Customer) involves going to the Processed > Handed Over to Customer and clicking Return. Choose items and reasons, optionally providing a credit note for unregistered customers, and specifying the refund method.
When a customer forgets to provide their bank details required for a COD refund, the refund process gets delayed, leaving the shipment's refund stuck. To address this, we have info bar in order details page that helps the store operations team to resolve the issue. The info bar displays the message: "Beneficiary details required for the refund have not been provided by the customer. If the customer has not received the SMS to submit their details, please resend the beneficiary information request via SMS." As shown in the image below.
.jpg)
Automated reverse Invoice Reference Numbers (IRNs) are generated for canceled or returned shipments for orders that already have existing forward IRNs.
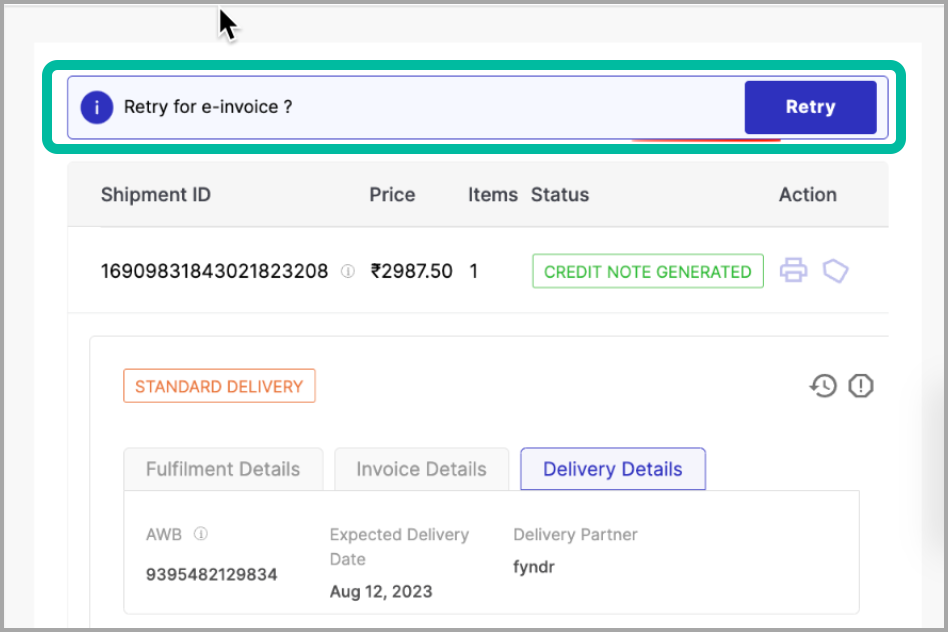
Sellers have the convenience of retrying the e-invoice generation process in the event of any failure.
Manually enter a Credit Note ID for a shipment
Merchants can manually enter a Credit Note ID for any shipment directly from the Order Details screen. This can be used when Auto Credit Note Generation is disabled for a fulfilment location.
When can you add a Credit Note ID?
You can enter a Credit Note ID for any order that has been invoiced and is later returned, cancelled, or marked as RTO. If a credit note has already been auto-generated or manually added, the action button to update it will no longer be available.
How it works
- Open the Order Details page.
- Each shipment is listed with status, price, items, and actions.
- If the order has been invoiced and is returned, cancelled, or marked as RTO, an input field will appear next to the Update button under the Actions column.
- Manually enter the Credit Note ID (e.g., J12345678901234) into the field.
- Click Update to save it.
- Once updated, the status label will change to CREDIT NOTE GENERATED.
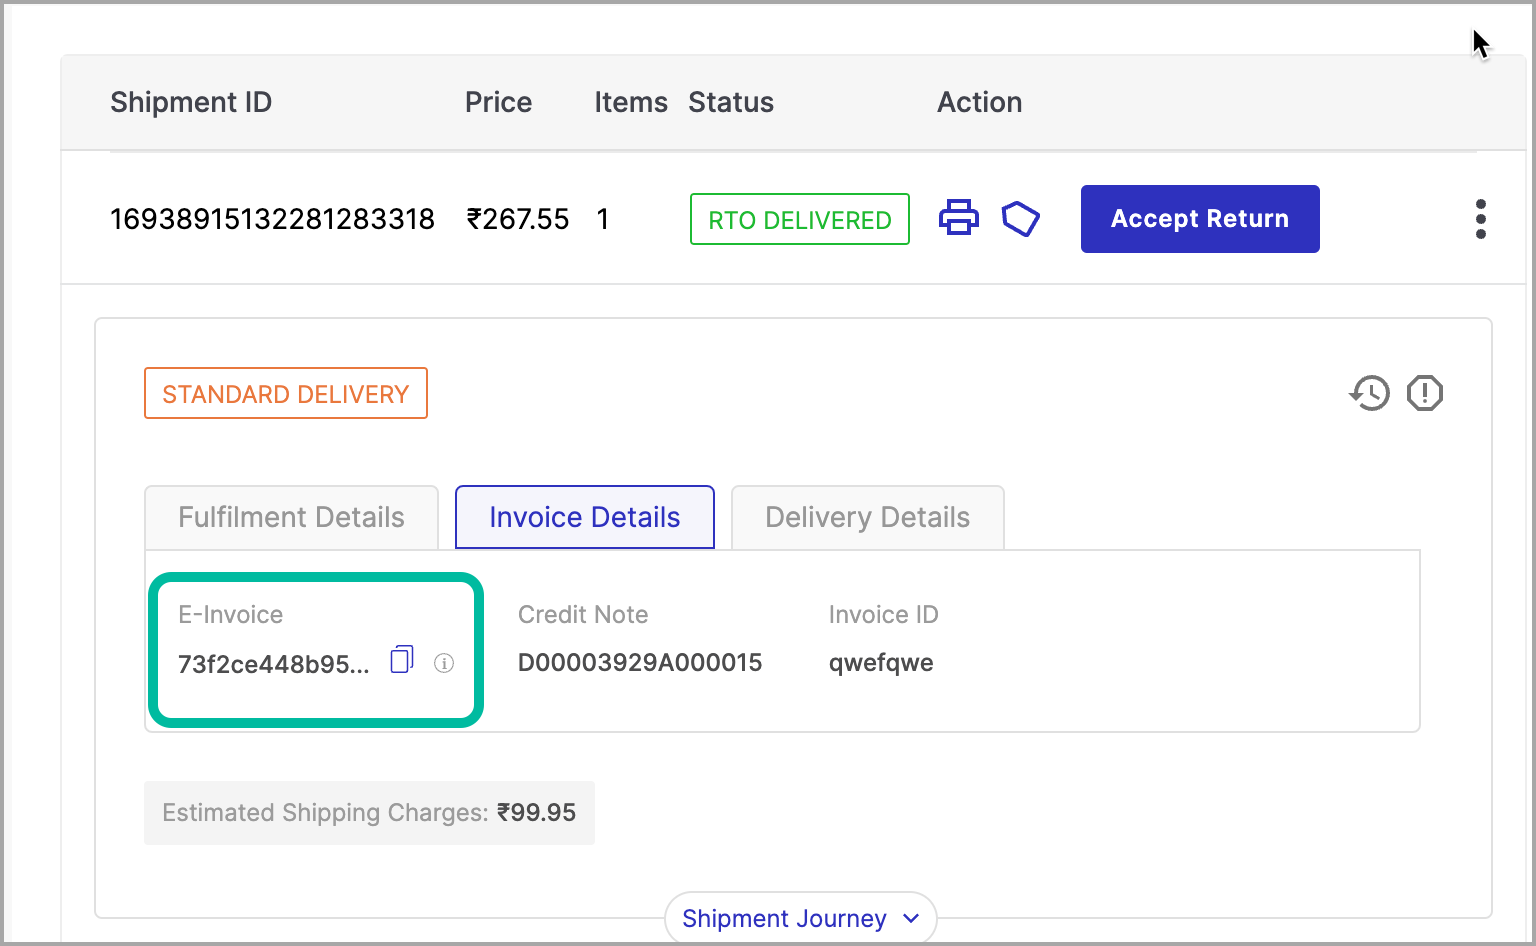
- Once added, the Credit Note ID will be displayed under the Invoice Details tab of the respective shipment.
- The Credit Note ID is merchant-defined and optional.
- The entered ID is saved against the shipment and reflected in reports.