Return QC & Cancellation
Your customers might return products due to unforeseeable circumstances. If a product is returnable, your customers would get an option to return the delivered product (if it's within the return window). However, it's worthwhile to know the reason behind returning a product too. At the same time, a Quality Check (QC) might be vital for you to validate the genuineness of a return.
Return Merchandise Authorisation (RMA) helps you create rules in which you can decide the list of reasons and sub-reasons to ask the customer, along with a QC mechanism to follow (if required).
How to add reasons
In the absence of a rule, Fynd Commerce displays a default list of reasons when a customer returns a product.
![]()
However, you can customise the above reasons for each sales channel.
Adding a single reason
Go to your sales channel settings and click Return Merchandise Authorisation.

Figure 2: RMA Settings Click Add Rule.

Figure 3: Adding a rule Choose the department and category to which the rule should apply. Whenever a customer returns a product belonging to that department and category, it will display the reasons you mentioned within the rule.

Figure 4: Choosing the filters Please NoteIf the product being returned does not belong to the category or department as per the rule you created, then the default rule would be applicable, which means, pre-decided reasons would appear (refer fig. 1).
Select a reason from the dropdown list. Let's call this 'parent reason' because you can create 'child reasons' a.k.a sub-reasons too.

Figure 5: Selecting a reason Click Save.

Figure 6: Saving the rule Any customer returning a product (that belongs to the department and category you specified in the rule) will get an option to choose the reason.

Figure 7: Storefront Output (single reason)
Adding multiple reasons
Since there can be any number of reasons behind returning a product, you need to show a couple of those reasons.
Click the Edit icon.

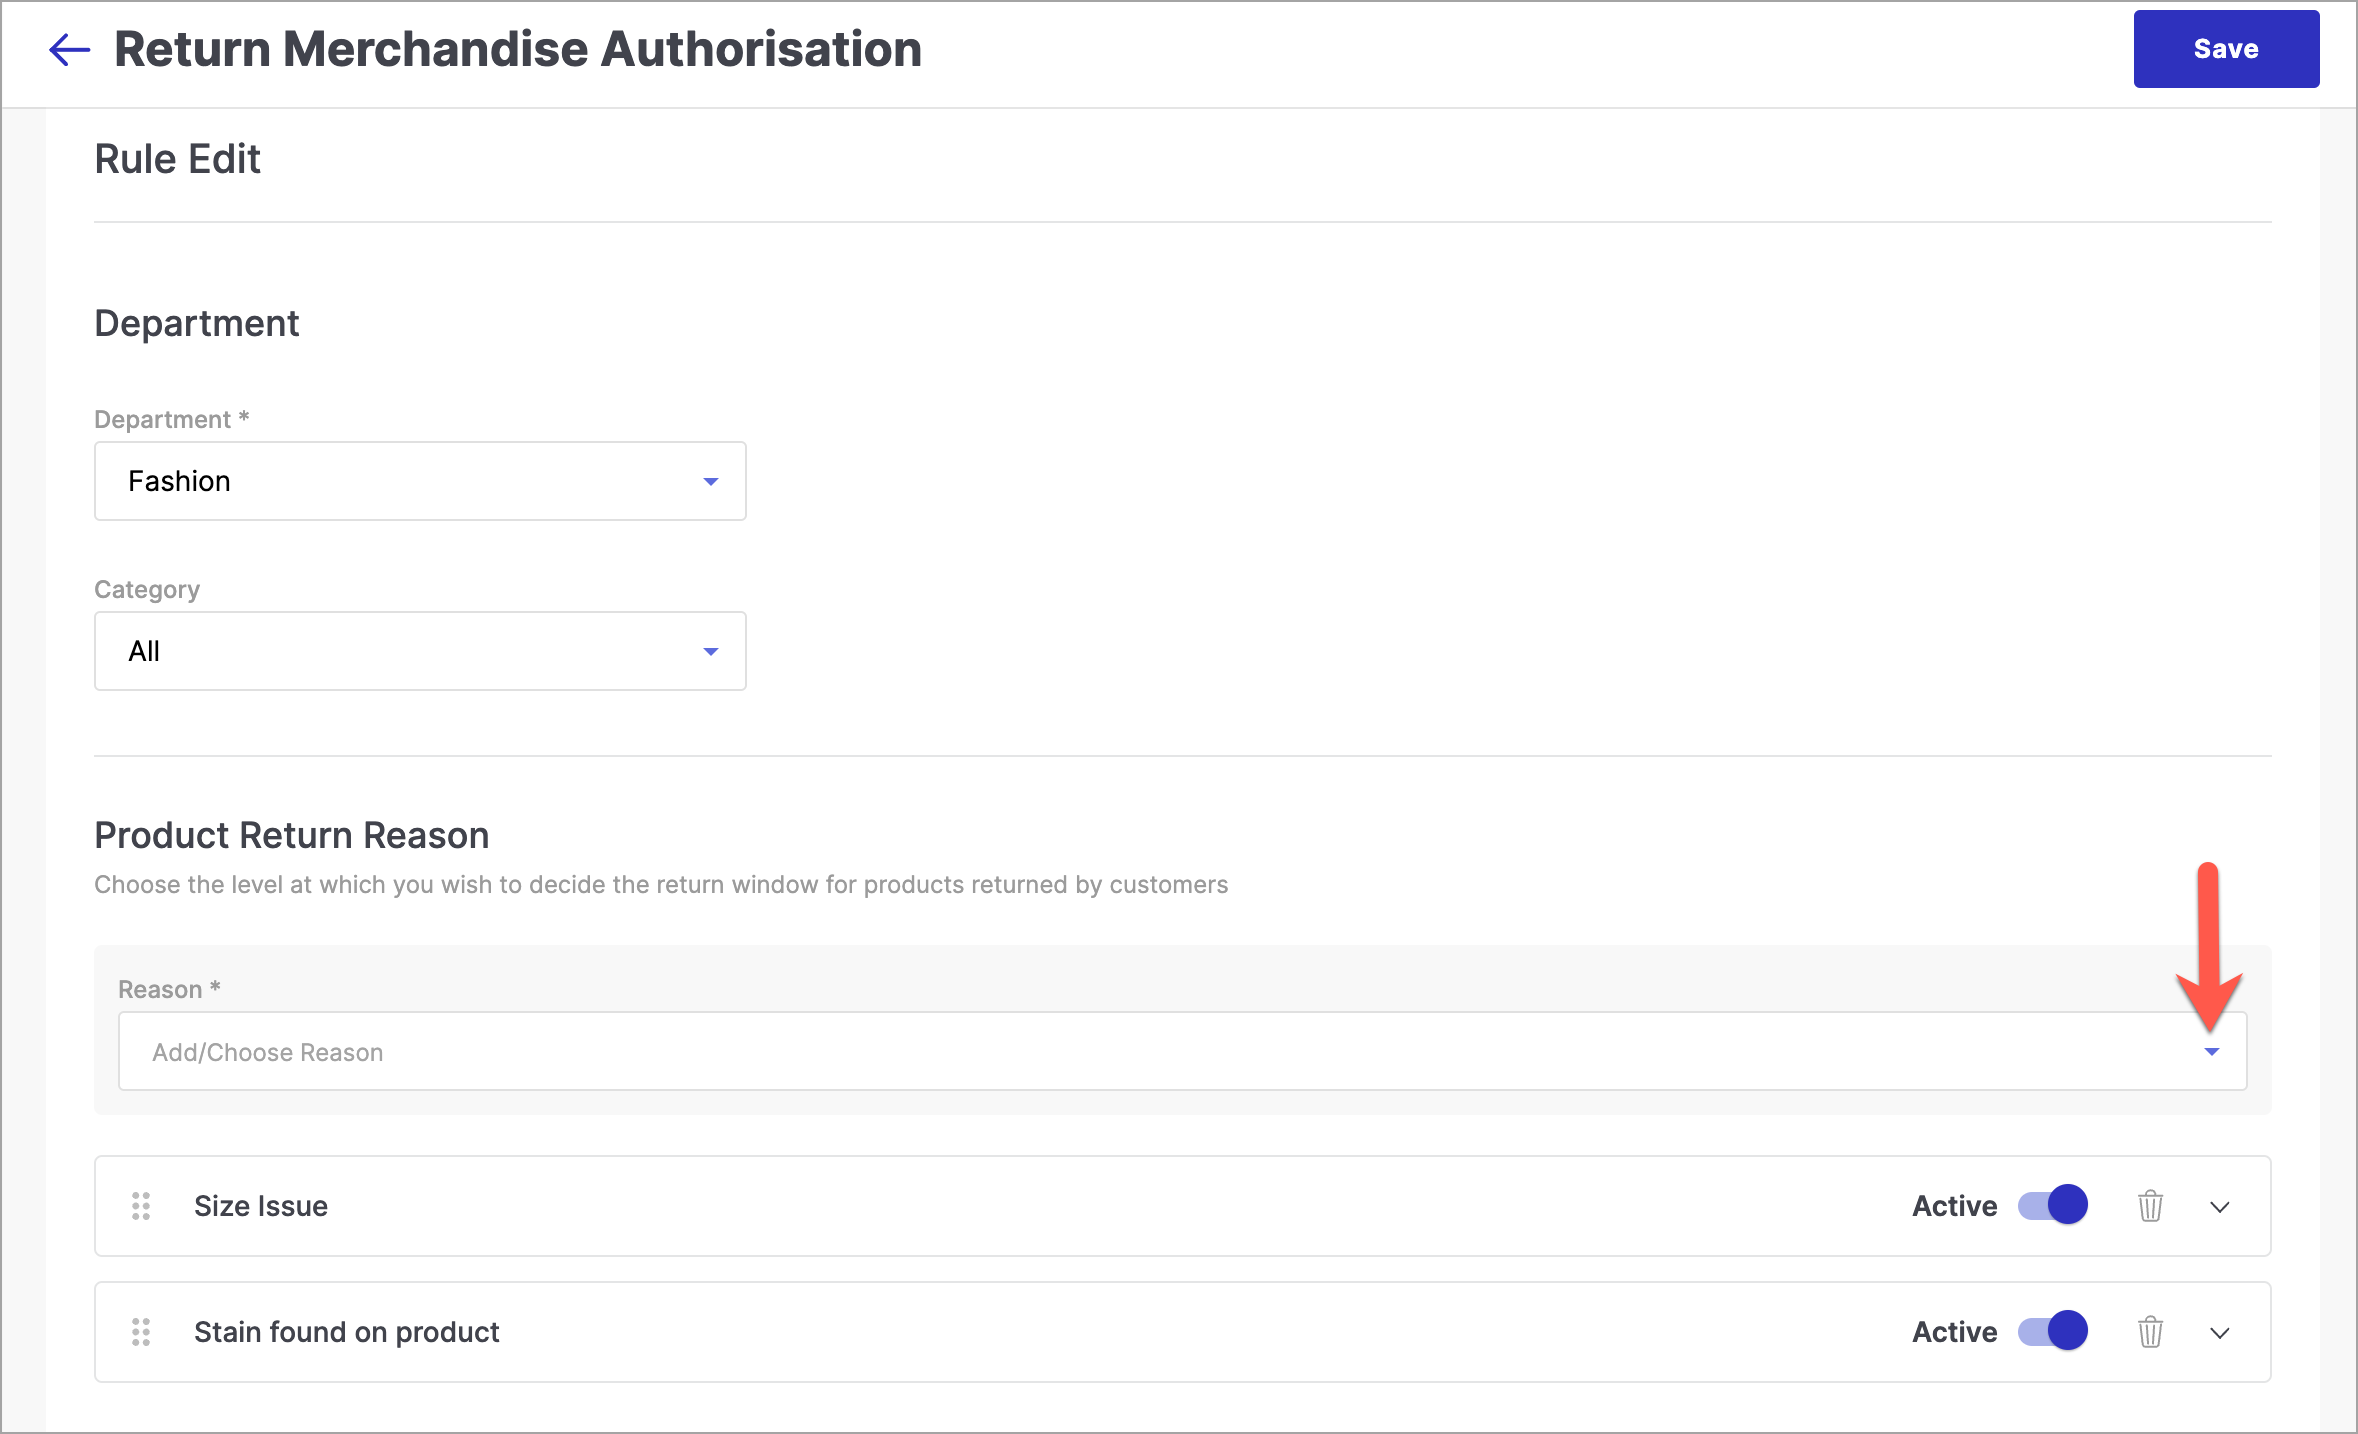
Figure 8: Editing a rule Use the dropdown to select another parent reason.

Figure 9: Adding one more reason Save the rule. When your customer returns the product, two options will appear.

Figure 10: Storefront Output (multiple reasons)
You can also re-arrange and shuffle the reasons by dragging them (from the left side) while creating the rule.
How to add sub-reasons
Sometimes, you might want to dig deeper to know the customer's exact excuse behind returning a product. In that case, you can add sub-reasons to all your parent reasons.
Click the Edit icon.

Figure 11: Editing an RMA rule Click the down arrow next to the parent reason (to which you want to add sub-reasons).

Figure 12: Editing a parent reason Click the + Sub Reason button.

Figure 13: Adding a sub-reason Accept the prompt.

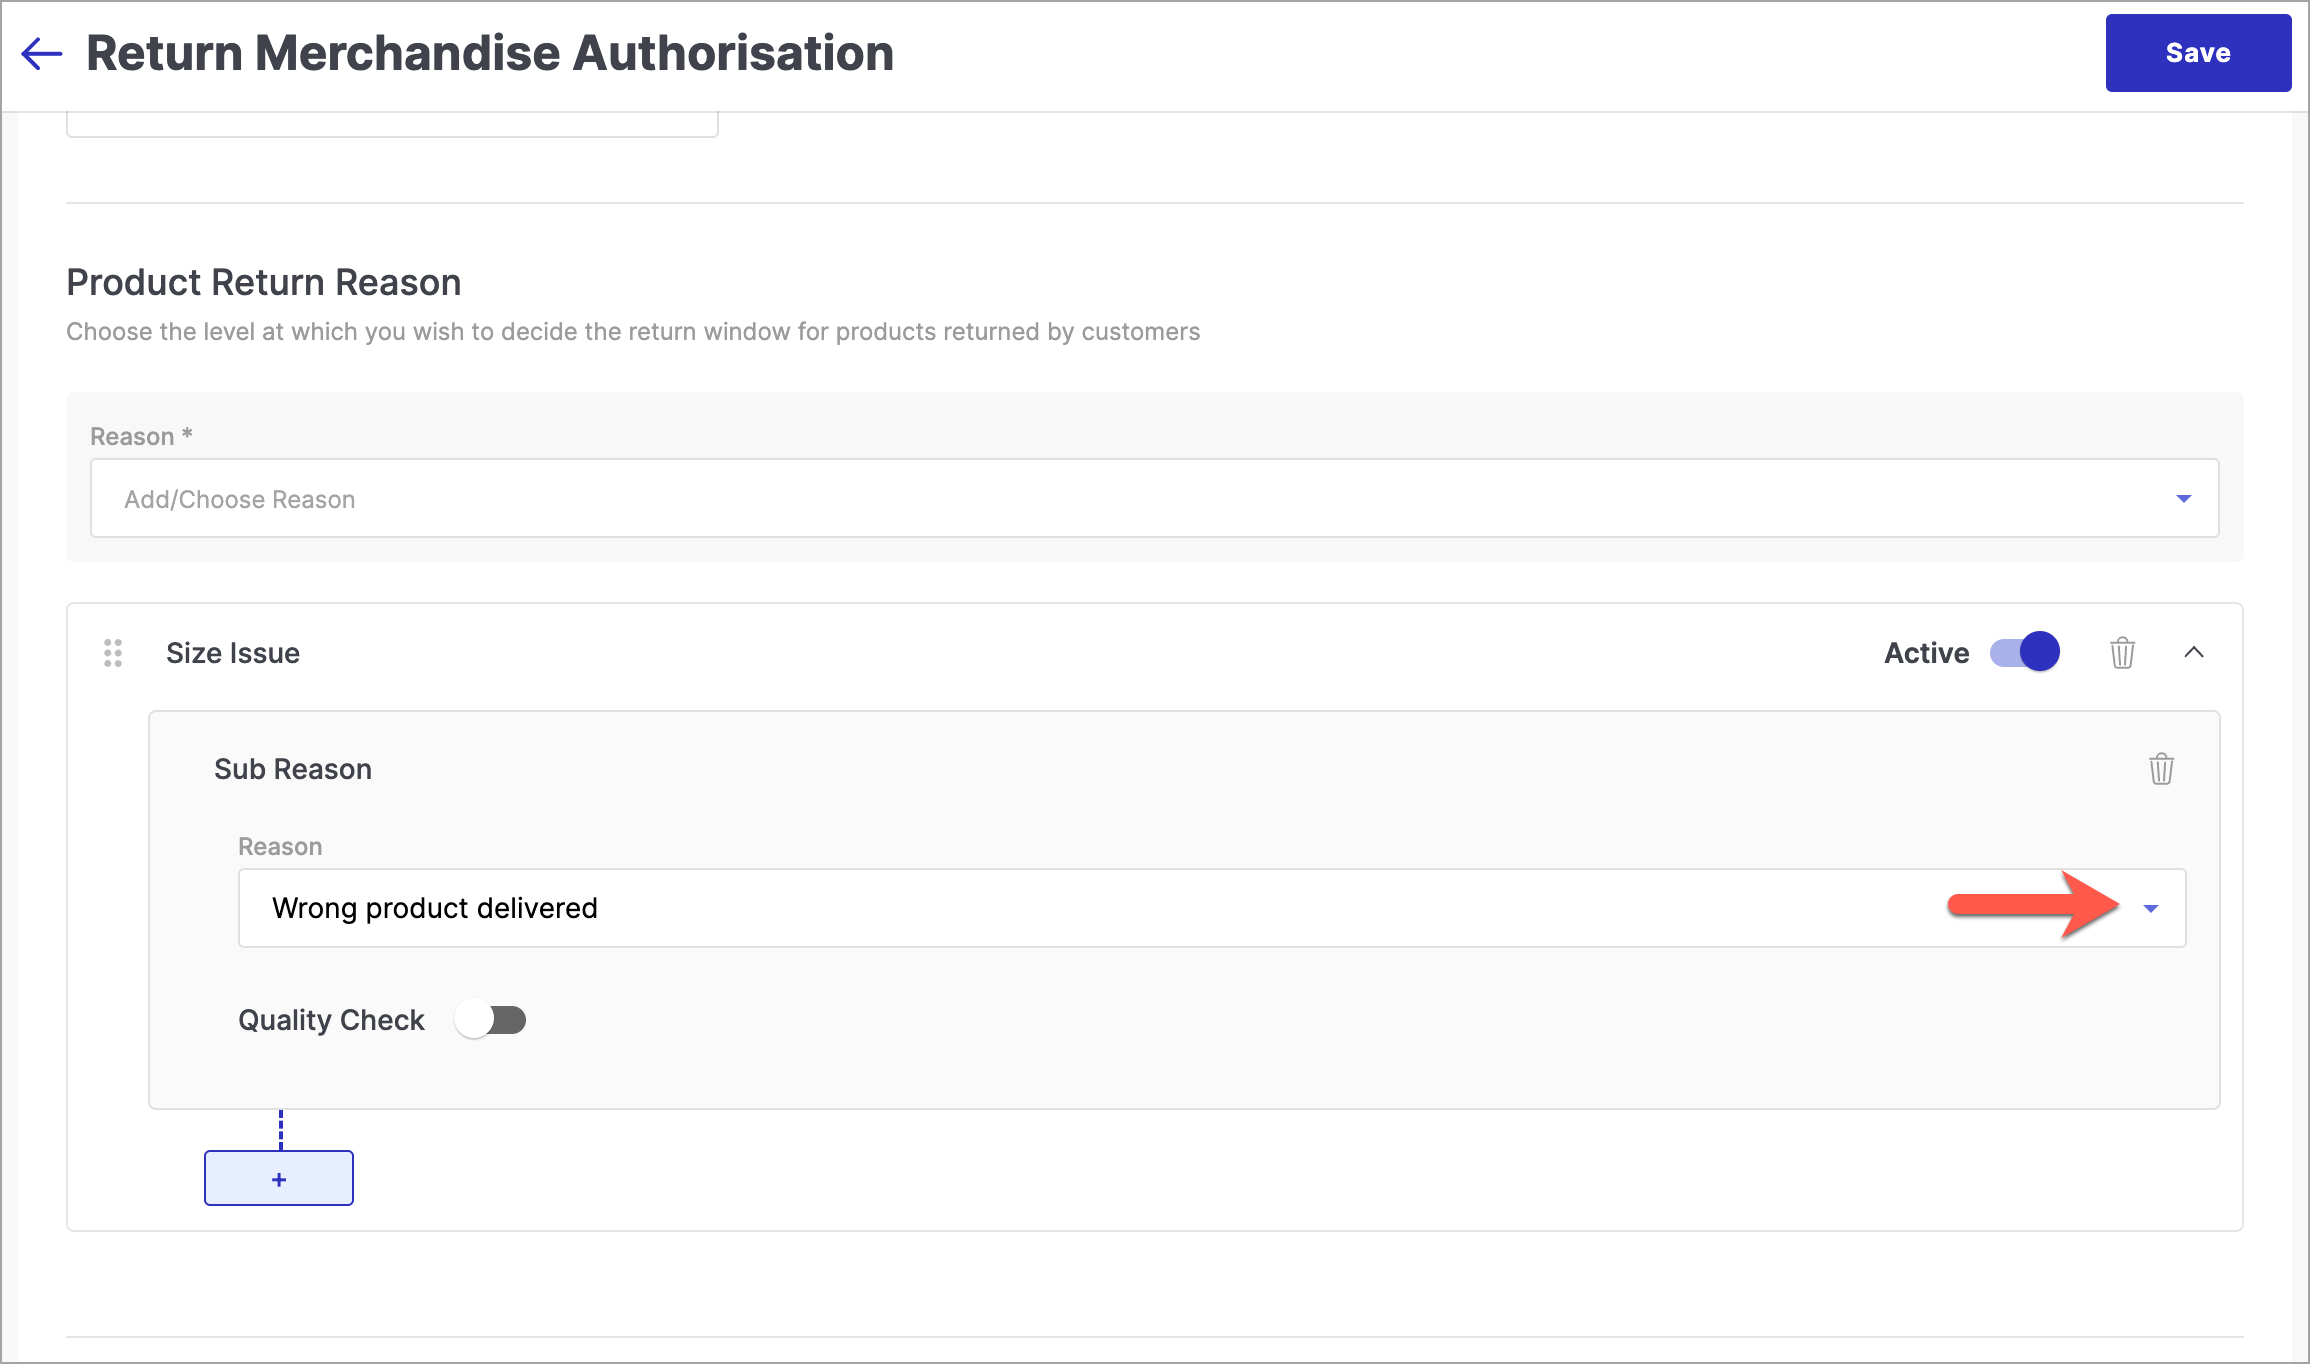
Figure 14: Accepting the prompt Click the dropdown and choose a sub-reason.

Figure 15: Choosing the sub-reason To add more sub-reasons to the same parent reason, click the + button.

Figure 16: Adding more sub-reasons Click the dropdown and choose the second sub-reason.

Figure 17: Choosing the second sub-reason Save the rule. When your customer returns the product and chooses the parent reason, two more sub-reasons will appear.

Figure 18: Storefront Output (parent reason with sub-reasons)
You can also re-arrange and shuffle the sub-reasons by dragging them (from the left side) while creating the rule.
Quality Check (QC)
QC is performed to verify whether a return request is genuine or not. There are two types of QC:
Pre & Door Quality Check - First, the customer has to upload the images of the product, and if the problem is genuine, the delivery partner (DP) will perform a second round of QC at the customer's doorstep. As a seller, you can decide the checks that the DP must perform at the doorstep.
Door Quality Check - DP will directly perform a QC at the customer's doorstep, based on the checks you set in the RMA rule.
Enabling a QC
You can enable a QC either for a parent reason or a child reason by using the toggle button labelled Quality Check.

Figure 19: Enabling QC Choose a QC type, and select the questions to be validated by the DP at the customer's doorstep.

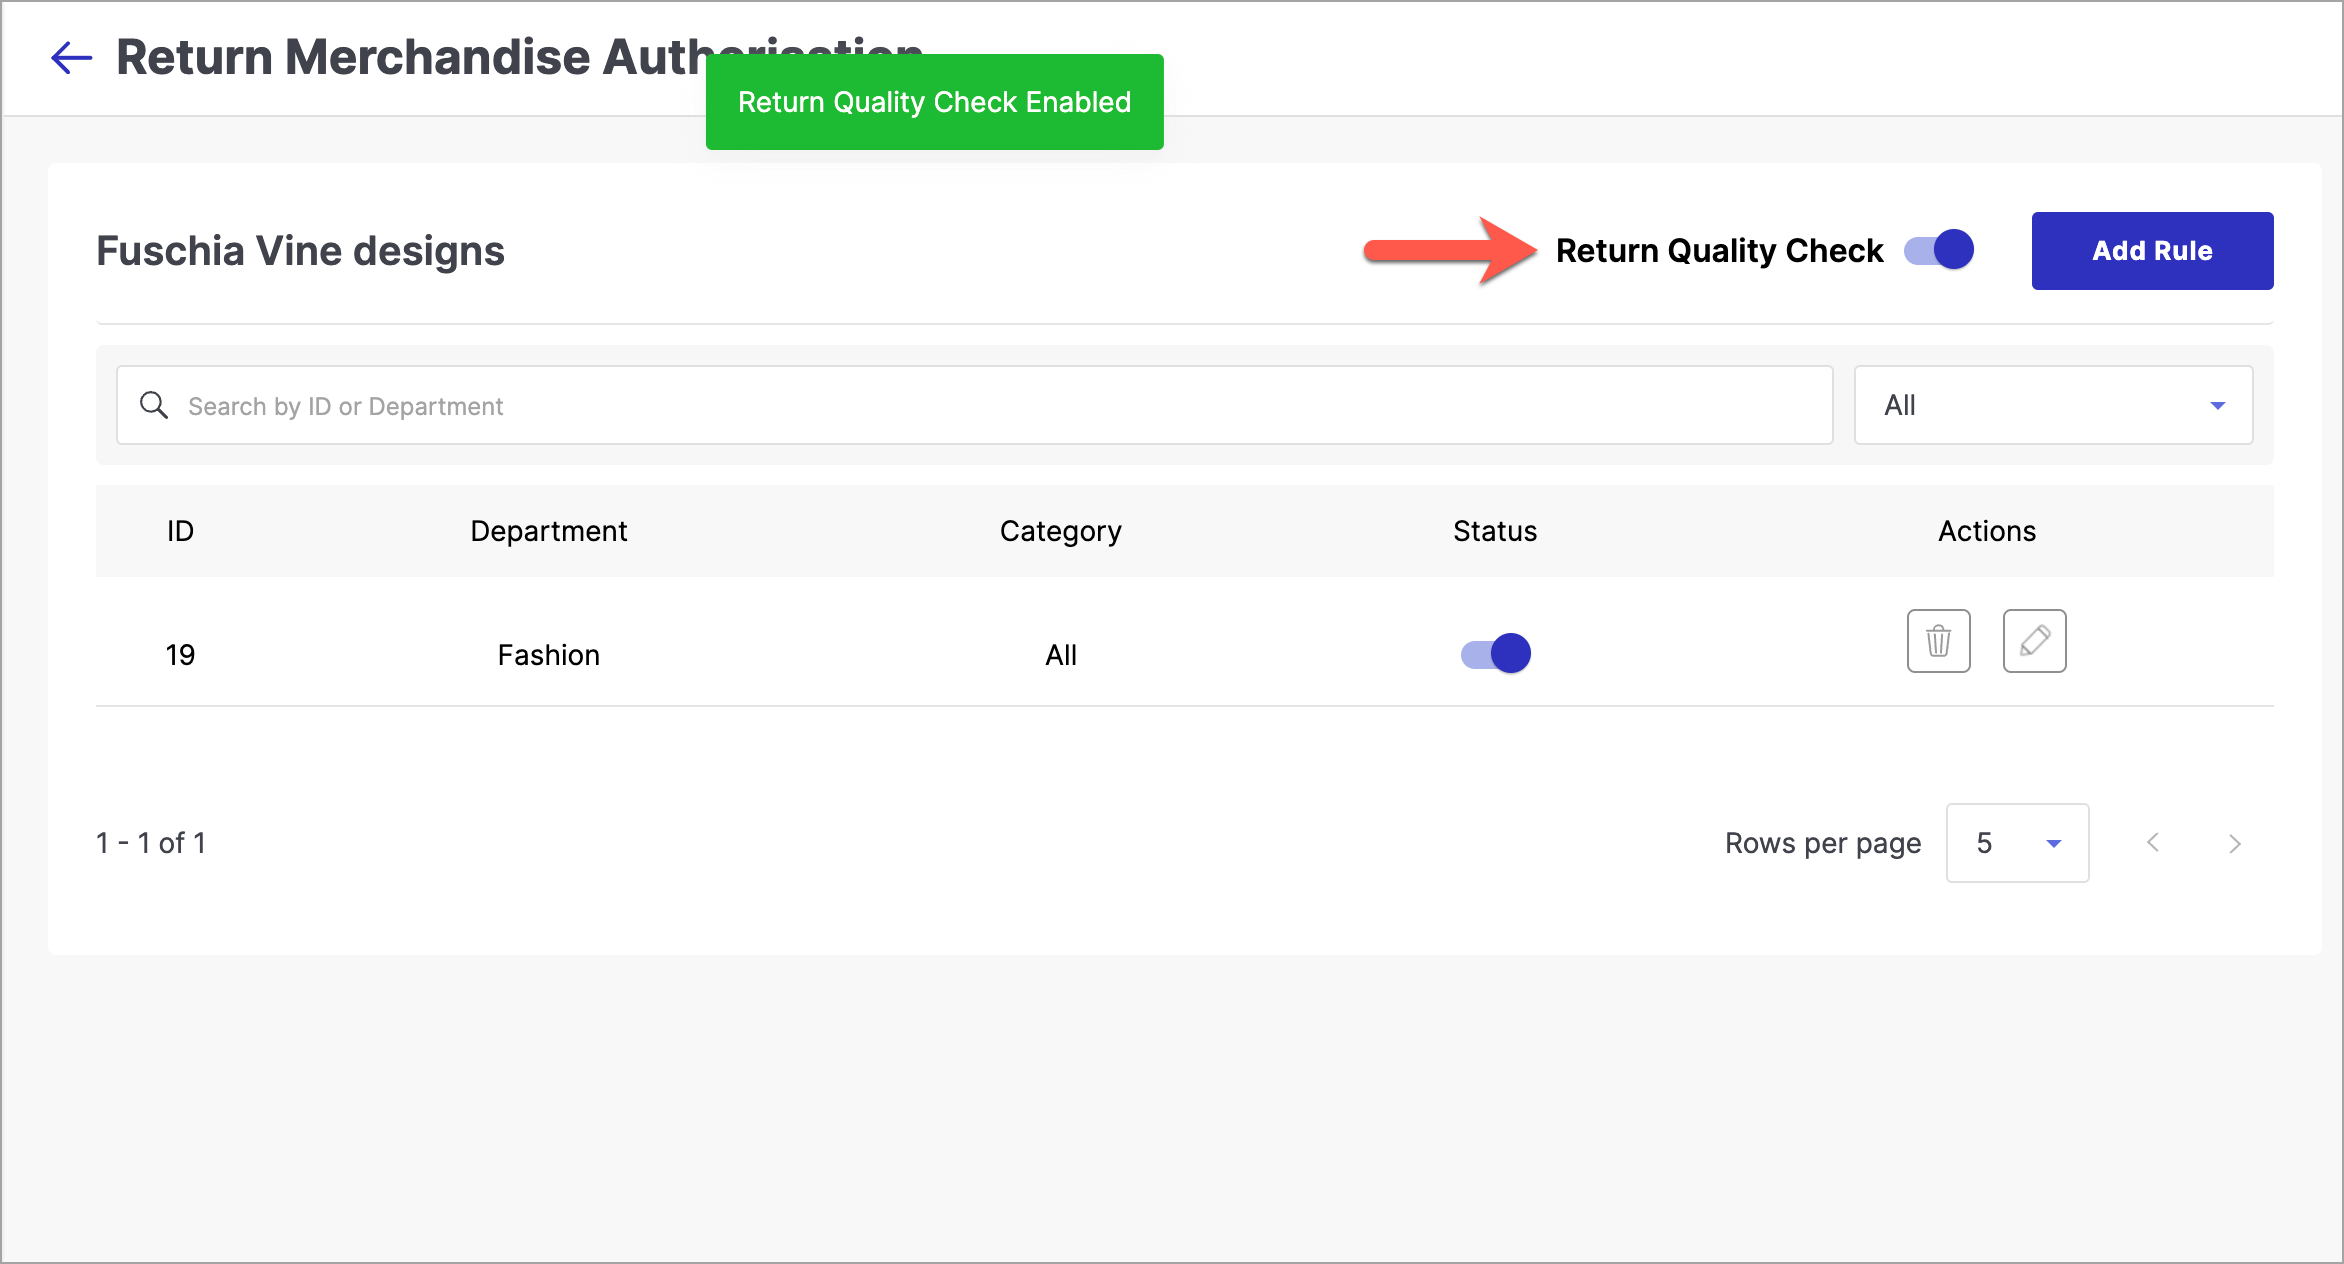
Figure 20: Choosing a QC type and doorstep questions Save the rule. Note that there is a master button to enable QC. Make sure it is turned ON, otherwise, QC won't be performed even though it's enabled within, for any reason/sub-reason.

Figure 21: Master QC enable/disable button cautionEnabling a QC might incur a charge for each shipment return.
When your customer returns the product and chooses a reason (which requires the first type of QC, i.e. 'Pre and Door Quality Check'), an option to upload product images would appear.

Figure 22: Storefront Output (1st QC type)
Disabling a QC
You can turn off a QC simply by using the toggle button labelled Quality Check.
![]()
Or, you may use the master button to disable the QC altogether (refer fig. 21). Once it is OFF, quality checks won't happen even though it's enabled within, for any reason/sub-reason.