Configure Login Screen
Introduction
This section is for selecting, authorizing and displaying components on the login page.
![]()
Display
Description: Enter the following details
Title - The top-heading of the login page.
Subtitle - A descriptive heading shown below the title.
Login Button Text - Customized text for the login button (only applicable to mobile apps).
Example:
![]()
- Result:
![]()
![]()
Images
- Description: Logo for the login page that will be displayed on the Web and your mobile apps.
- Example:
![]()
![]()
![]()
![]()
- Result:
![]()
![]()
Options
- Description: Choose the options you want to display on the login-page for your users.
Allow login as a Guest - Allow anonymous users to browse your application and place orders.
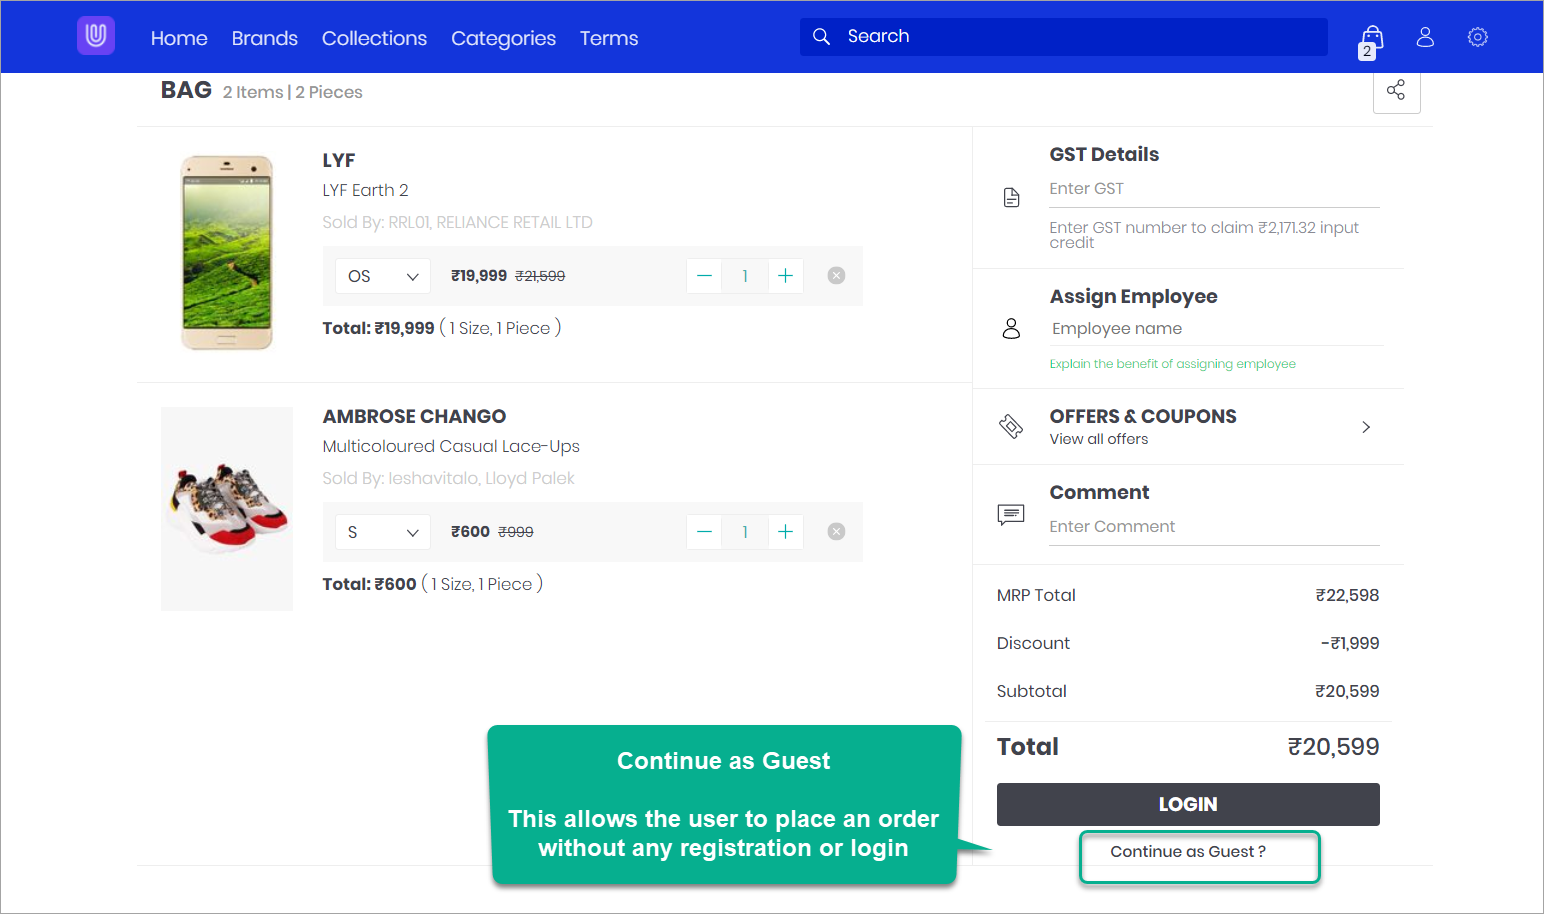
Figure 10a: Allow login as a Guest - Enabled noteYou must also turn ON the Enable Guest Checkout option in your Theme Settings. Go to Appearance → Themes → Edit → Page Configuration, and select Cart Landing in the drop-down as shown below. Click Save once you turn ON the Enable Guest Checkout option.
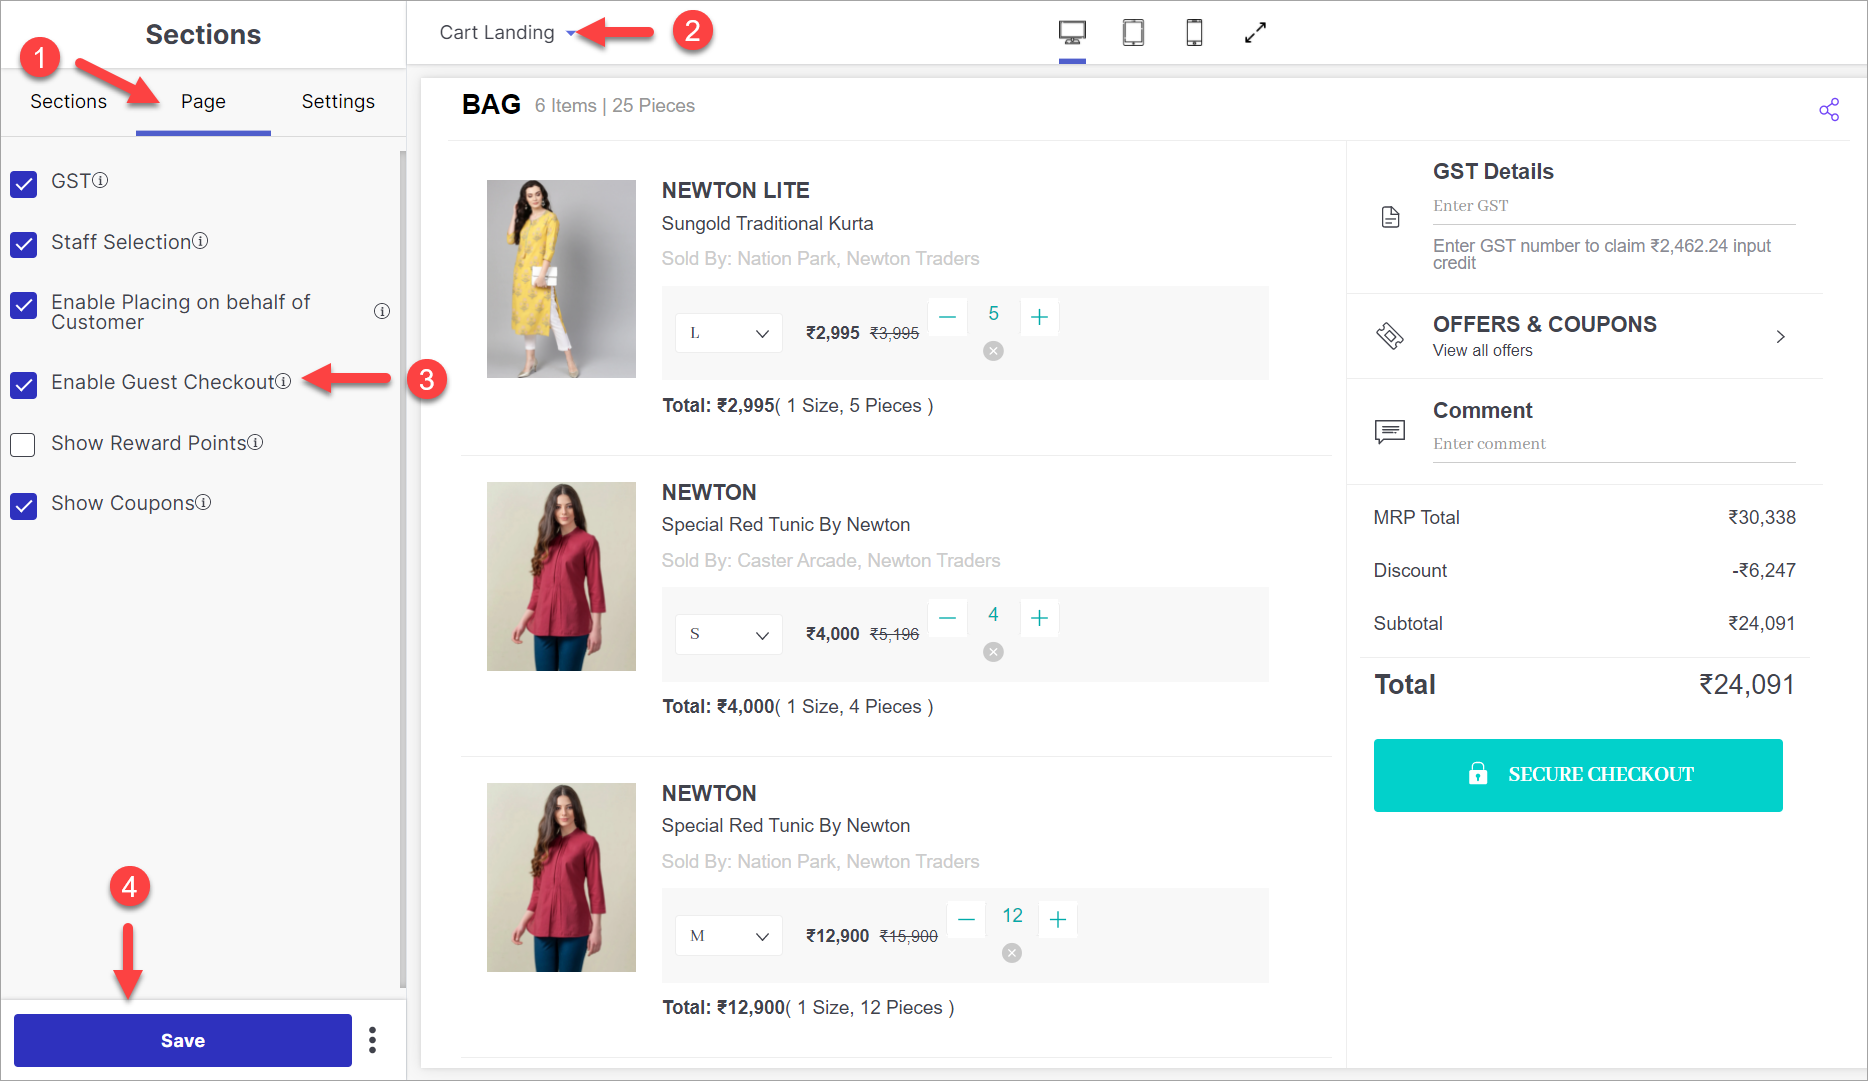
Figure 10b: Enabling Guest Login in Theme Settings Login with Password - Allow users to enter email ID and password for login. If disabled, user will not be able to enter email ID and password for login.
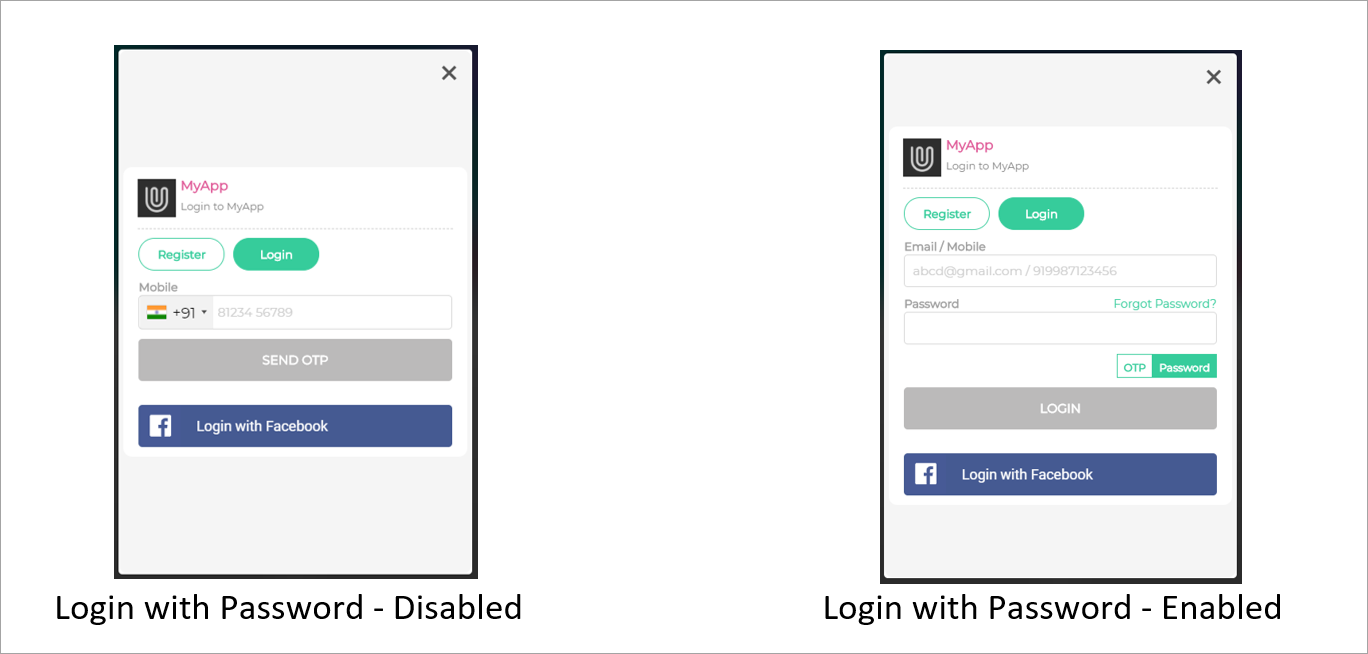
Figure 11: Login with Password Login with SMS OTP - Allow users to enter mobile number and OTP for login. If disabled, user will not be able to enter mobile number and OTP for login.
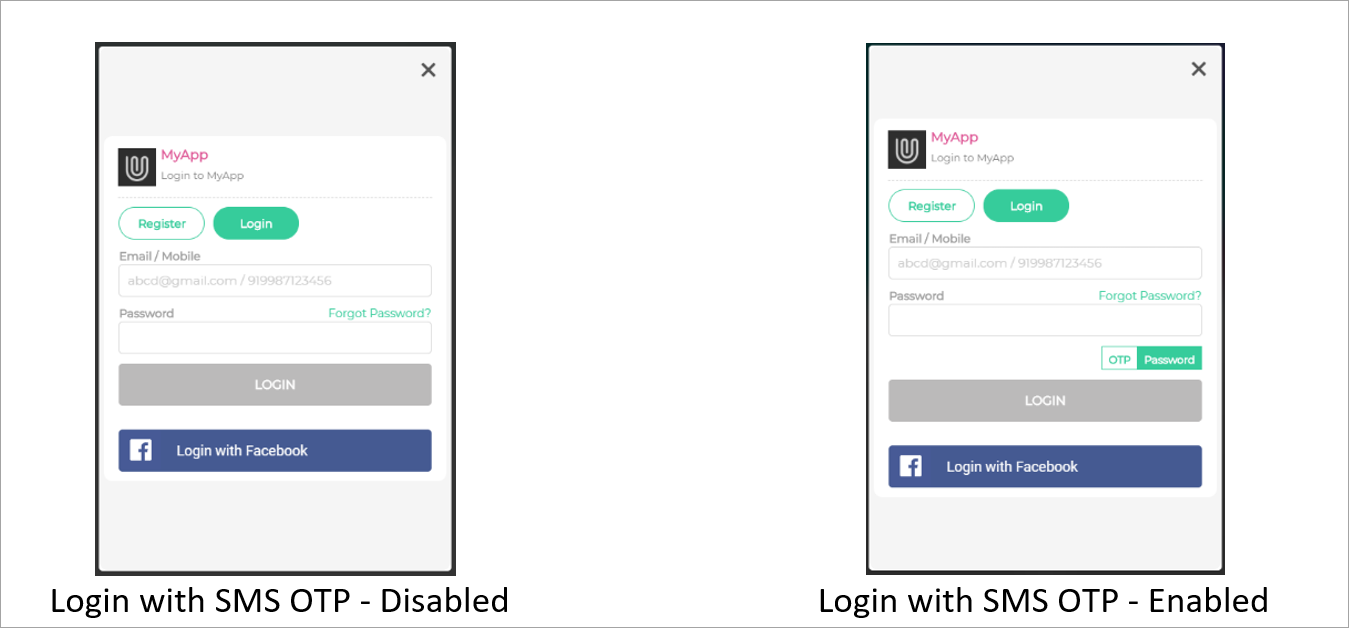
Figure 12: Login with SMS OTP Register Page - Shows a registration link on visiting the landing page, if enabled.
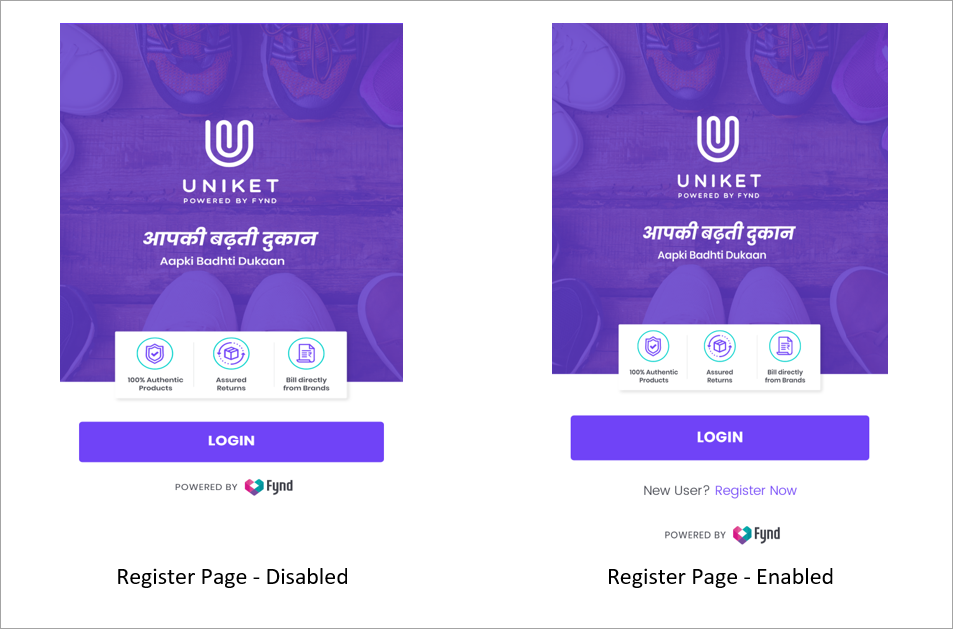
Figure 13: Show Register Page Show Register Button - Shows a register option on the login page, if enabled.
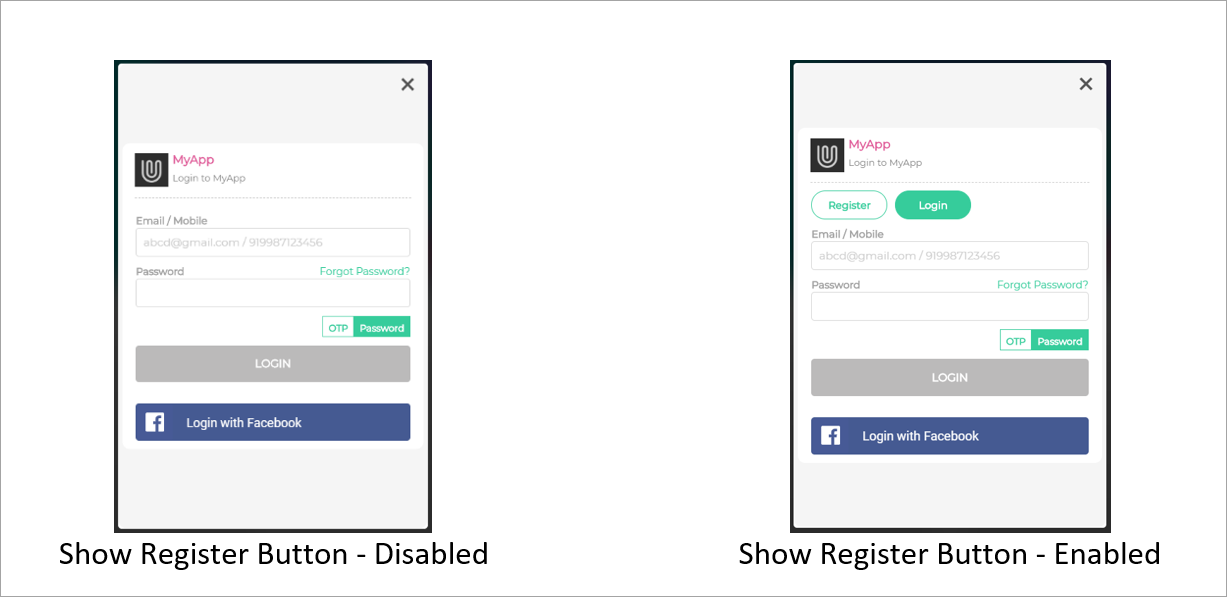
Figure 14: Show Register Button Show Forgot Password - Shows a forgot password option for the users in case they wish to reset their password.
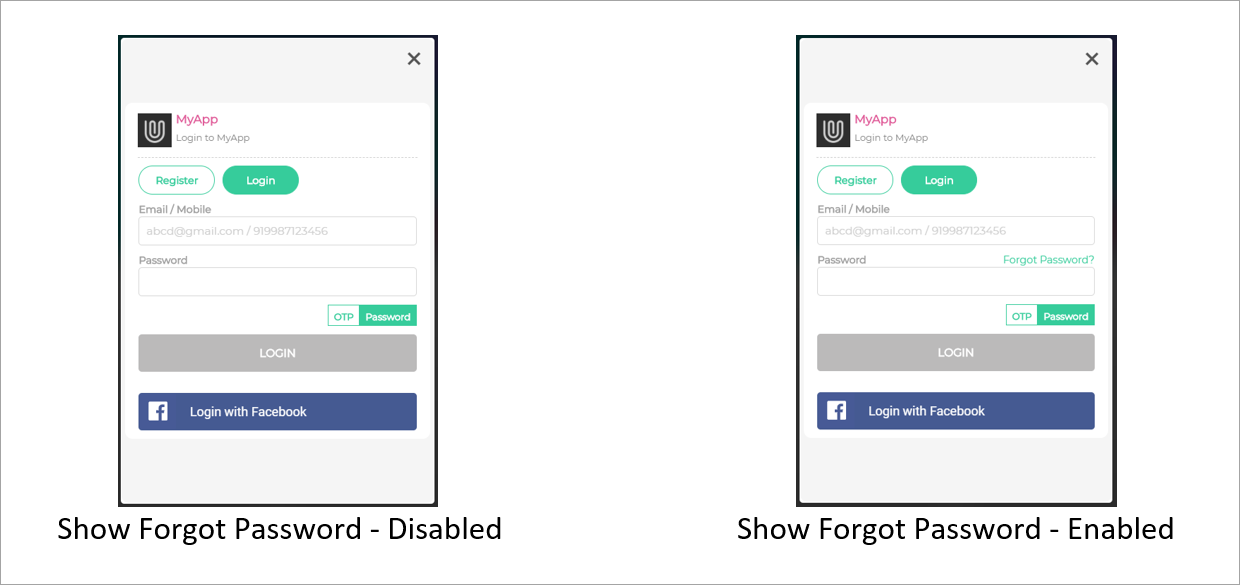
Figure 15: Show Forgot Password Is Email ID required for login? - Allow users to sign-in with or without entering their email ID. On enabling this, there are 2 options: soft and hard. Select
Softif you want to make it optional for the user to enter their mail ID. Else, selectHard, if you want to make it mandatory for the user to enter their mail ID.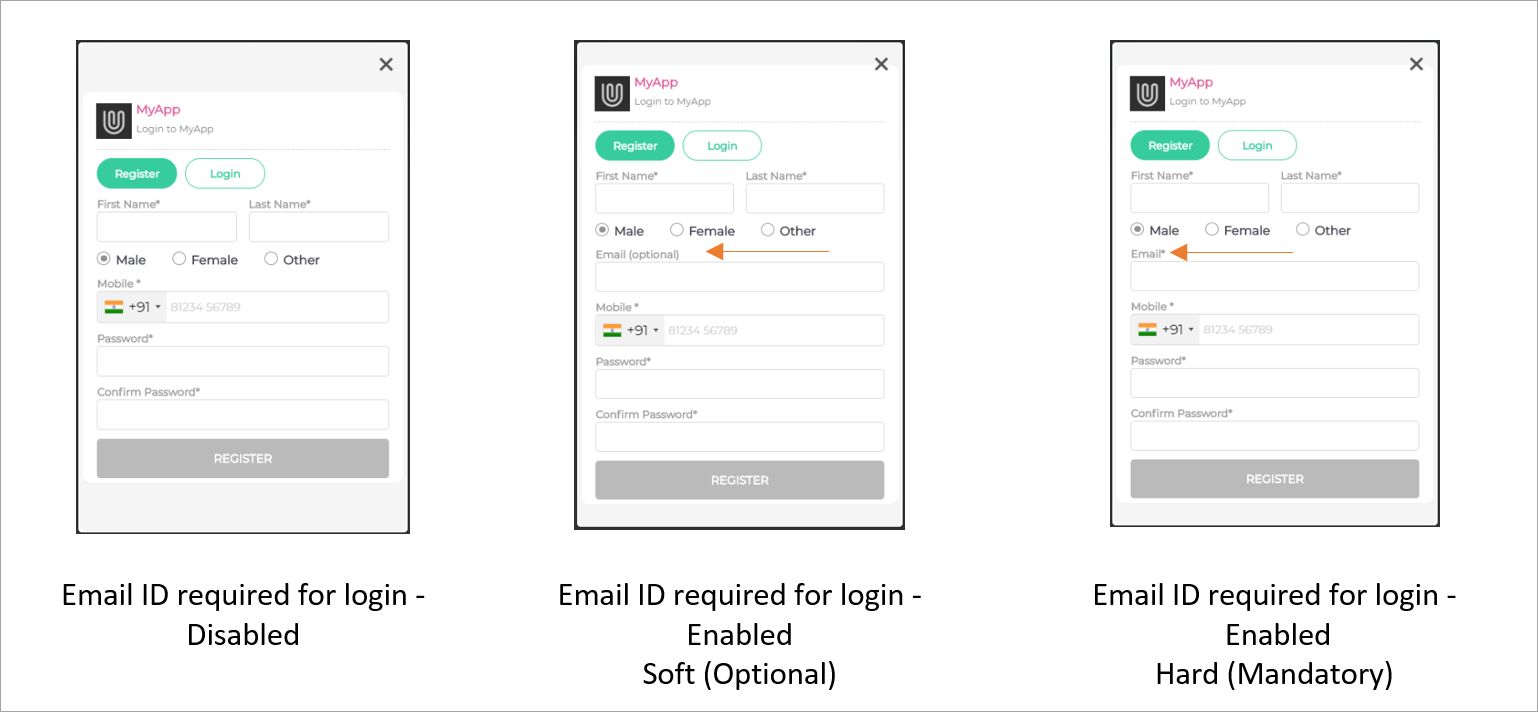
Figure 16: Email ID required Is Phone required for signup? - When users sign up for the Fynd Commerce, you can provide them with a choice that suits them best:
- Is Email ID required for login? - Allow users to sign-in with or without entering their email ID. On enabling this, there are 2 options:
Soft: Users can choose to enter their email ID or not for login.
Hard: Users are mandated to enter their email ID for login.
noteWe've simplified user authentication for international customers. Now, email is mandatory, while the mobile number is optional. This change aligns with user preferences and reduces international OTP support costs. It enhances payment convenience and offers flexibility by making the mobile number change optional for transactions.
Phone Signup: Alternatively, users can enable the phone number option, which enforces providing a phone number as a mandatory requirement for signup.
Choosing Signup Levels (Hard and Soft) - You hold the power to determine the level of necessity for phone numbers and emails:
If you set the phone number signup to "Hard" (mandatory), email signup becomes "Soft" (optional).
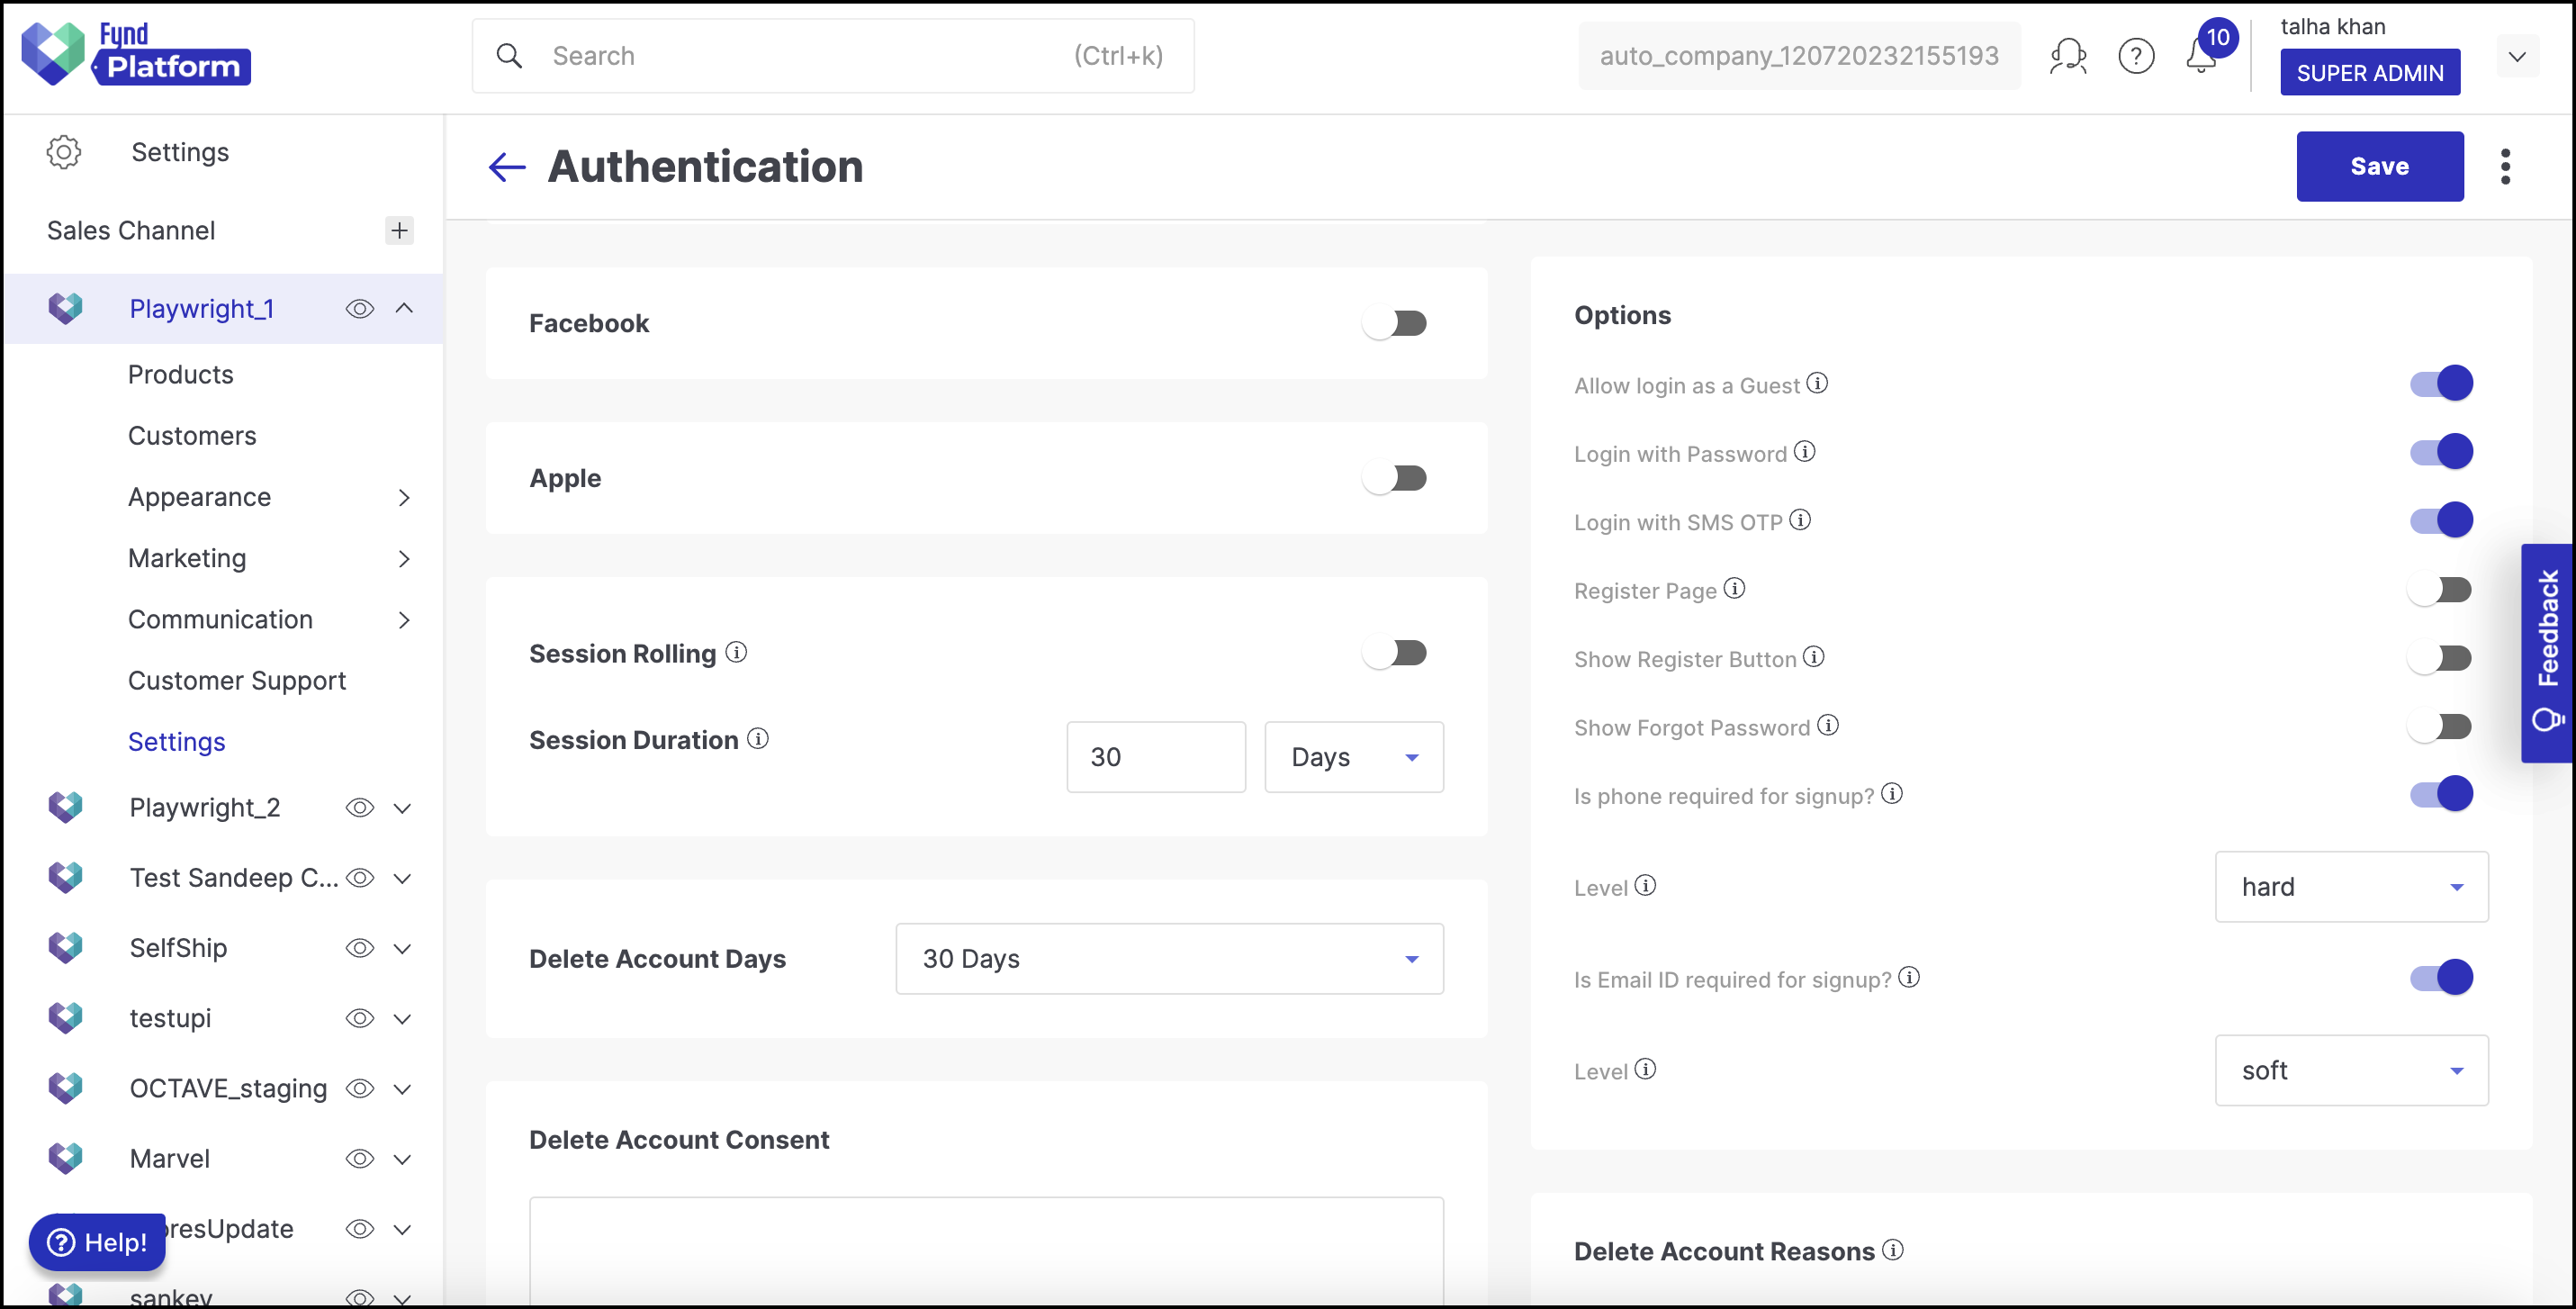
Figure 17a: Mobile Hard & Email Soft Conversely, if you set the email signup to "Hard" (mandatory), the phone number signup becomes "Soft" (optional).
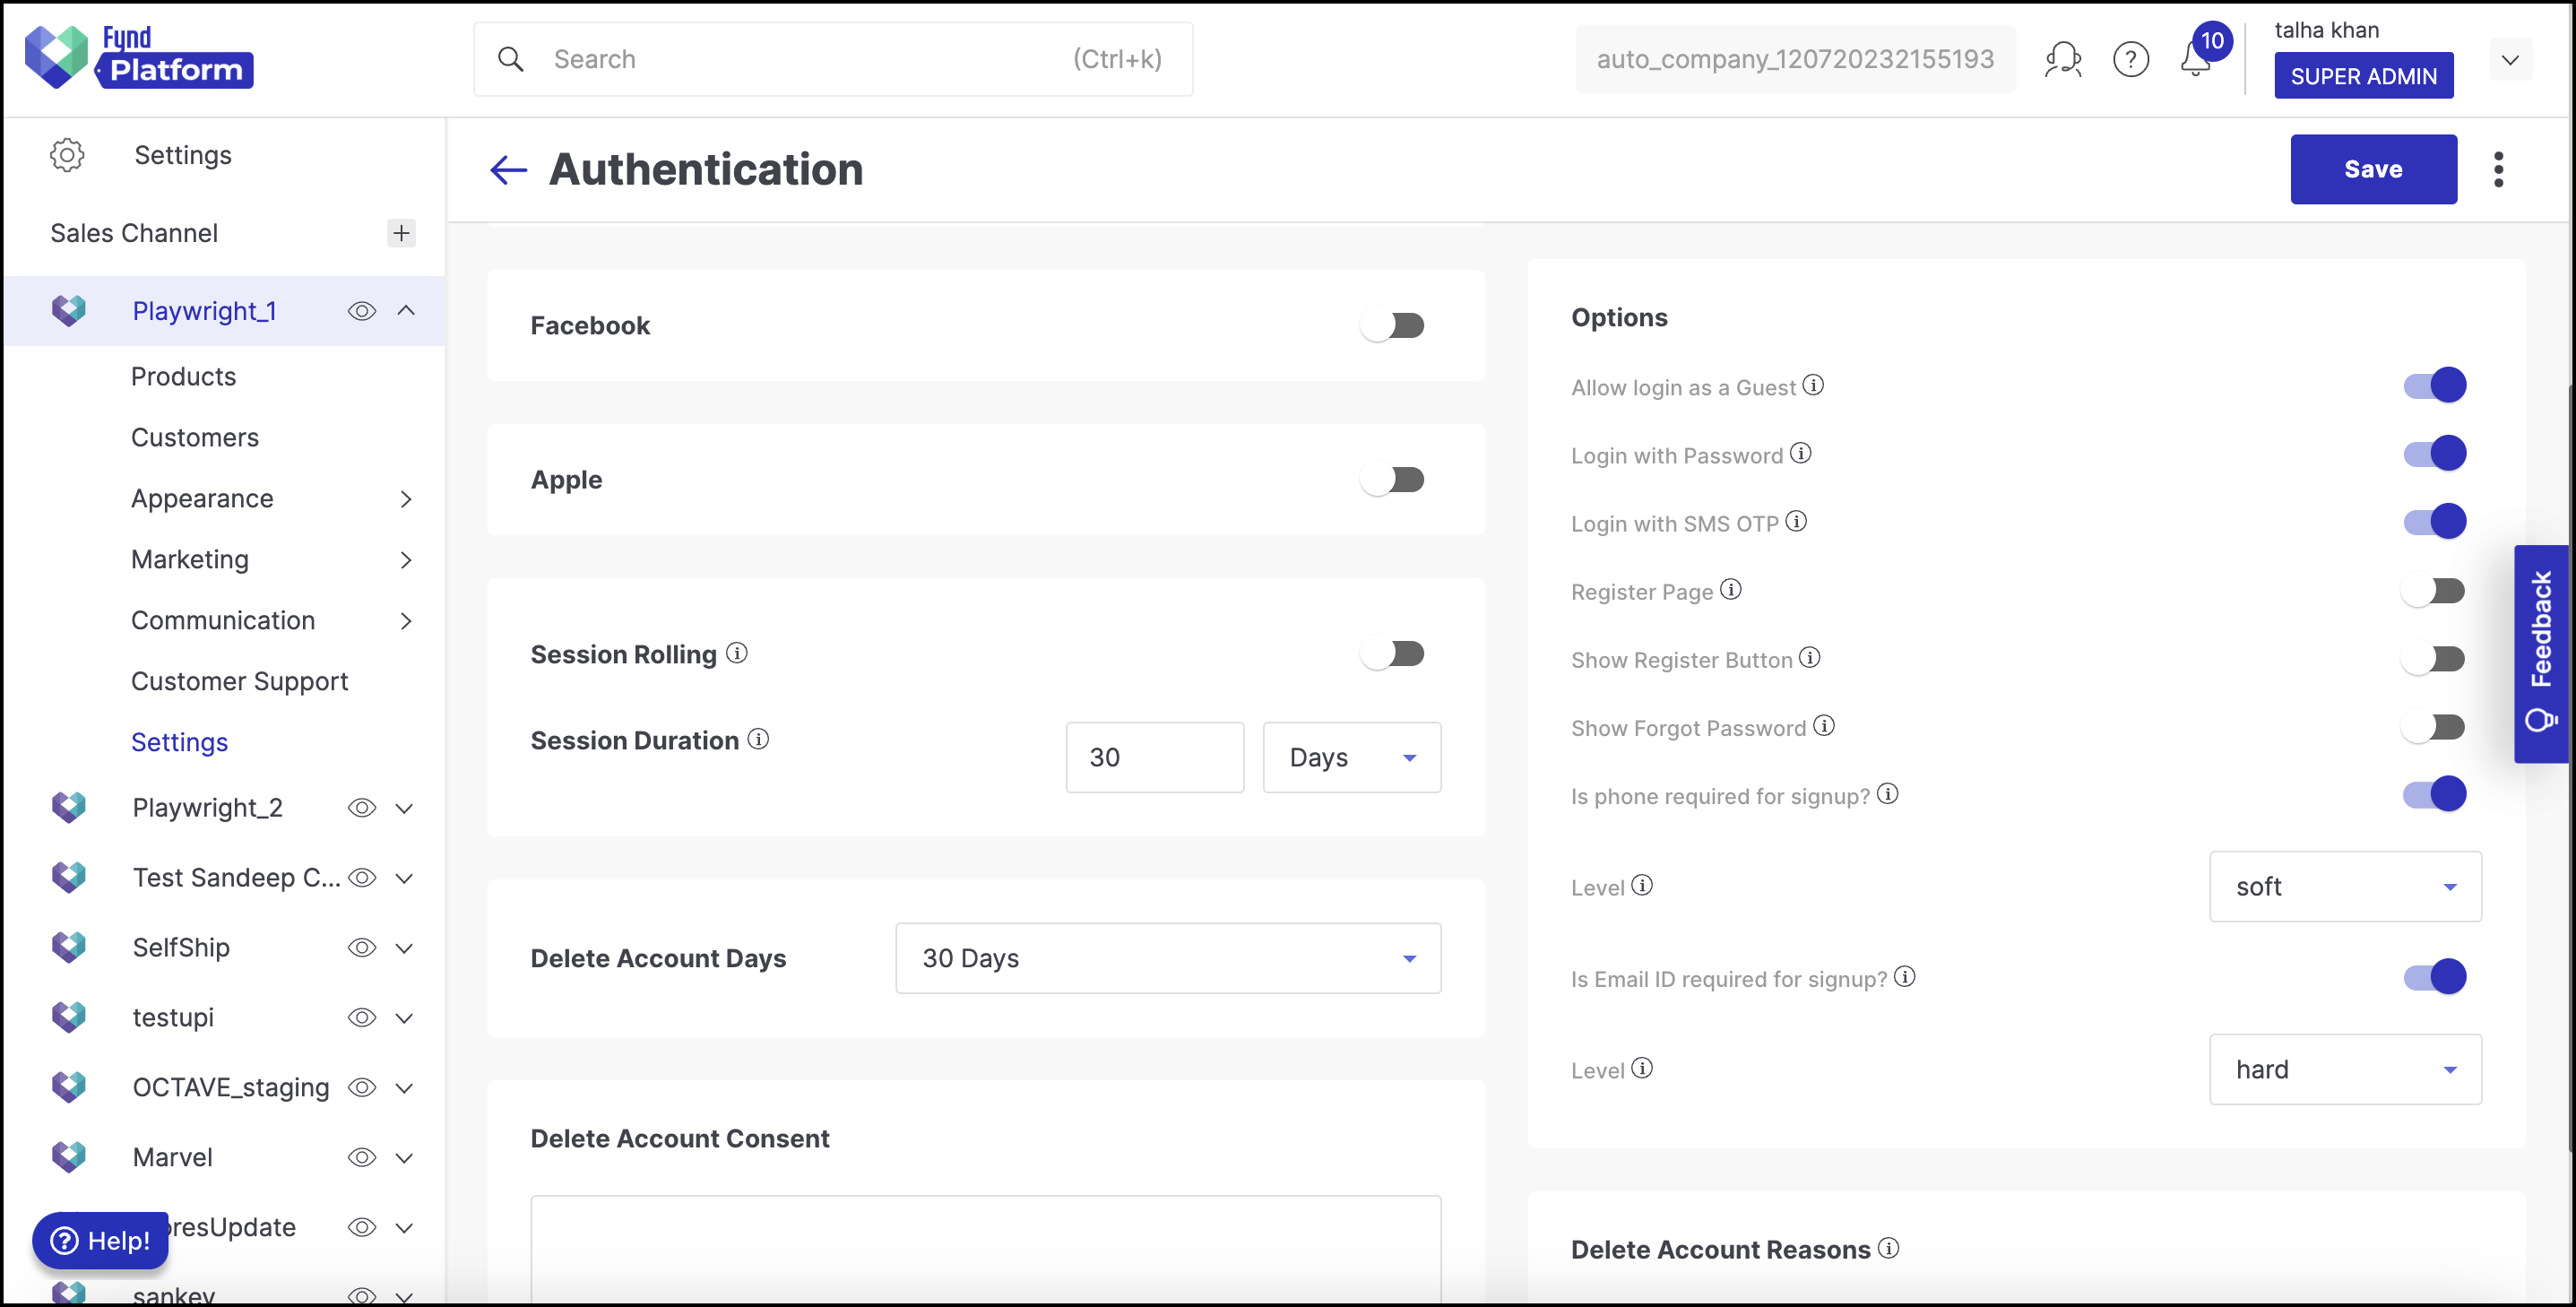
Figure 17b: Mobile Soft & Email Hard
Remember, you cannot set both Phone and Email signups to "Hard" simultaneously. One must remain "Hard" while the other remains "Soft".
![]()
How to Disable Phone or Email Signup?
If you wish to exclusively offer email-based logins, you can disable the phone option. The same applies if you want to solely enable phone-based logins, disabling the email option.
![]()
Disabling the phone/email option will remove it from the login screen and will no longer be optional for users.
![]()
![]()
In scenarios where Phone is set to "Hard," Email must be "Soft," allowing users to decide whether to provide an email for signup.
For adjustments, navigate to Platform >> Sales Channel >> Settings >> Authentication and configure the options accordingly from the options. This ensures a seamless and tailored login experience for your users.
Google
Read Google Login
Facebook
Read Facebook Login
Session Control
Read Session Control
Account Deletion
Your customer might want to delete their user account from your website due to xyz reasons. As a seller, it's upto you to decide how you wish to handle such a request.
Here are 3 features available with you:
Delete Account Days - Decide the number of days after which the account should get deleted once the user raises a deletion request. Minimum: 1 Days, Maximum: 90 days.

Figure 18a: Deletion Days Delete Account Consent - A user should be aware of the implication of deleting an account. Therefore, write everything that the user should know about account deleteion, including the loss of data. The user is expected to read this information on the mobile app and then give the consent to delete the account.
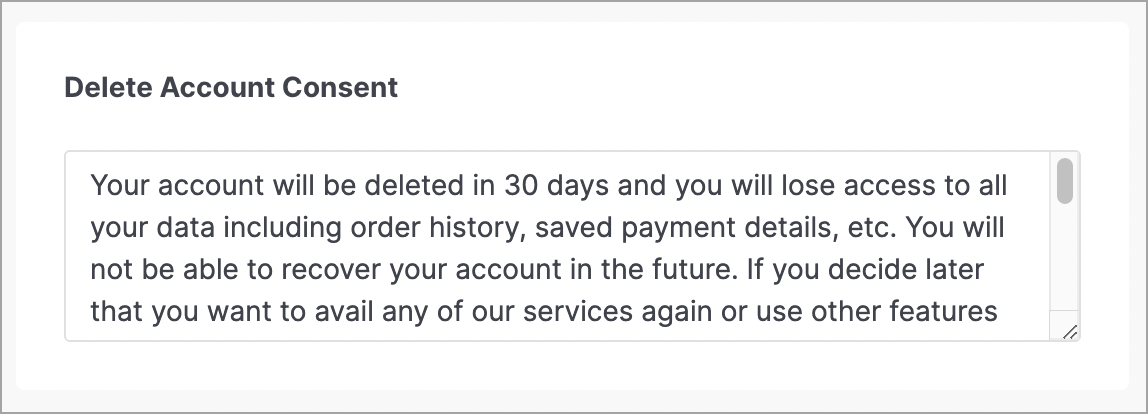
Figure 18b: Writing Consent Delete Account Reasons - As a seller, you might want to know the reasons behind account deletion. Here, you can create a sequential list of reasons which should be displayed to the user (on the mobile app) while requesting for the deletion of account.
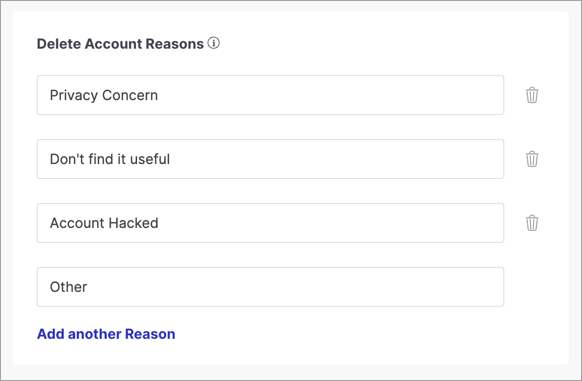
Figure 18c: Taking Feedback Reasons
Once the account is deleted, the customer can recreate an account with fresh data, provided the customer is not permanently blocked by you in the Customers section of your sales channel.