Build a Team
Introduction
Use this section to manage your team, invite individuals and add to your staff. You can flexibly grant your staff with company-level access to its team, products, orders and much more. Moreover, you can also set their access to one or more sales channels, including marketplaces and resellers.
Main Screen

In this document, you will learn more about:
Invite Users
Click on Invite.
You can type an email address or mobile number and press the
Enterkey to add more. Next, click the Search button.
Figure 2: Invite Users by email/number
You will get the following list:
- Unregistered - Users who are being invited.
- Pending - Users who have been sent an invite but are yet to accept it.
- Registered - Users who have registered using the invite link, but are yet to be added as staff.
- Staff - Users who have been added as a staff member.

Figure 3: List of Users As you can see in the list, 3 out of 4 users are unregistered and 1 of them is already a staff. You can individually invite users by clicking Send Invite or invite them all at once using Invite All.
Give permissions to the invited staff to access the sections.
- Full Access gives staff access to all the sections.
- Using Custom, you can selectively decide the sections for which staff will have access.
Each permission listed under Company Access form enables the merchant to control what areas of the platform a team member can access.
Profiles: This permission allows members to access and manage company profiles. They can create, configure, and customize the brands and selling locations associated with the company.
Extensions: Members can extend the application’s capabilities by integrating additional features or third-party tools.
Settings: This permission grants access to configure and customize application features across multiple touchpoints.
Analytics: Members with this permission can get real-time insights into a product's lifecycle. They can view detailed reports and analytics about products, including the option to download graphs and data for deeper analysis.
Logistics: This permission enables members to manage delivery and shipment logistics. This includes handling setups for various delivery partners and coordinating self-shipping services for the business.
Orders: This permission provides access to the history of all customer orders placed using the platform. Members can view, manage, and track customer orders, enabling smooth order processing.
Teams: With this permission, members can manage team members and configurations. It allows you to add individuals to your staff, manage the company's internal team structure, and configure different sales channels.
Developers: Members gain access to platform APIs and SDKs, which allow them to build systems, develop applications, and integrate the e-commerce platform with other tools.
Audit Trail: This permission gives access to activity logs that track and display the changes made by platform users. It’s useful for tracking modifications, ensuring compliance, and maintaining oversight of platform usage.
Product: This permission allows users to manage and update products and their inventories within the platform.
Inventory: This permission grants the ability to manage product inventory. They can view, create, update, and delete stock levels for the items listed in the catalog, ensuring inventory accuracy.
Catalog: This permission allows members to manage the product catalog itself. They can create, update, and delete products, manage product categories, and ensure the catalog reflects the company’s offerings accurately.
Order Role is used to decide the permissions that the staff would have in the Order Management System (OMS).
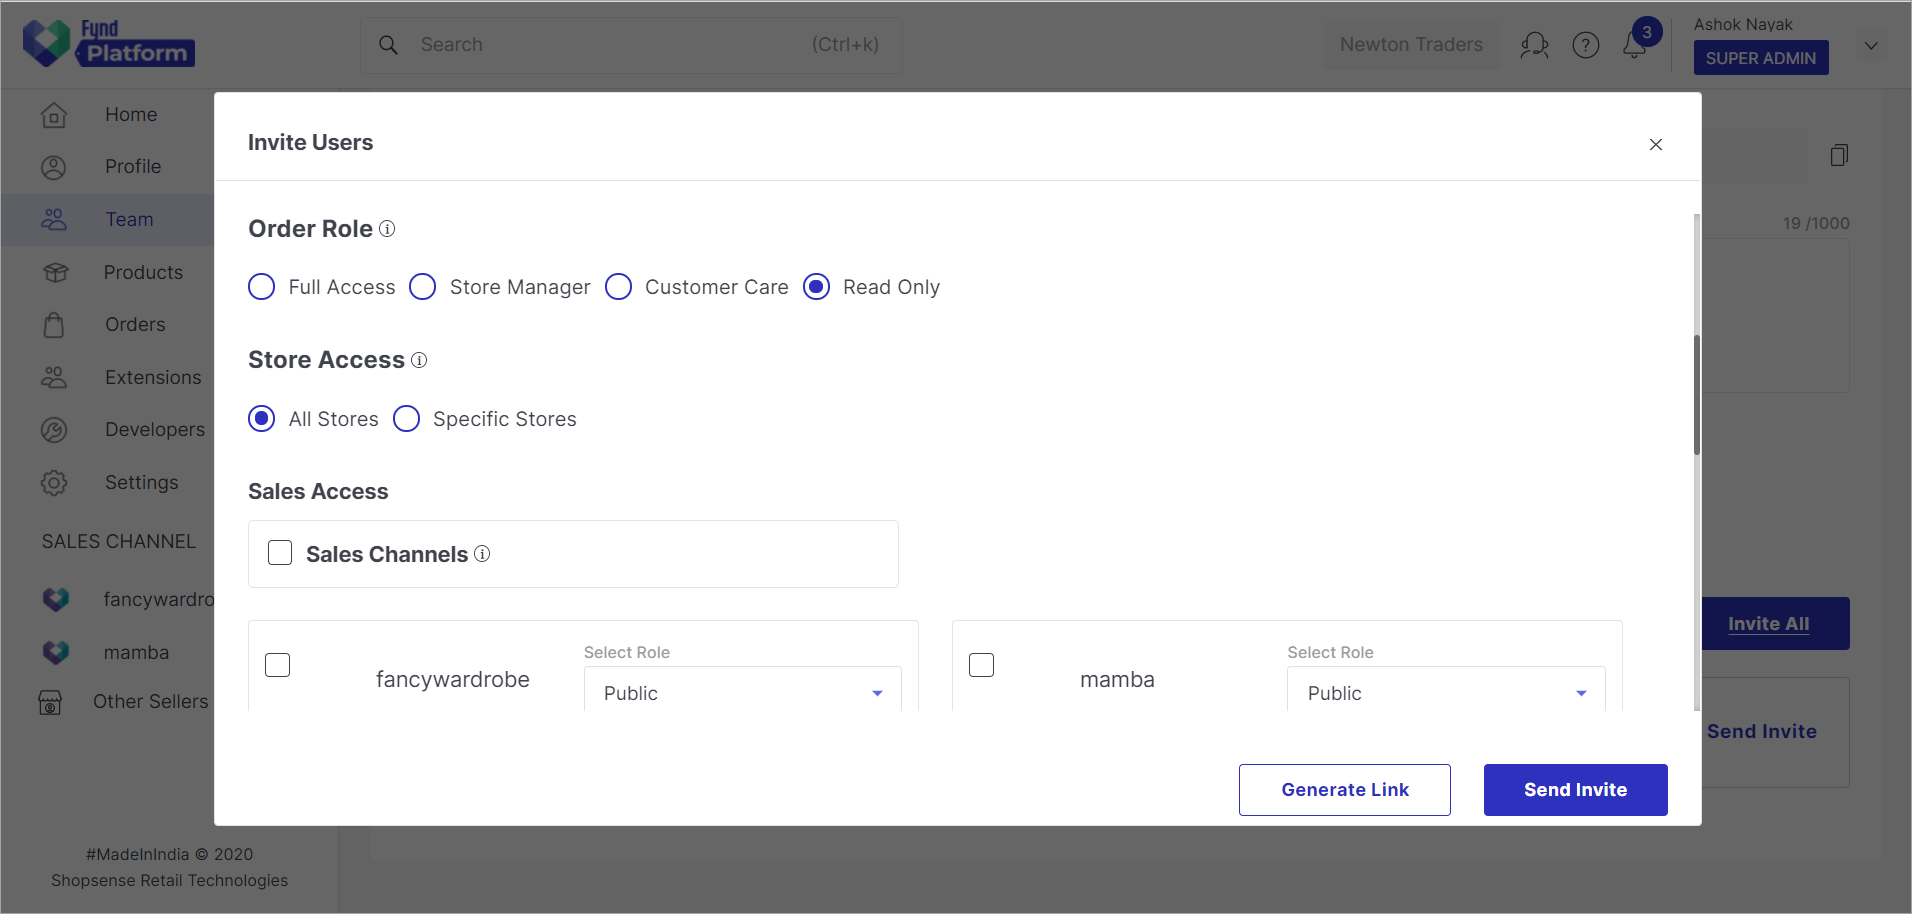
Figure 5: Selecting Order Role Full Access: Staff can perform all kinds of operations (process, cancel, etc.) on all the orders in the company.
Store Manager: Staff having store manager role can view, confirm, cancel, generate invoice, generate manifest, and accept an order return. It's important to note that a staff manager won't be able to process an order return.
Customer Care: Those with customer care as their role can view the orders, cancel orders, trigger an order return, and update bank details in case of a return. Staff won't be able to place or process an order.
Read-Only: Those with read-only access will be able to perform only those actions that do not alter the system. This includes viewing the order and downloading the invoice/manifest. Staff with read-only permissions will not be able to place a phone call to a customer via Order Management System.
Similar to Order Role, the Store Access option is also in strict accordance with the Order Management System. In short, staff can view or edit the orders of only those stores which are defined here.

Figure 6: Granting Store Access All Stores: Staff can view/edit the orders of all the selling locations created in the company.
Specific Stores: Staff can view/edit the orders of few selected stores in the company.
Use the Sales Access checkbox to grant the staff the permission to create sales channels.
Select the sales channel and its sections to which a staff will get access. In this example, we have 2 sales channels fancywardrobe and mamba. Using the Select Role drop-down, you can grant permissions to access the sections within the sales channel.
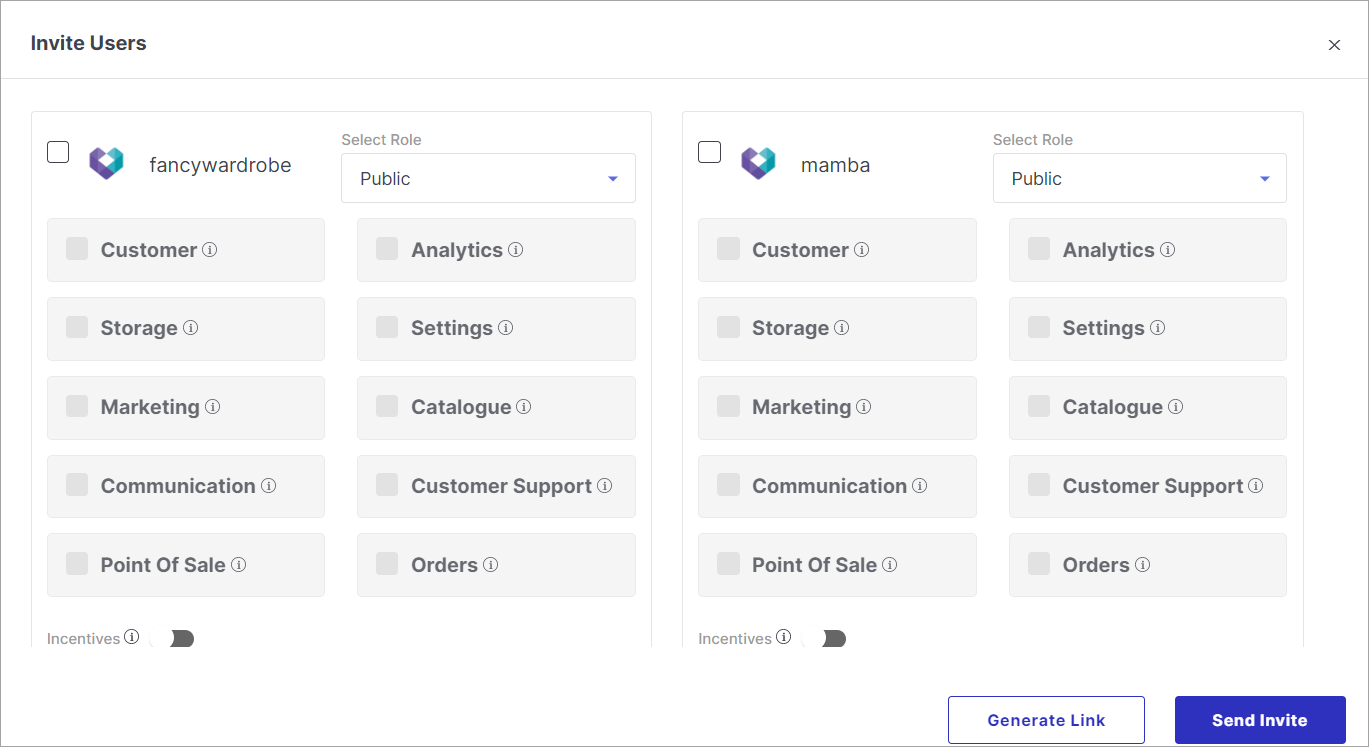
Figure 7a: Selecting Sales-level Role The below chart depicts the permissions that are granted to the staff w.r.t the role.
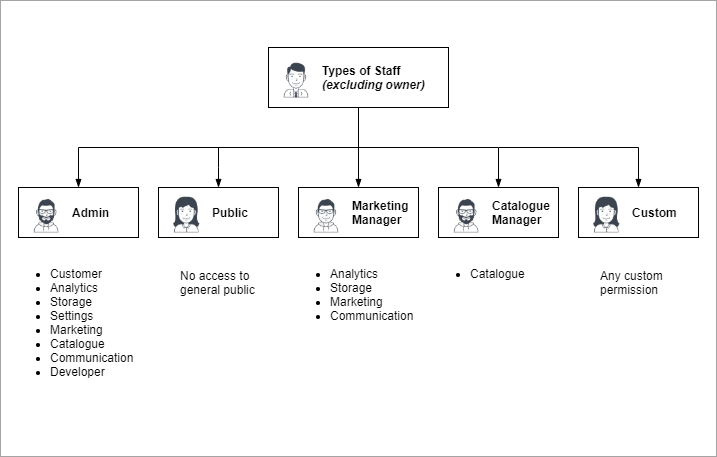
Figure 7b: Role & Permission Chart You can also click on Edit Store Access to edit stores while sending the invite. Select the store from the dropdown and click ok.
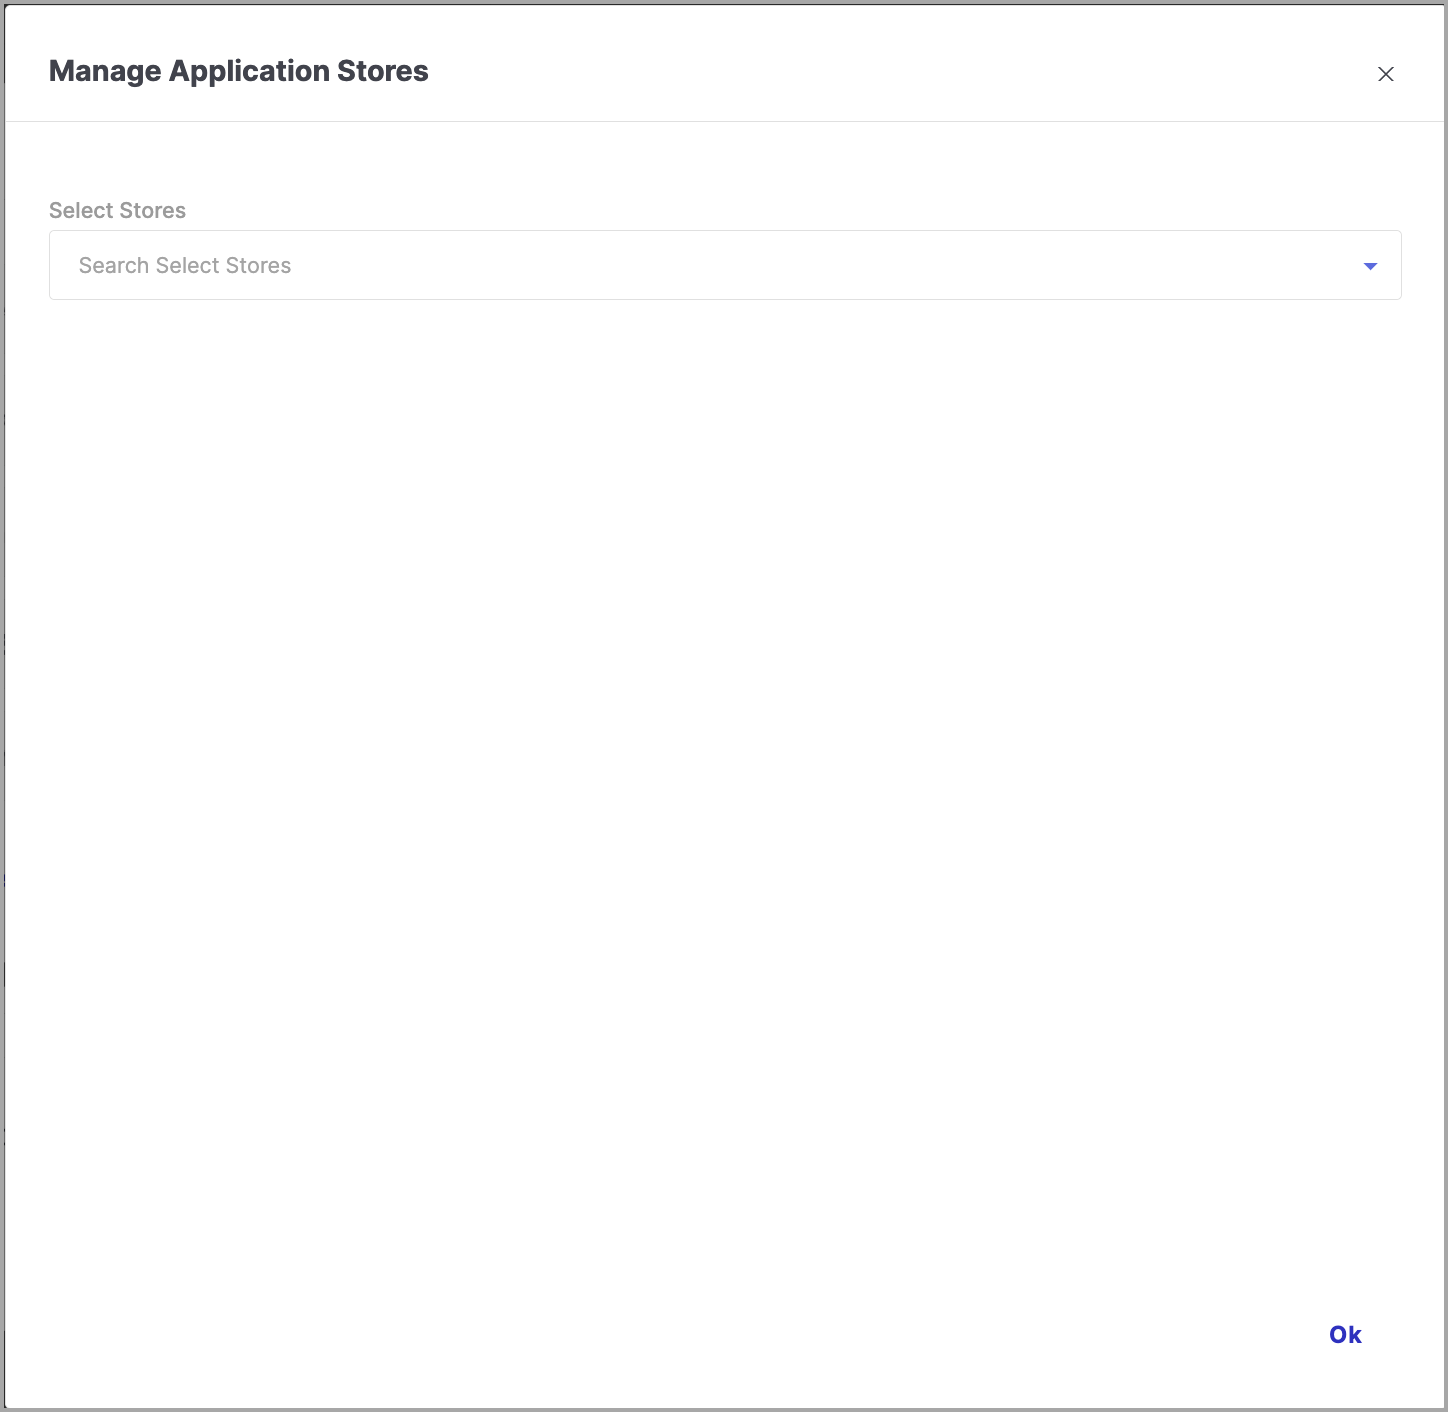
Figure 8: Manage Application Stores You can grant your staff the permission to manage marketplaces, such as Flipkart, Amazon, Myntra, AJIO, and many more using the Marketplaces checkbox.
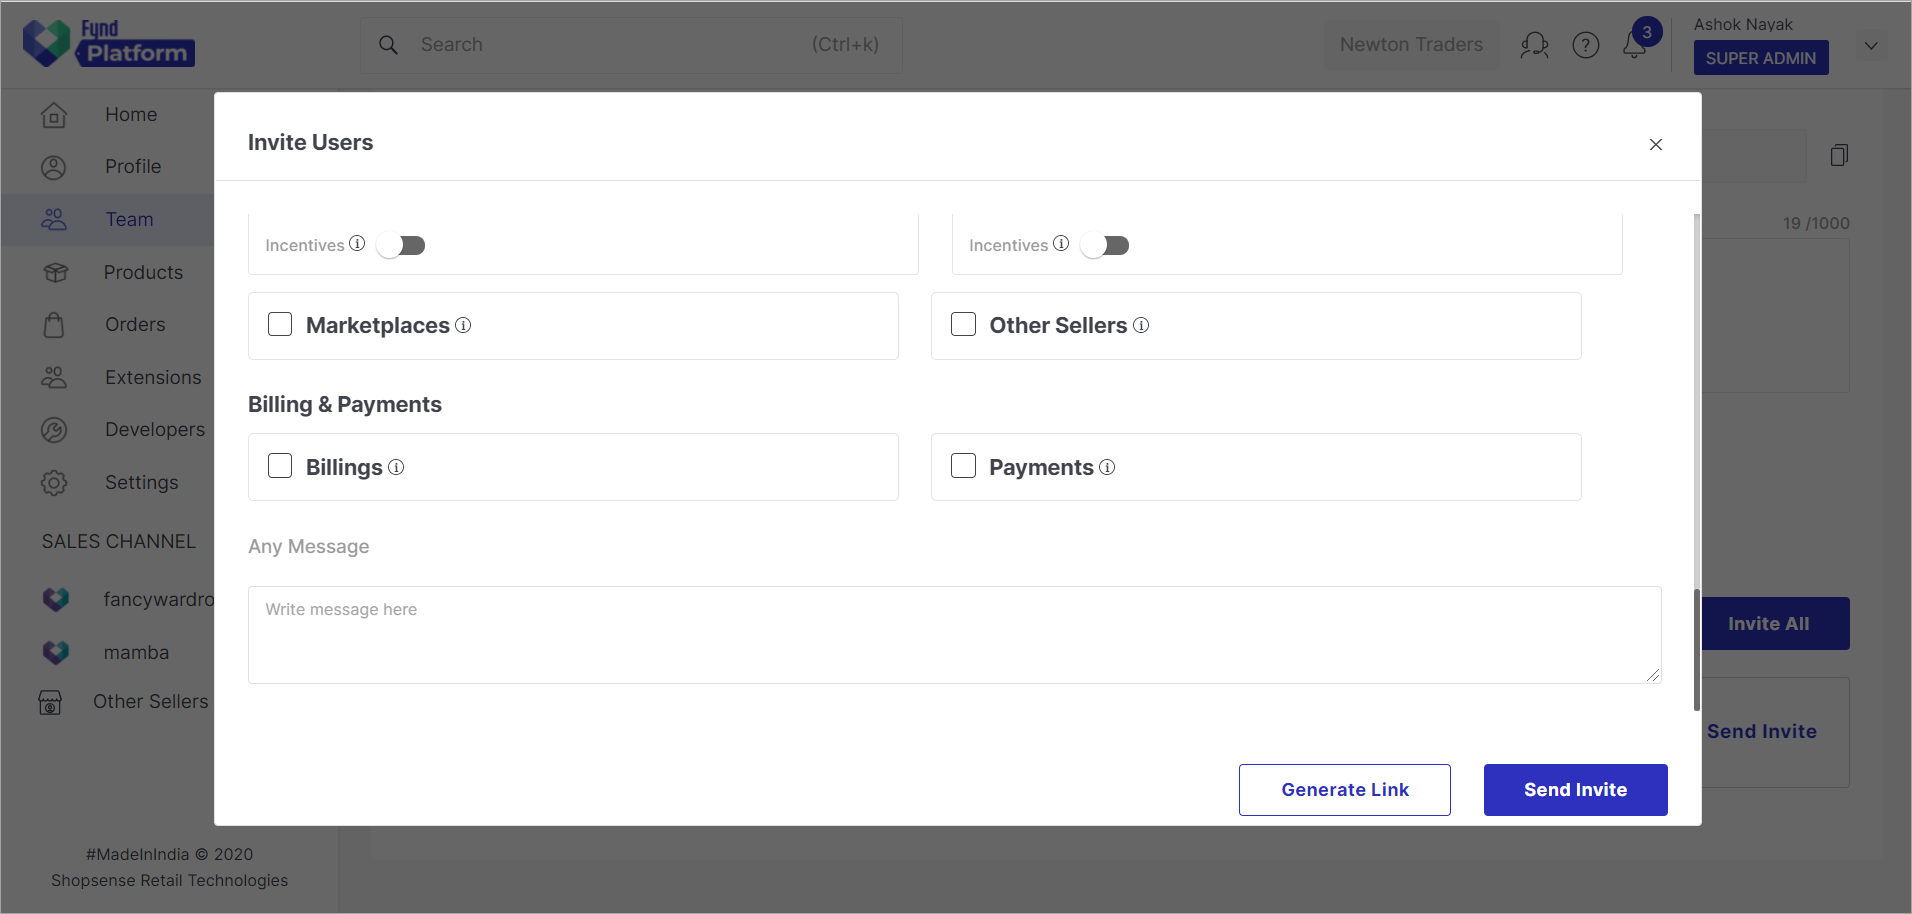
Figure 9: Other Permissions Other Sellers option allows your staff to monitor the companies and selling locations that are reselling products through your inventory (a.k.a franchise mode).
You can also allow your staff to view and manage the billings and payments. Moreover, you may write a custom message that will appear in the invite message.
Click Send Invite and wait for the users to accept the invite and register in the application.
Add the users who have accepted the invite as a staff.

Figure 10: Adding As Staff Confirm the inclusion of the user.

Figure 11: List Of Staff Members
Roles
If your organization maintains a list of members, your members need not register separately on Fynd Commerce. Instead, they can use the Login as Organization option. Read SAML SSO for more details. The Roles section is only for creating a role and deciding the permissions that will be granted to the users who log in via SSO.
Let's assume, you want to choose the permissions users would get if they login via Azure AD.
On the Team page, go to Roles.
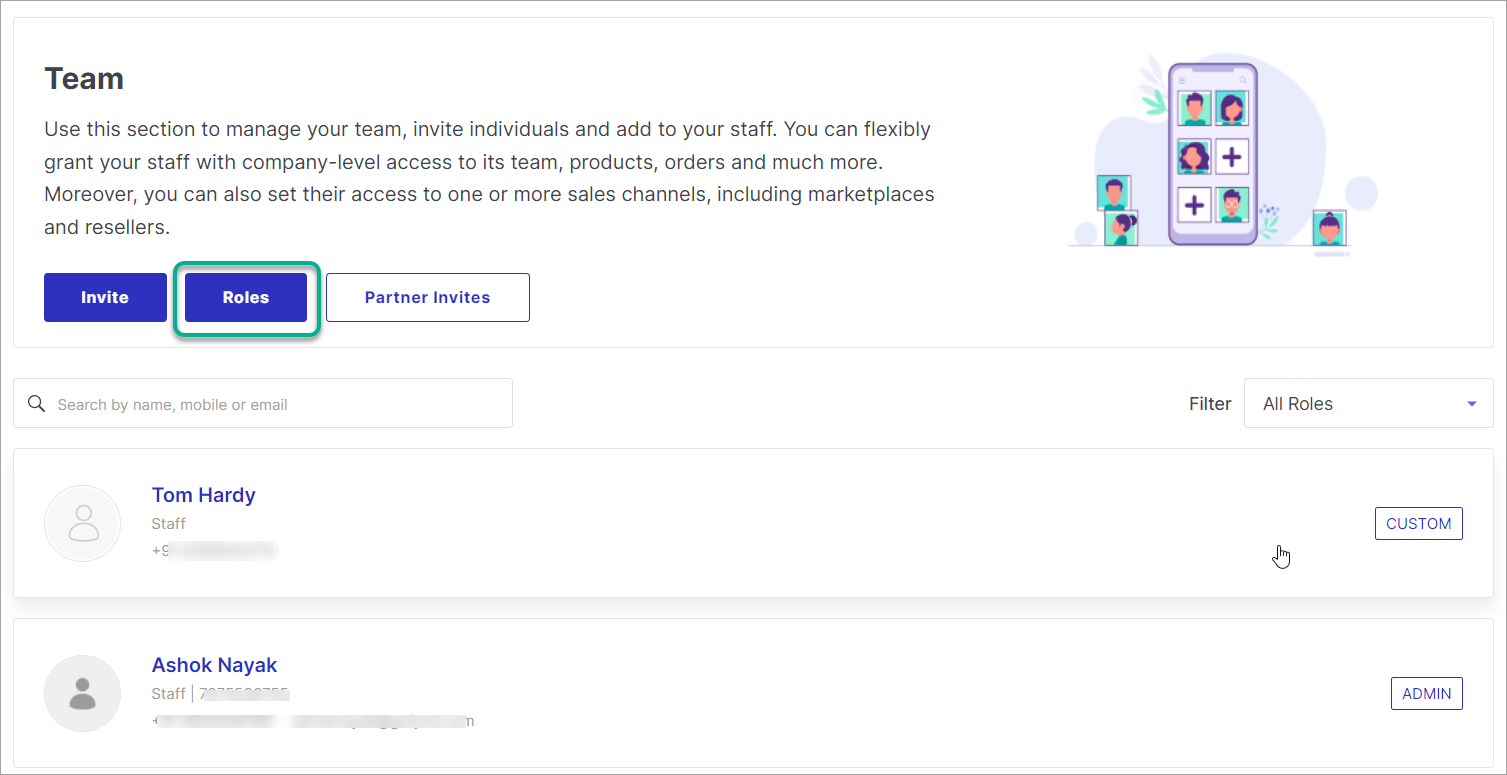
Figure 12: Roles Section
Click Create Role.
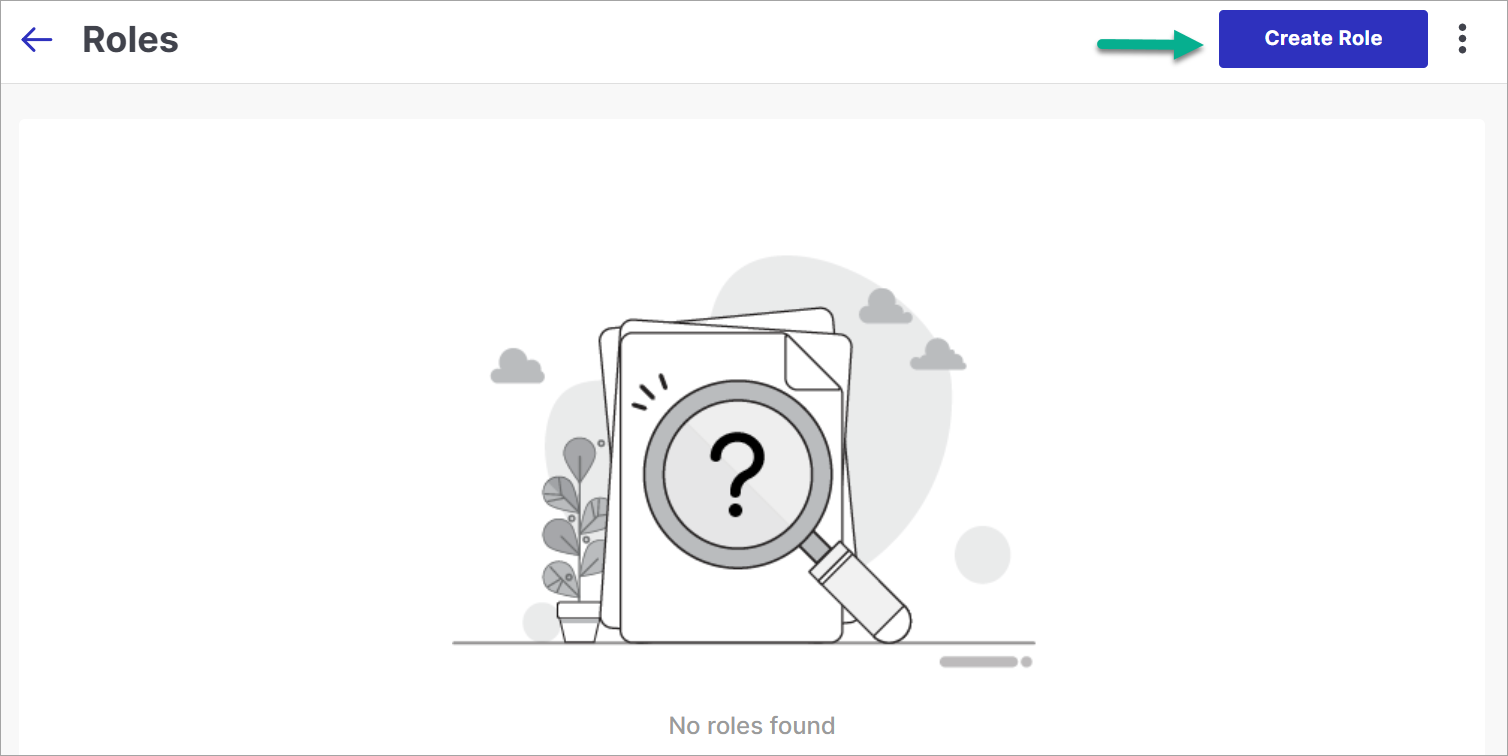
Figure 13: Creating A Role
Choose the permissions.
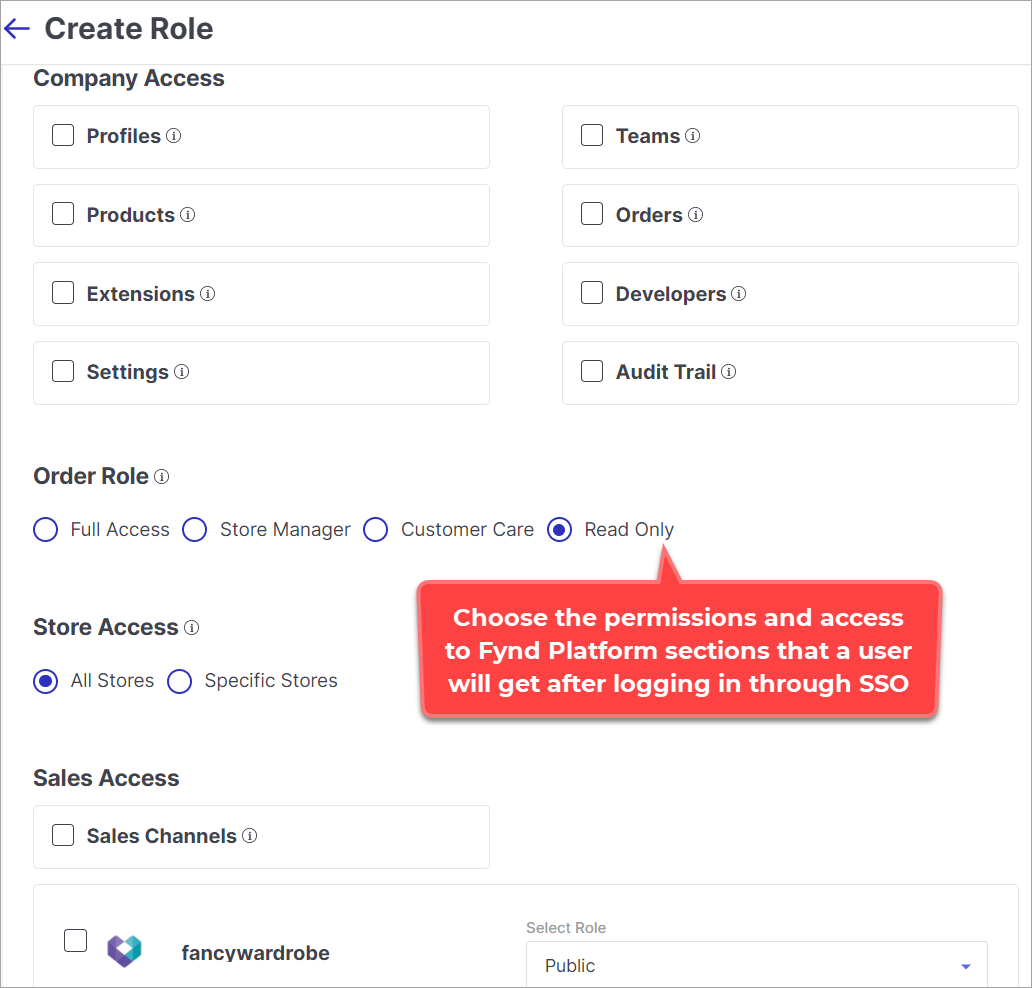
Figure 14: Giving Permissions
Click Save.
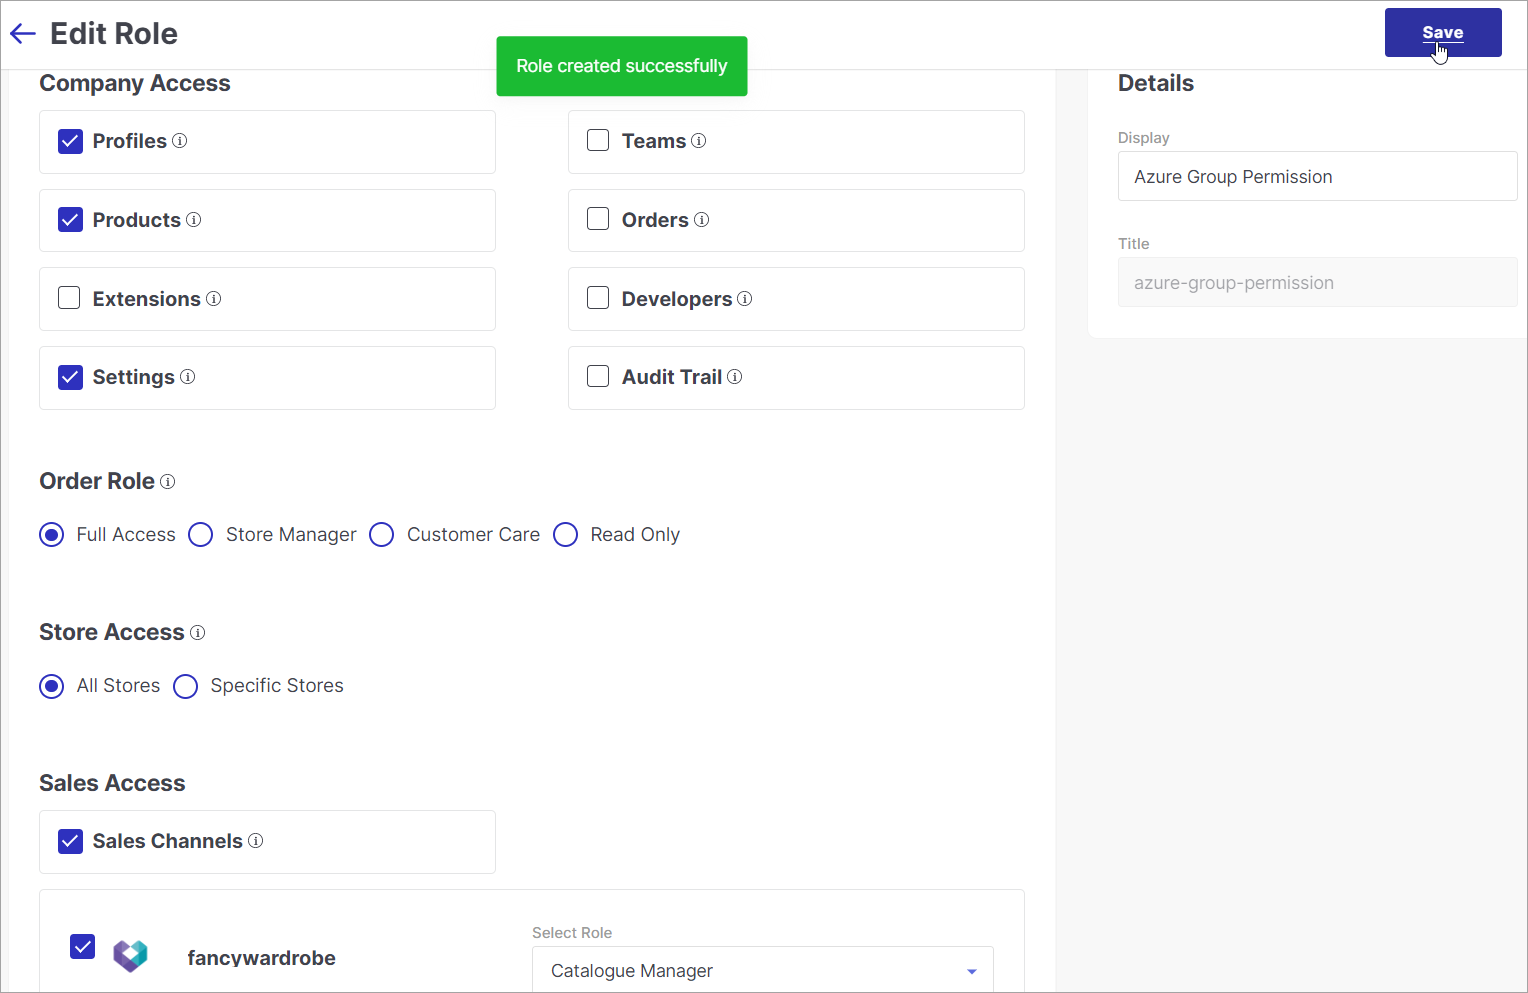
Figure 15: Role Creation Successful
For more details on how the role is used, refer our Azure AD documentation.
Partner Invites
Here you can see the pending, accepted and rejected invites.
On the Team page, go to Partner Invites.
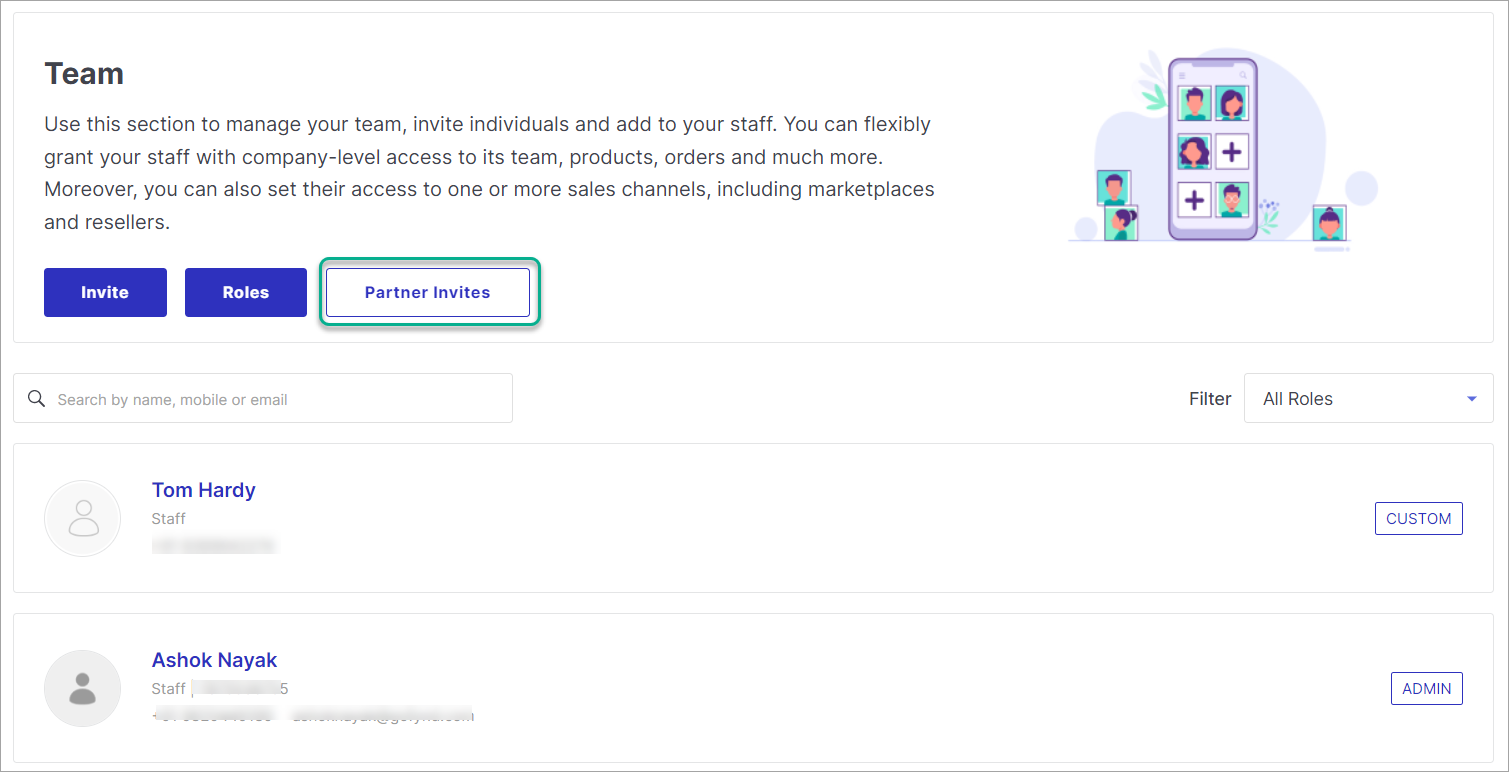
Figure 1: Partner Invites You can see the list of pending invites.
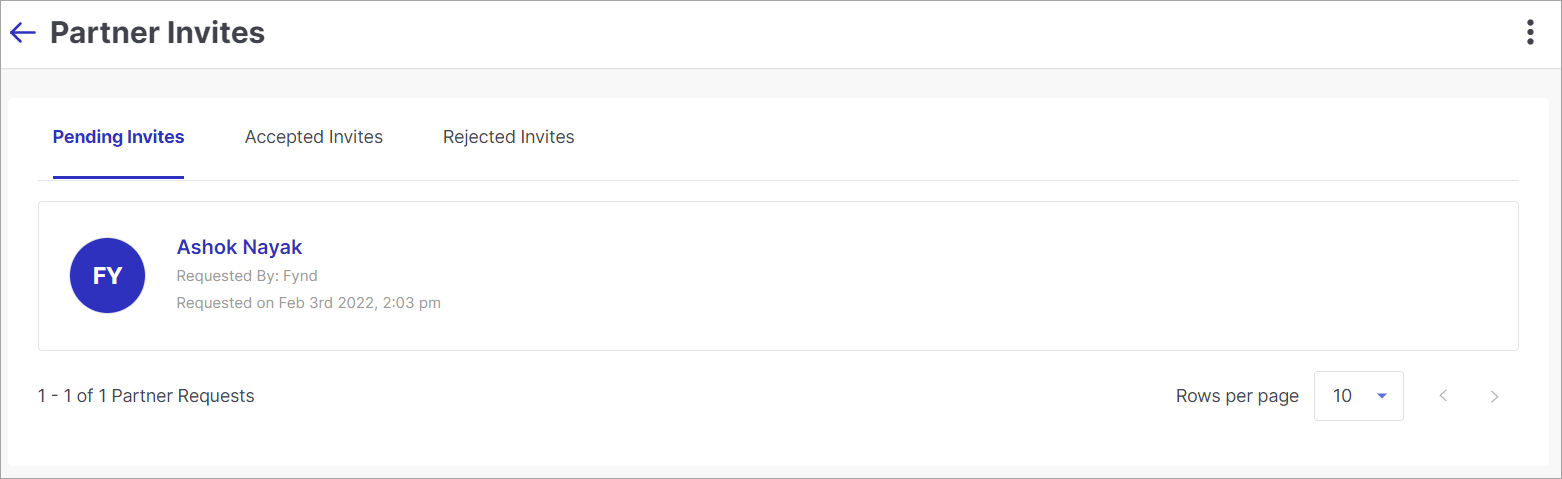
Figure 2: Pending Invite You can click on the invite and either accept or reject the invite. Let's click Accept for this invite.
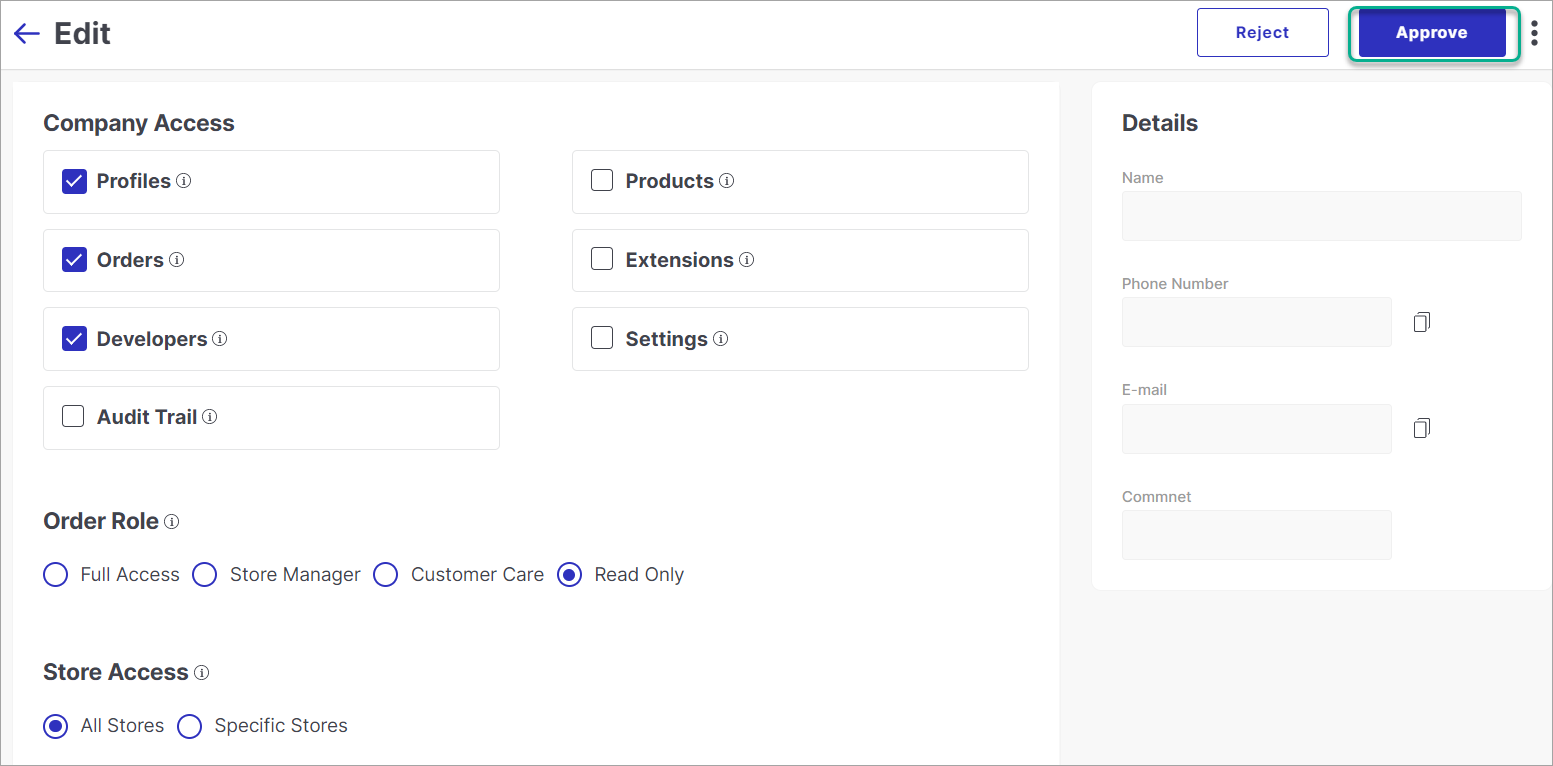
Figure 3: Accept Invite Go to Accepted Invites, you can see the list of users that have been accepted.
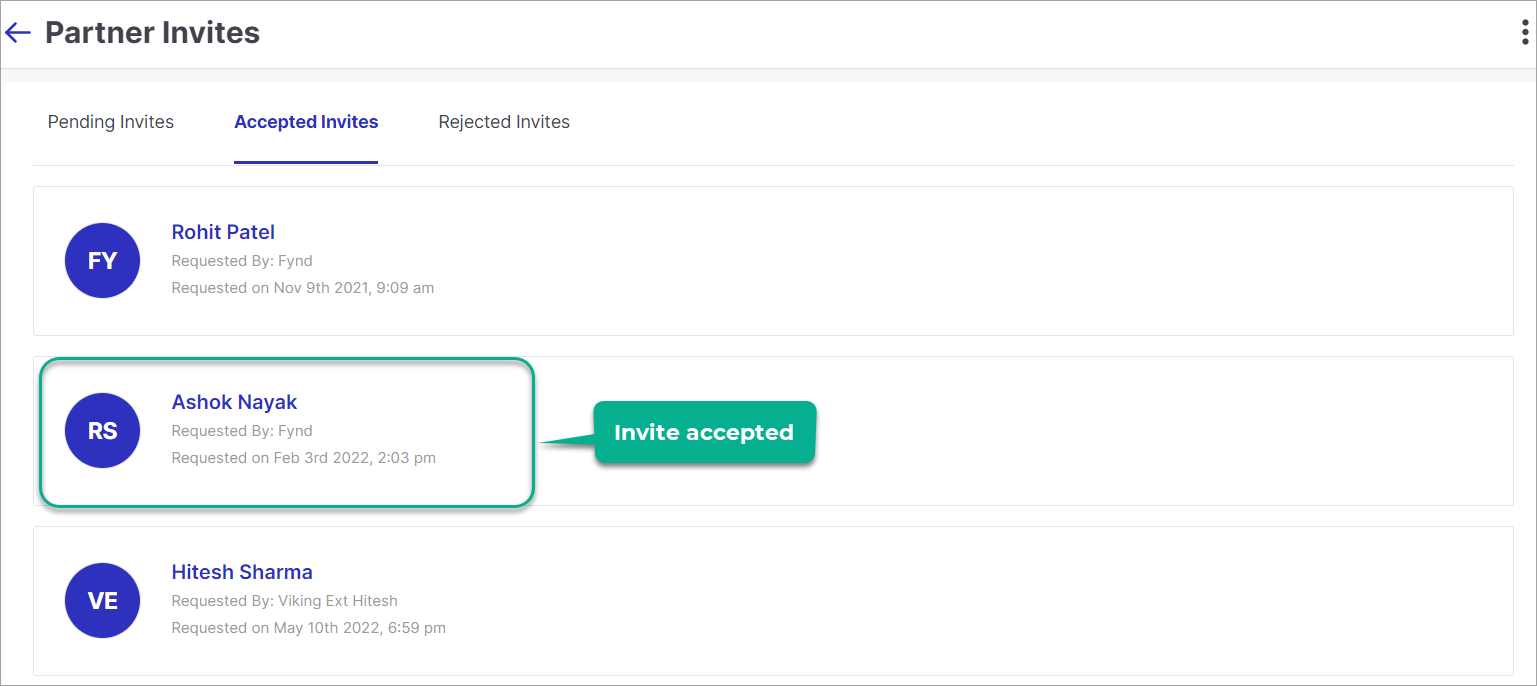
Figure 4: Accepted Invites Similarly you can reject invites. Let's select a pending invite and select Reject.
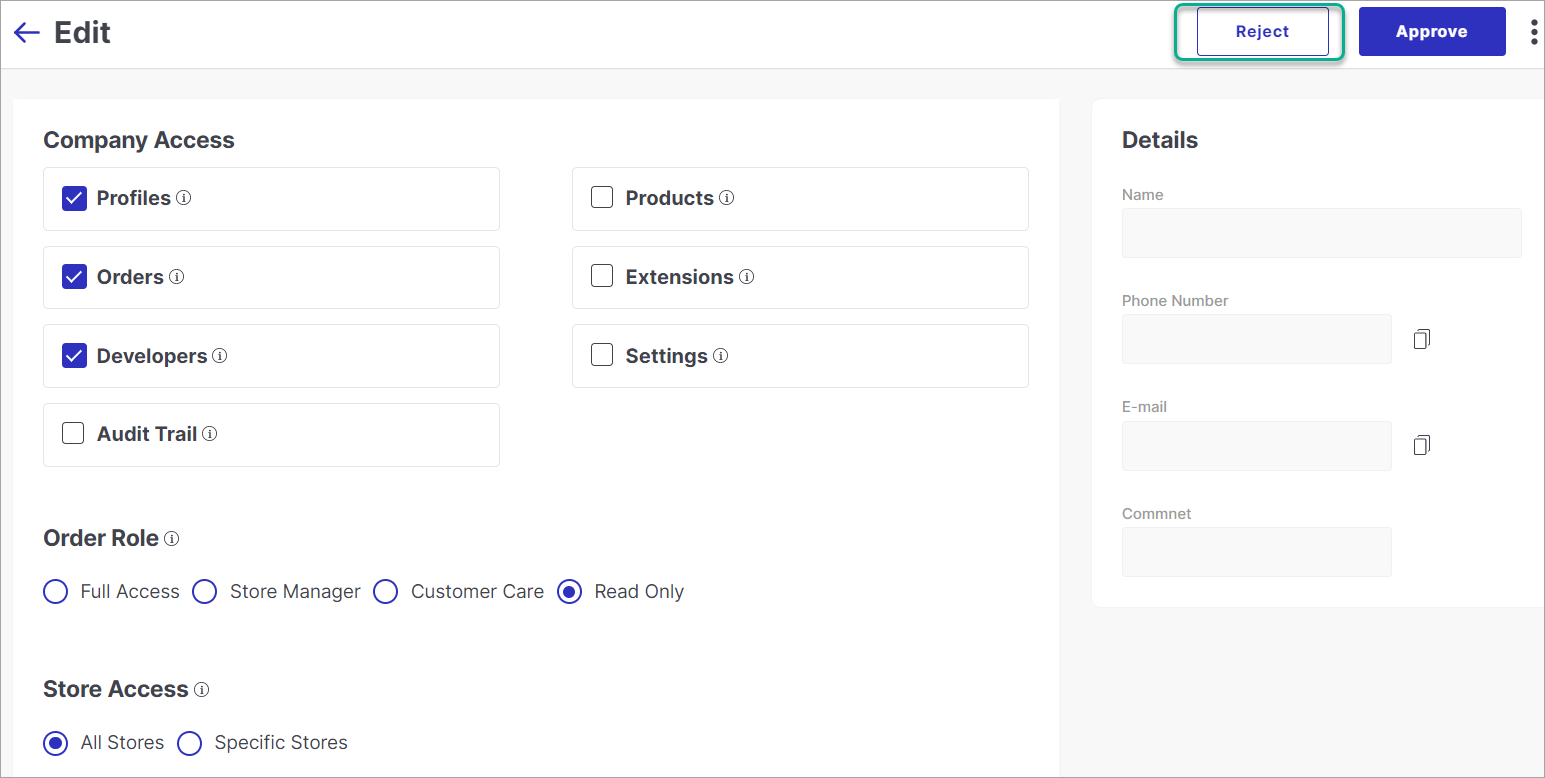
Figure 5: Reject Invite Go to the Rejected Invites page to see the rejected user.
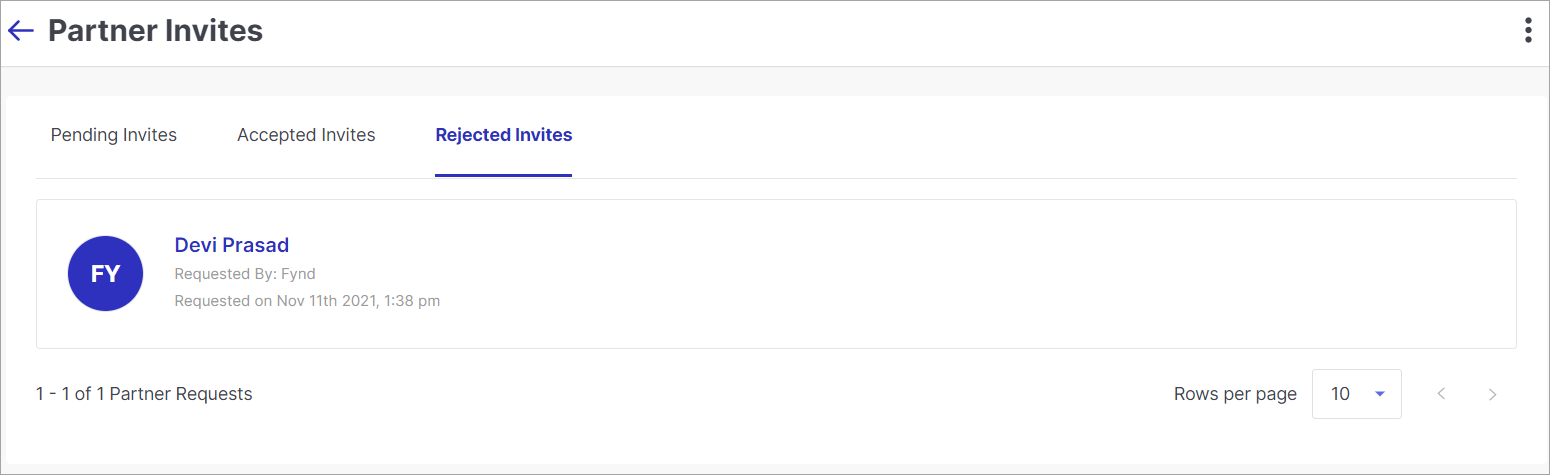
Figure 6: Rejected Invites