SAML Single Sign-On
Introduction
Once you have created a business account on Fynd Platform, you can set up a SAML single sign-on, through which, members in your organization can authenticate through your identity provider, rather than registering individually on Fynd Platform.
You can set up a single sign-on (SSO) on Fynd Platform using identity providers such as G-Suite and Azure AD. SAML will facilitate the data between the identity provider (IDP) and service provider (SP).
![]()
In this document, we will learn the process of configuring SAML SSO with the following identity providers:
G-Suite
A Google Workspace Admin account (formerly known as G-Suite).
Set up your custom SAML app in your Google Admin Console (admin.google.com).
Click Add App → Add private SAML app. Enter a name and icon in the App Details page and click Continue.
On the Google Identity Provider details page, click Download Metadata to get the setup information.

Figure 2: Identity Provider Details Page
Copy and paste the following IDP settings into Fynd Platform:
- SSO URL
- Entity ID
- Certificate

Figure 3a: Copying The SSO URL, Entity ID, And Certificate 
Figure 3b: Pasting The SSO URL, Entity ID, And Certificate
Copy and paste the following SP settings from Fynd Platform to the IDP console.
- Issuer
- Callback Url

Figure 4a: Copying The Issuer And Callback Url 
Figure 4b: SAML Application 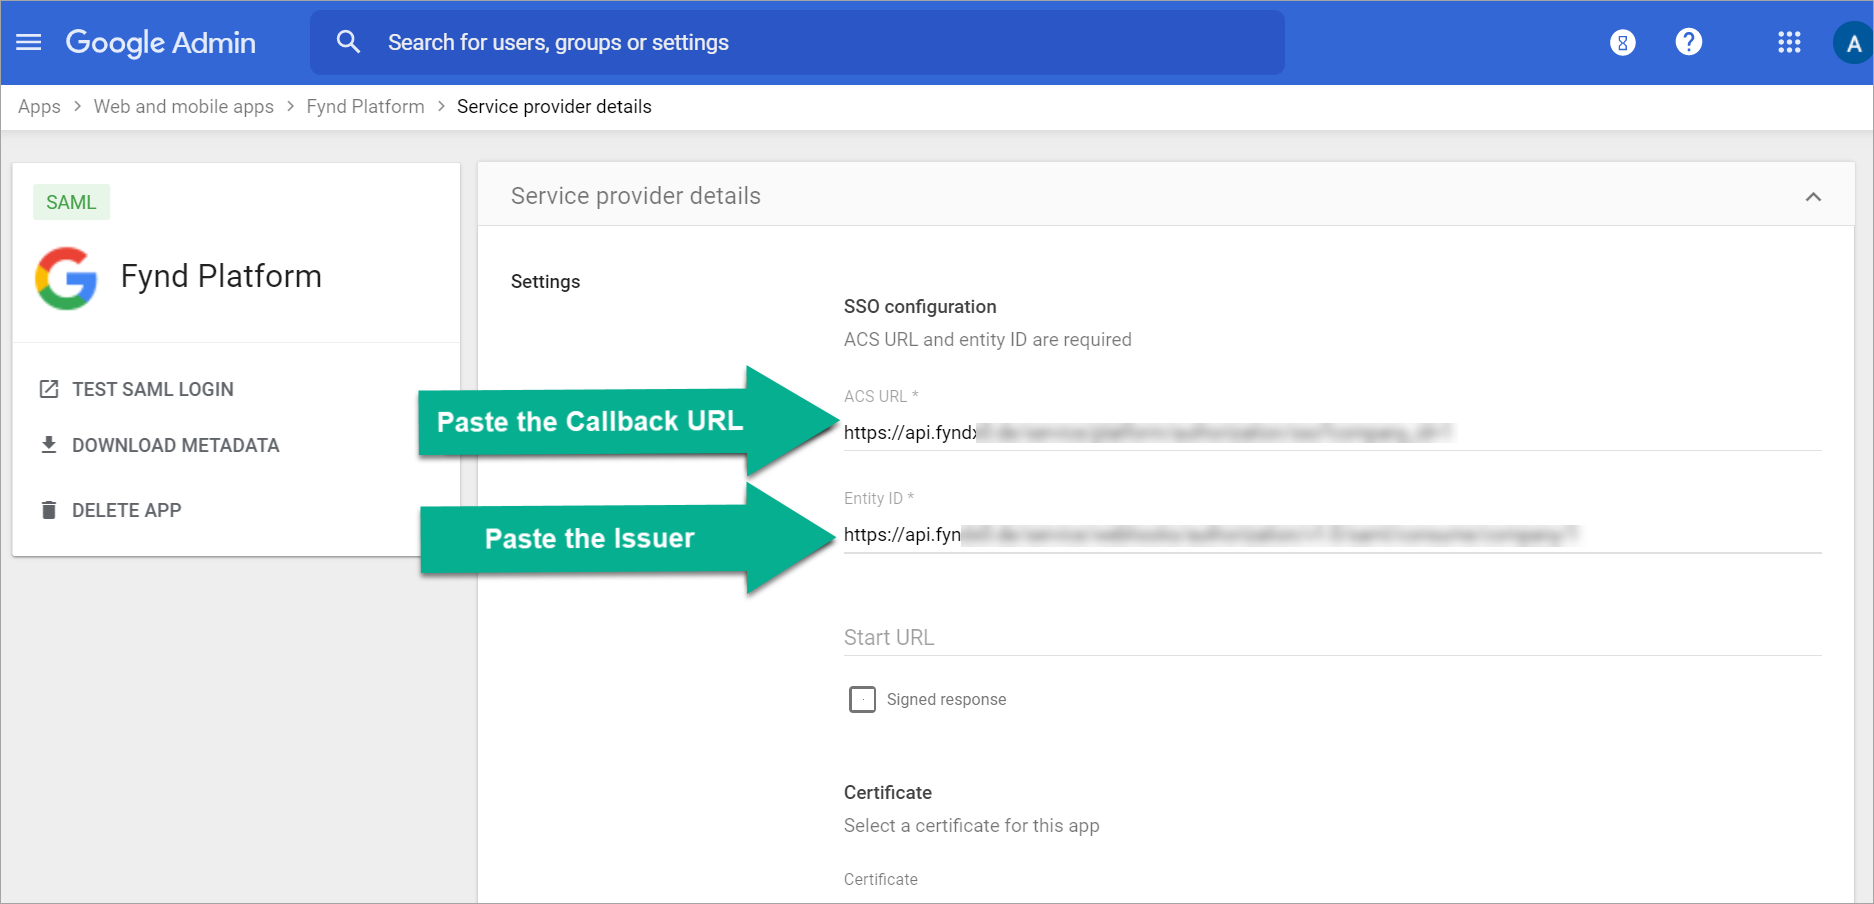
Figure 4c: Service Provider Details Page
Under IDP settings, you get the following additional configurations:

Figure 5: Addition Configurations in SAML SSO Settings noteEnter a text to display on the login screen.
Logo - Upload an image to display on the login screen.
Session Age - Specify a duration (in hours) beyond which a user will be logged out.
Assign Roles Manually - Role determines the access and permissions a user will get in Fynd Platform. Enable this option to manually assign roles to users signed in via SSO. Disable the option to fetch and sync the roles directly from G-Suite.
Role - Shows a list of roles if defined already within the Team section of Fynd Platform.
Create New Role - If no role is defined yet, use this option to create a role, and specify the permissions granted to the users who log in via SSO.

Figure 5a: Creating A Role 
Figure 5b: Giving Permissions 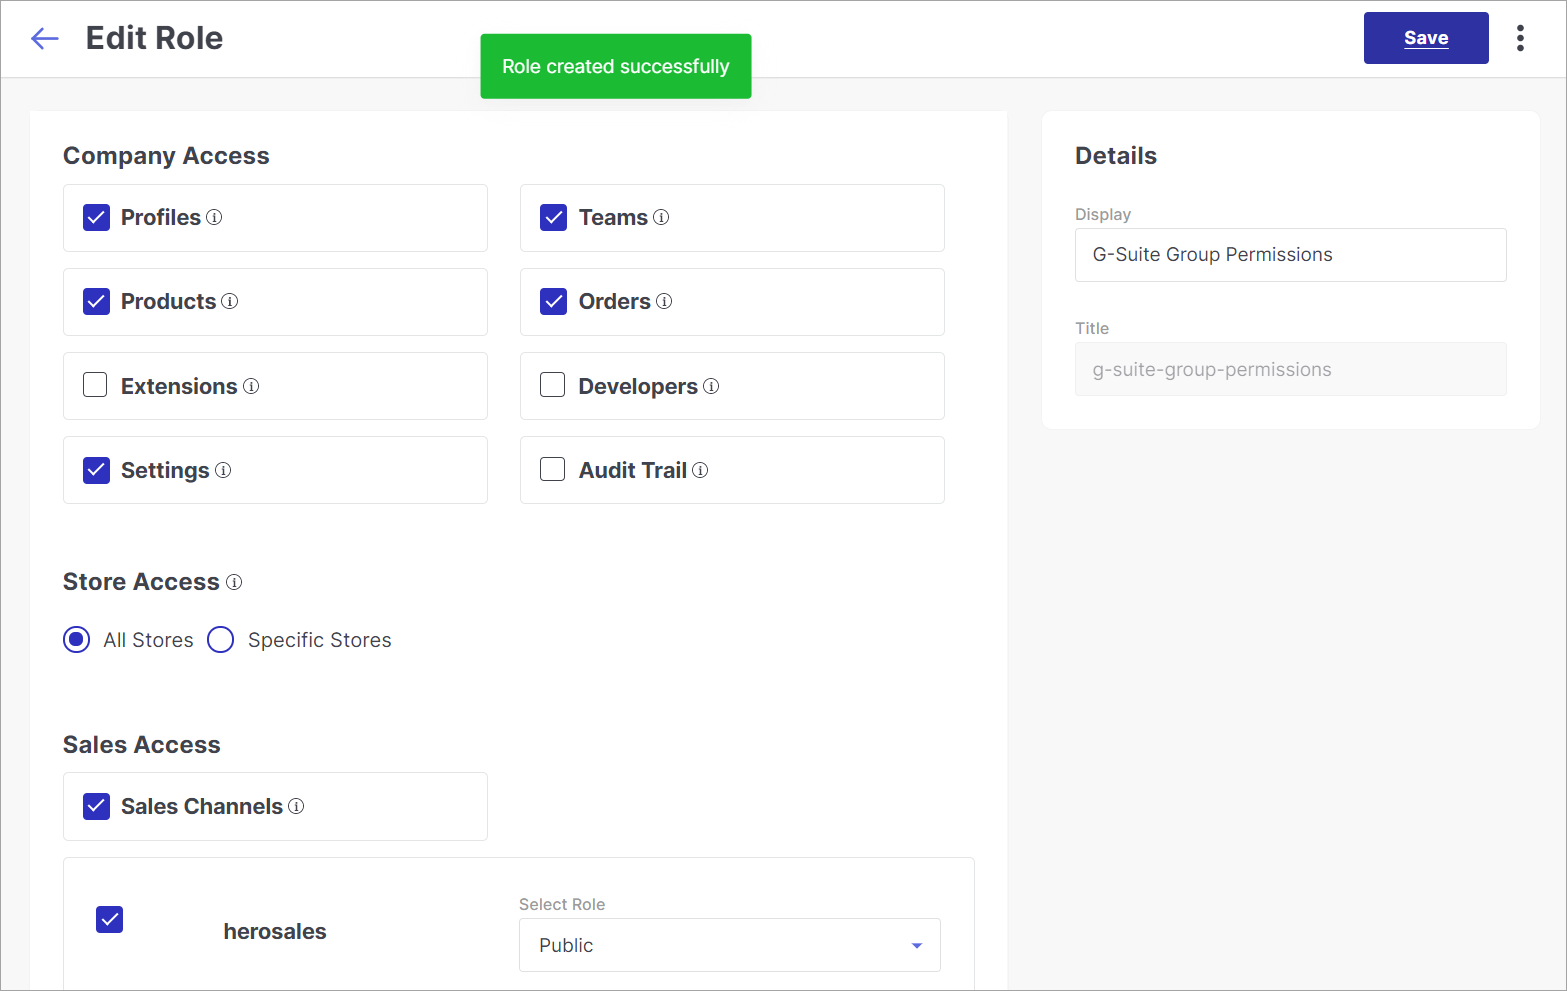
Figure 5c: Role Creation Successful 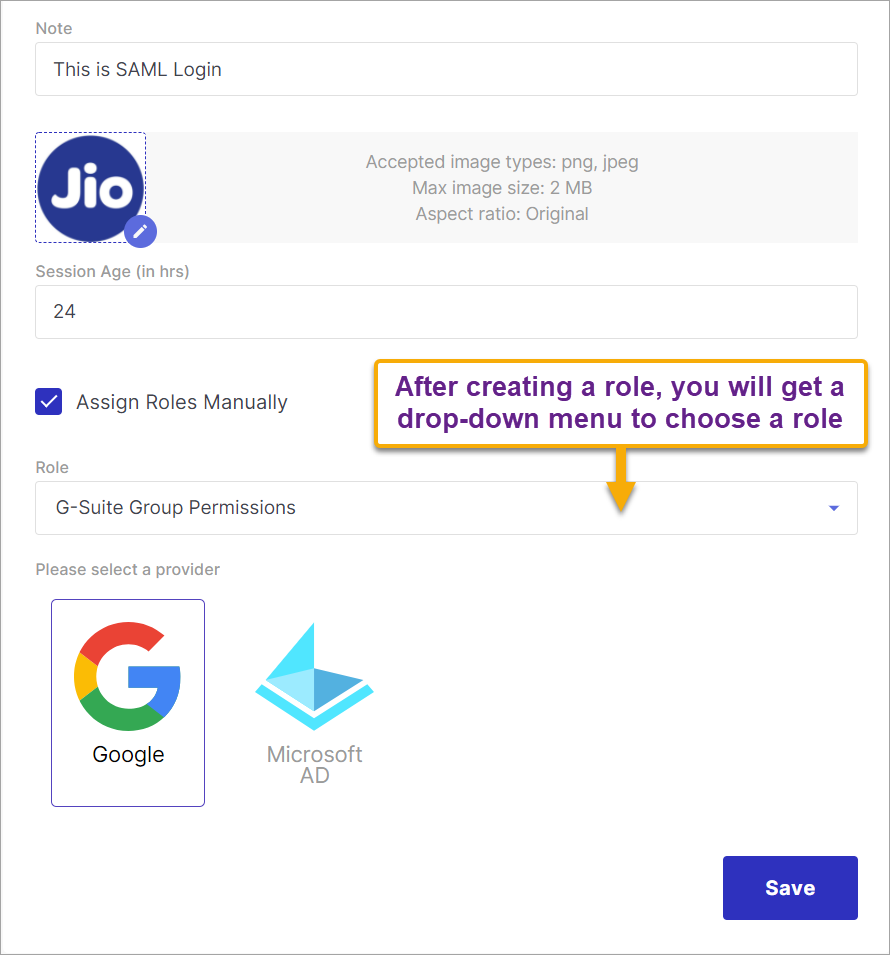
Figure 5d: Choosing A Role
Provider - Select an identity provider; in this case, Google.
Upon successful setup, members of your organization who have not registered on Fynd Platform can choose Login as Organisation.

Figure 6: Fynd Platform Login Page
They can enter the Company ID.

Figure 7a: Single Sign-On Page 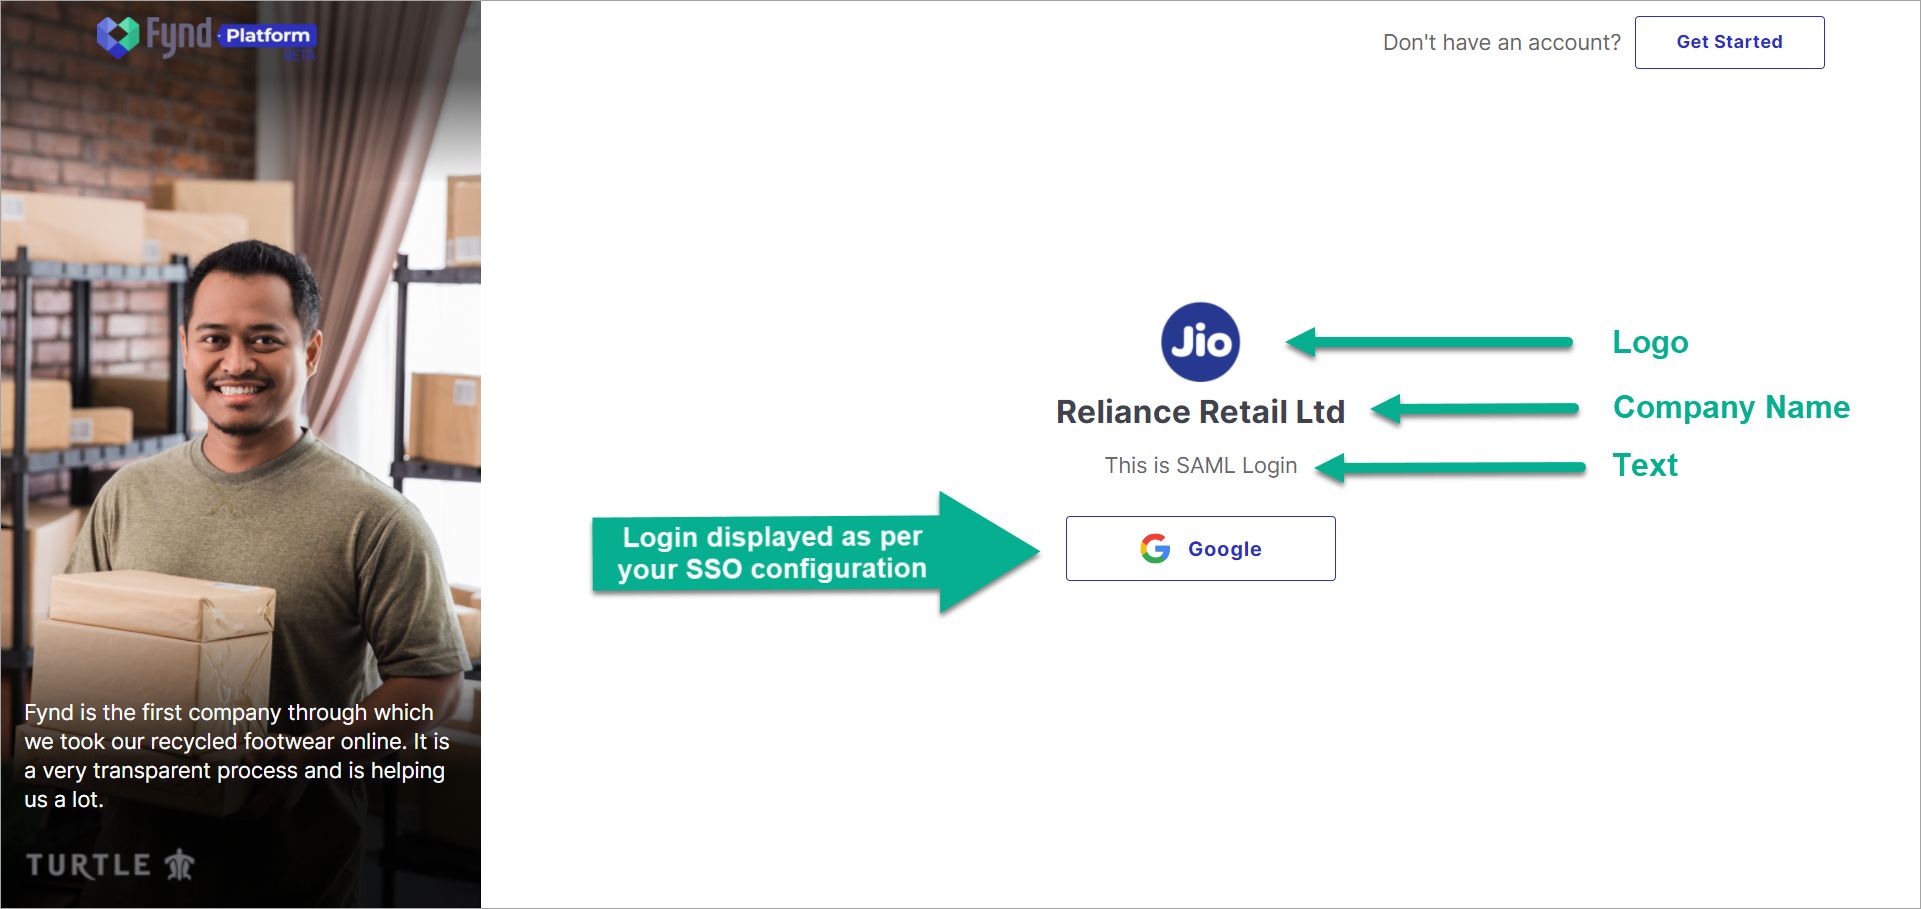
Figure 7b: SAML Login Page
Finally, they can sign in to Fynd Platform using their Google Account.

Figure 8: Google Sign-In Page
Azure AD
An Azure account with an active subscription, and an enterprise application created within it for setting up SSO. Click here to know more about adding an application in Azure AD.
After adding an enterprise application, you'll get an overview page.

Figure 1: Enterprise Application Overview Page In the Manage section, select Single sign-on.

Figure 2: Single Sign-On Configuration Go to SAML SSO settings in Fynd Platform, and copy the following SP settings:
- Issuer
- Callback Url

Figure 3a: Copying The Issuer And Callback Url Use the Edit option in the first block, i.e., 'Basic SAML Configuration' to paste the copied values as shown below.
- Issuer → Identifier
- Callback Url → Reply URL

Figure 3b: Pasting The Issuer And Callback Url
Go to the 4th block, i.e., 'Set up yourAppName' and click on View step-by-step instructions.

Figure 4: Checking IDP Settings
From the pane (on the right-side), copy the following values one-by-one:
- SAML Single Sign-On Service URL
- SAML Entity ID

Figure 5a: Copying Data For SSO URL And Entity ID Paste the copied values in IDP Settings of Fynd Platform as shown below.
- SAML Single Sign-On Service URL → SSO URL
- SAML Entity ID → Entity ID

Figure 5b: Pasting Data Into SSO URL And Entity ID
Go to the 3rd block, i.e., 'SAML Signing Certificate*' and use the Download button next to 'Certificate (Base64)'.

Figure 6: Downloading Certificate
Use any text editor to open the certificate, and copy its content.

Figure 7a: Copying Certificate Content Paste the copied content in the IDP Settings of Fynd Platform.

Figure 7b: Pasting Certificate Content
Under IDP settings, you get the following additional configurations:

Figure 8: Addition Configurations in SAML SSO Settings noteEnter a text to display on the login screen.
Logo - Upload an image to display on the login screen.
Session Age - Specify a duration (in hours) beyond which a user will be logged out.
Assign Roles Manually - Enabled by default for Azure AD.
Role - Shows a list of roles defined within the Team section of Fynd Platform.
Create New Role - If no role is defined yet, use this option to create a role and specify the permissions granted to the users who log in via SSO.

Figure 8a: Giving Permissions 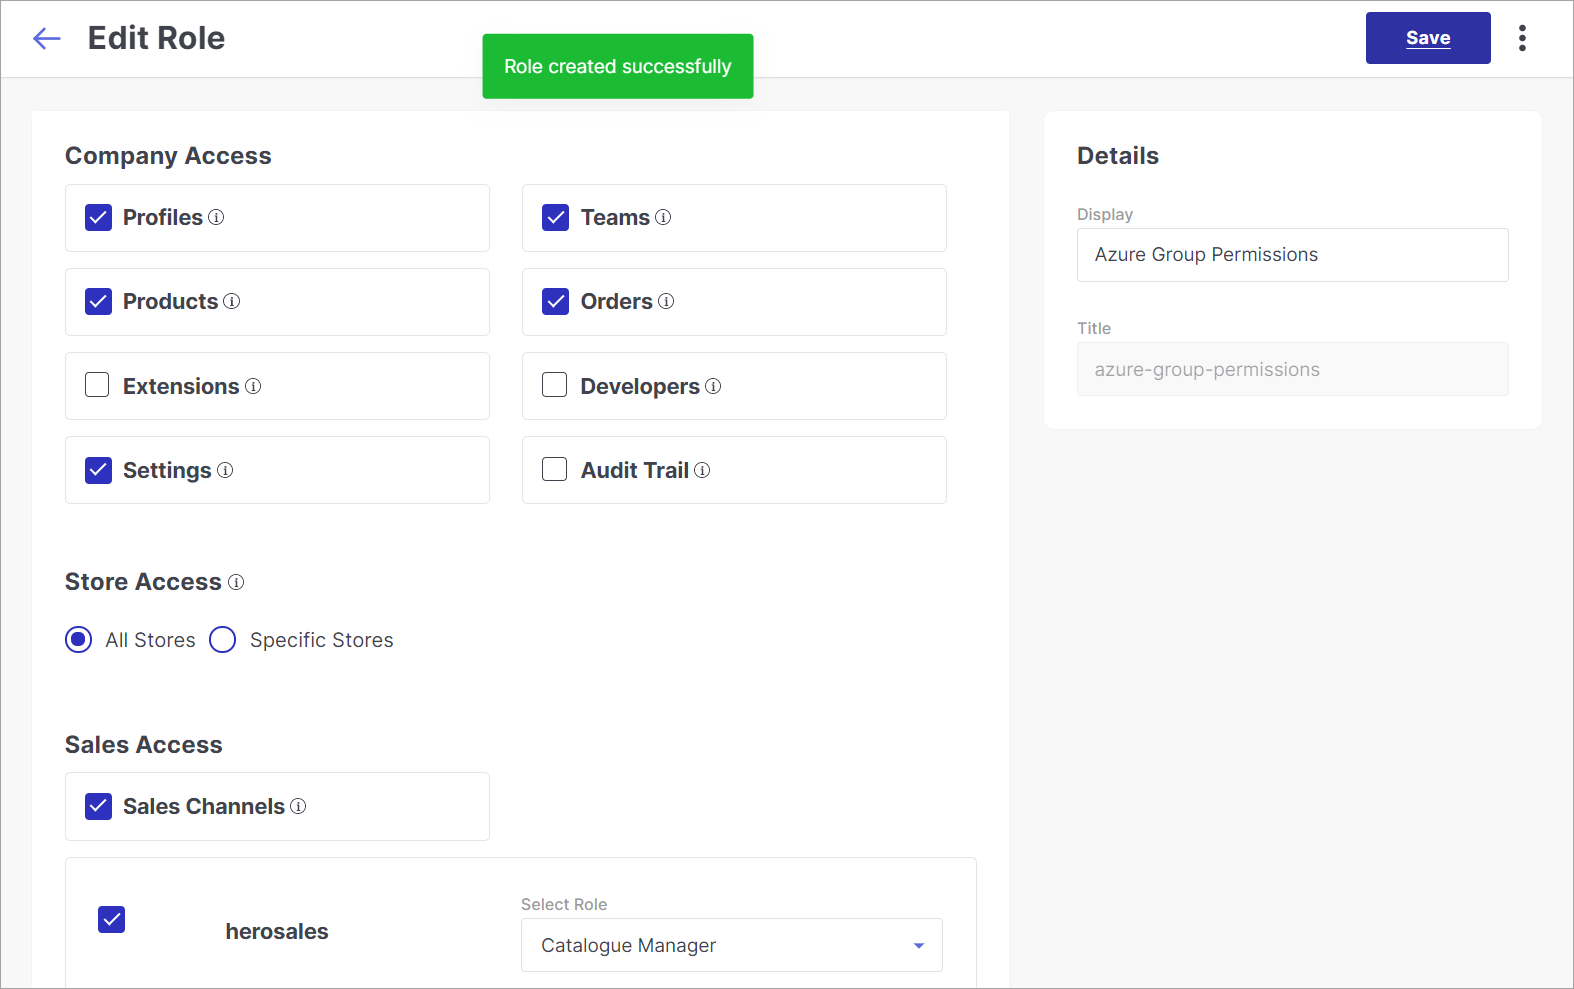
Figure 8b: Role Creation Successful 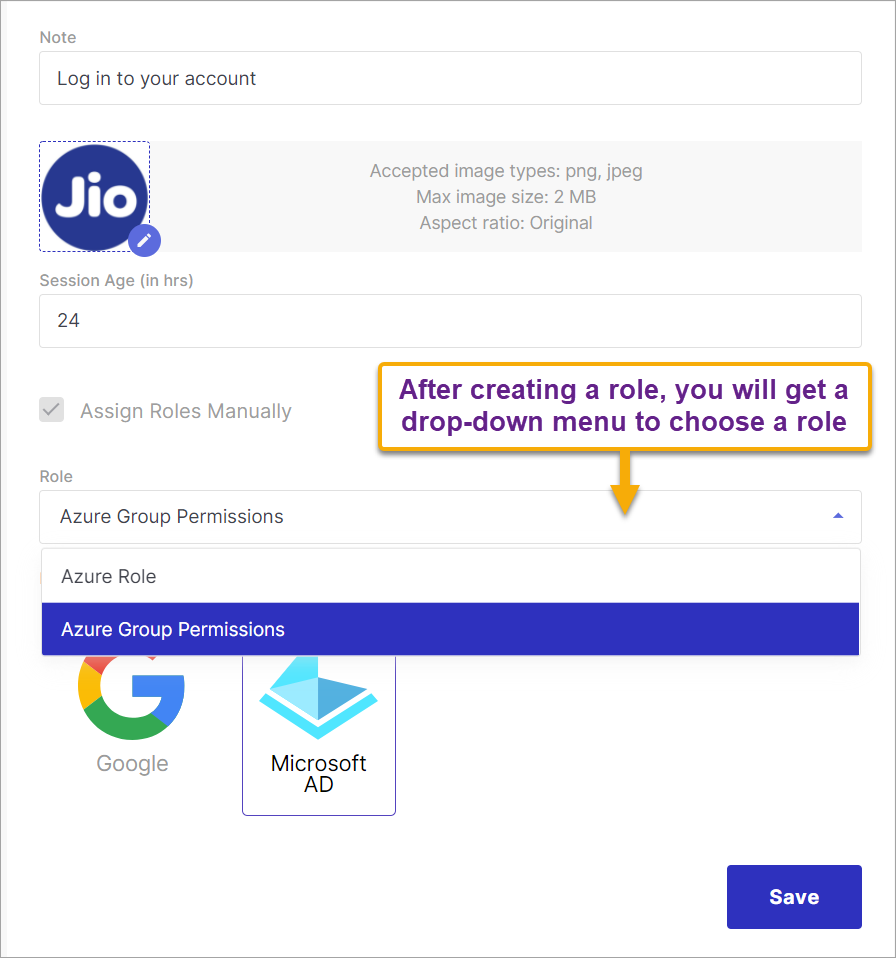
Figure 8c: Choosing A Role
Provider - Select an identity provider; in this case, Microsoft AD.
Upon successful setup, members of your organization who have not registered on Fynd Platform can choose Login as Organisation.

Figure 9: Fynd Platform Login Page
They can enter your Company ID.

Figure 10a: Single Sign-On Page 
Figure 10b: SAML Login Page
Finally, they can sign in to Fynd Platform using their Microsoft Account.

Figure 11: Microsoft Sign-In Page