Screensaver
Introduction
Screensaver extension allows you to upload media files like images, videos or ads that display the latest offers on products or brands on the landing page of your website. Each media file is called a screen and can be linked to any webpage. It helps increase sales by displaying the latest offers as soon as a customer visits your website.
Steps to use Screensaver Extension
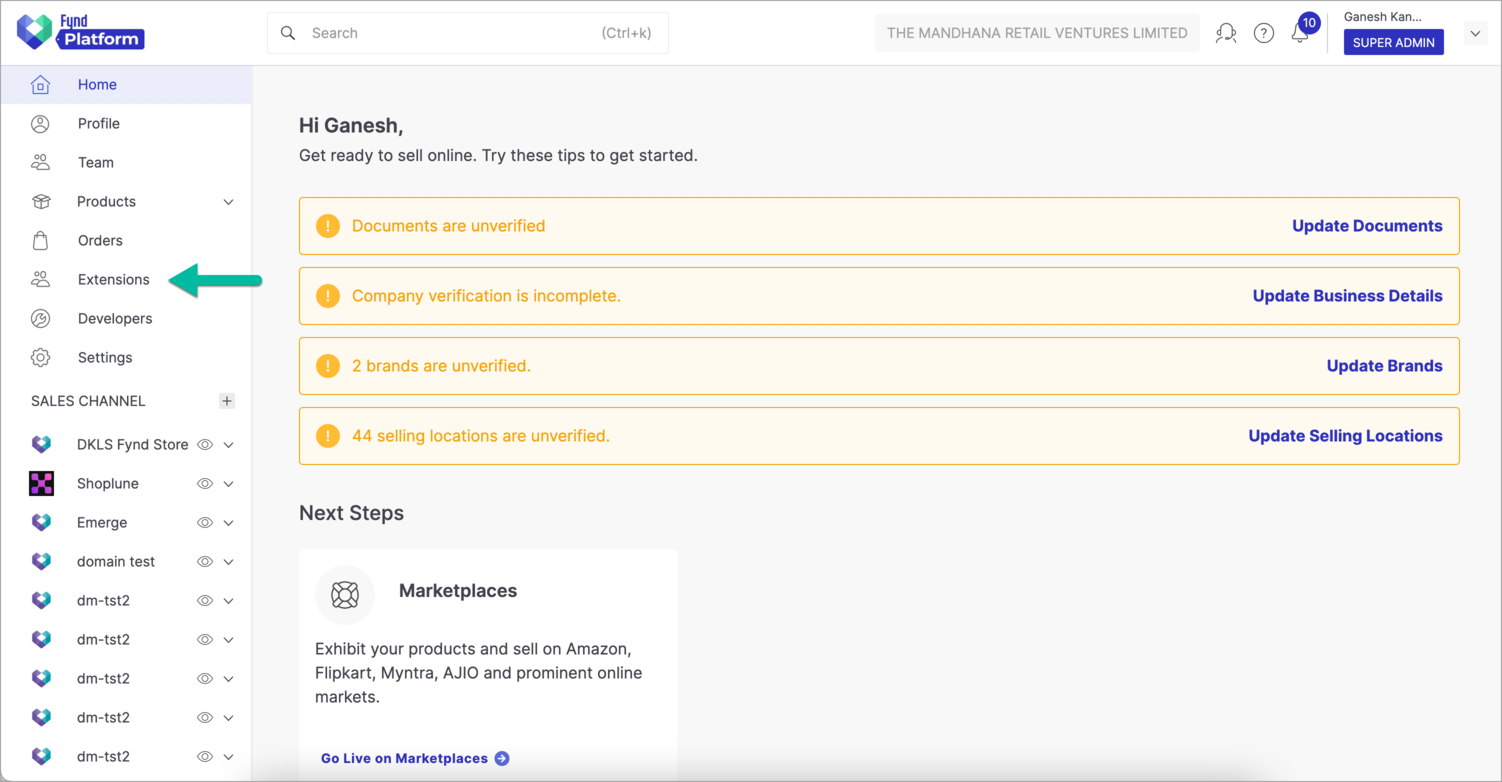
Go to Extensions in Fynd Platform.

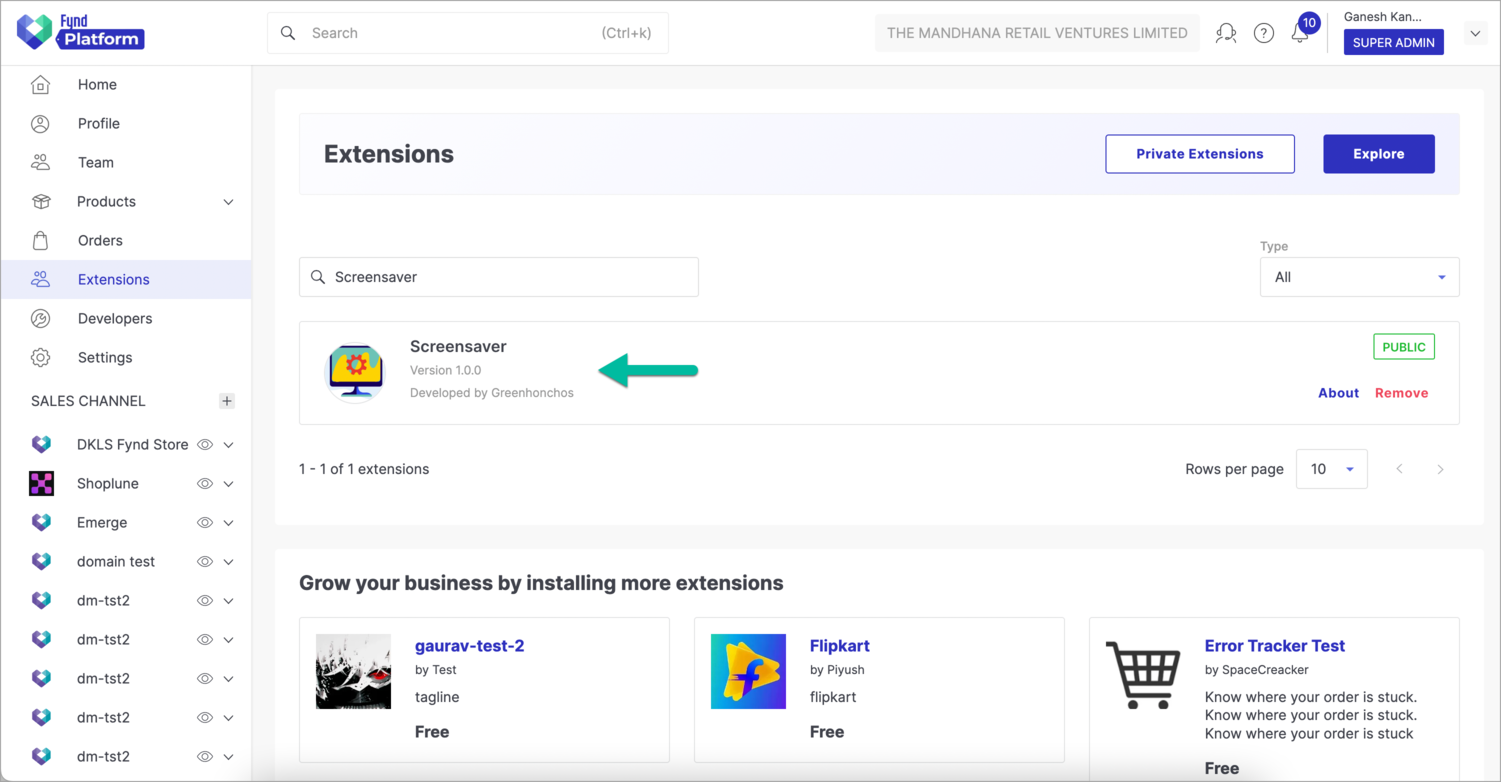
Figure 1: Extensions Section - Fynd Platform Click Screensaver extension.

Figure 2: Screensaver Extension noteOnce you have installed this extension, it will be available in the list here.
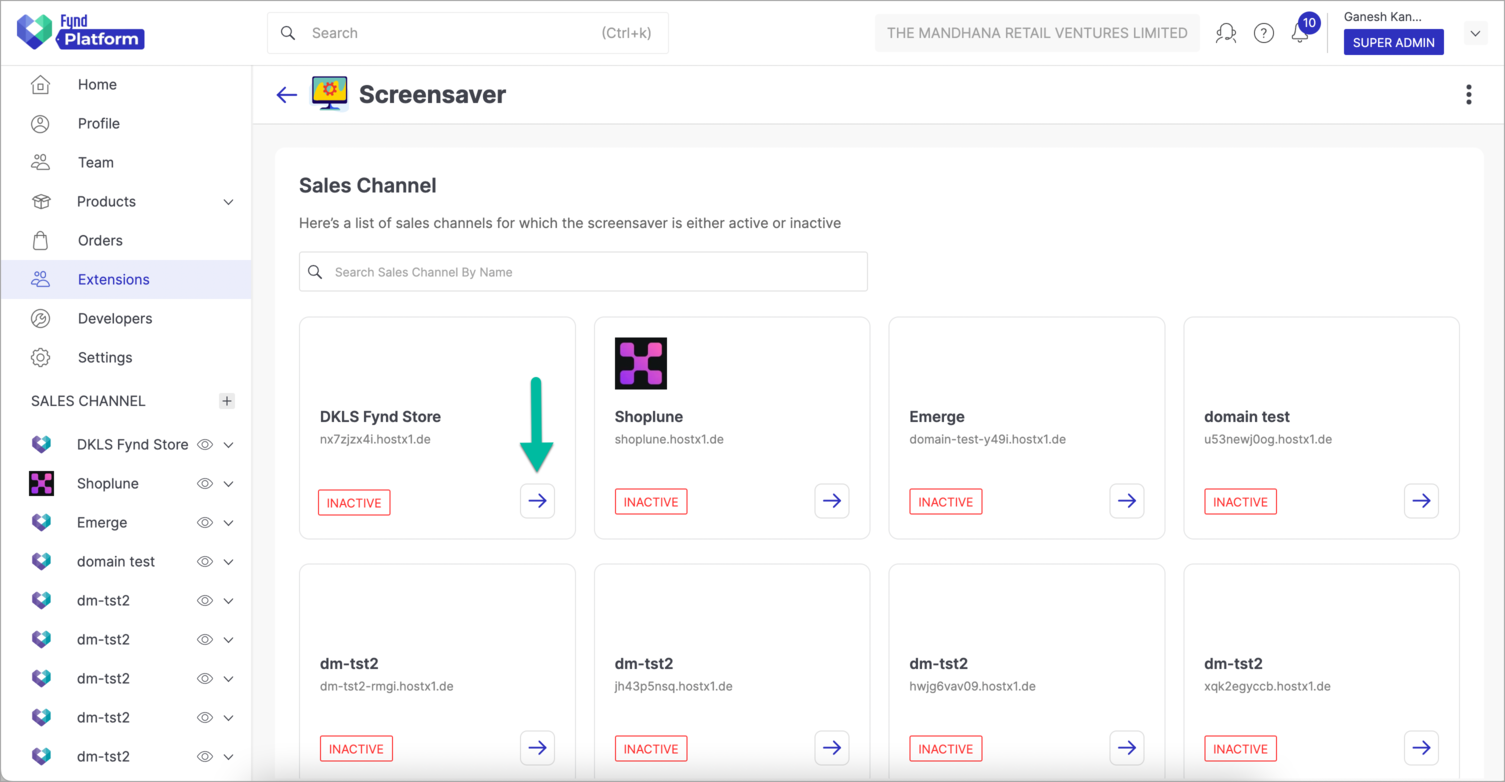
Select desired sales channel. Here, we have selected 'DKLS Fynd Store'.

Figure 3: Selecting Desired Sales Channel Let us configure screensaver settings.

Figure 4: Create New Screensaver - Name - Enter suitable name for the screensaver. For e.g., Grand Season Sale.
- Platform - Select the platform (Web, Android, iOS) on which this screensaver should be displayed.
- Start Time - Enter the time of inactivity after which this screensaver will be displayed. For e.g., 30 sec, 5 min, etc.
- Transition Time - The time (in seconds) allotted to an individual slide or screen in the screensaver. Note that if you are using a video in your screensaver, the length of that video should be less than the duration entered here.
- Button background - Select suitable colour to fill background of the button.
- Preview background - Select suitable colour to fill background of the screensaver window on your website.
- Button text - Enter suitable text to customise the button label. For e.g., Start Shopping.
- Button text color - Select suitable colour for the label of the button.
- Media Type - Upload your media files like images and videos.
- Link to Screen - Add a link so that when a user clicks on this slide he will be redirected to that link.
- Add Screen - Add more slides in your screensaver, if required.
- Save - Upon clicking this button, your configuration will be saved.
noteYou will have to follow this step to update the existing screensavers on your website.
Activating/Deactivating Screensaver Extension
Turn ON the toggle button to activate screensaver for sales channel (Refer Figure 5).
Click Save.

Figure 5: Activating Screensaver Extension
Final Output
Visit the sales channel and you will see that the screensaver is visible on your website.
![]()