Inorbit
Introduction
The Inorbit Marketplace Extension is a tool that integrates your products and selling locations with the Inorbit marketplace. This guide outlines the process of installing the extension, setting it up, managing products and selling locations, and using features such as manual sync and inventory reporting. It covers key tasks including mapping products and locations, bulk operations, and synchronizing inventory between the Fynd Platform and Inorbit marketplace.
Installing Extension
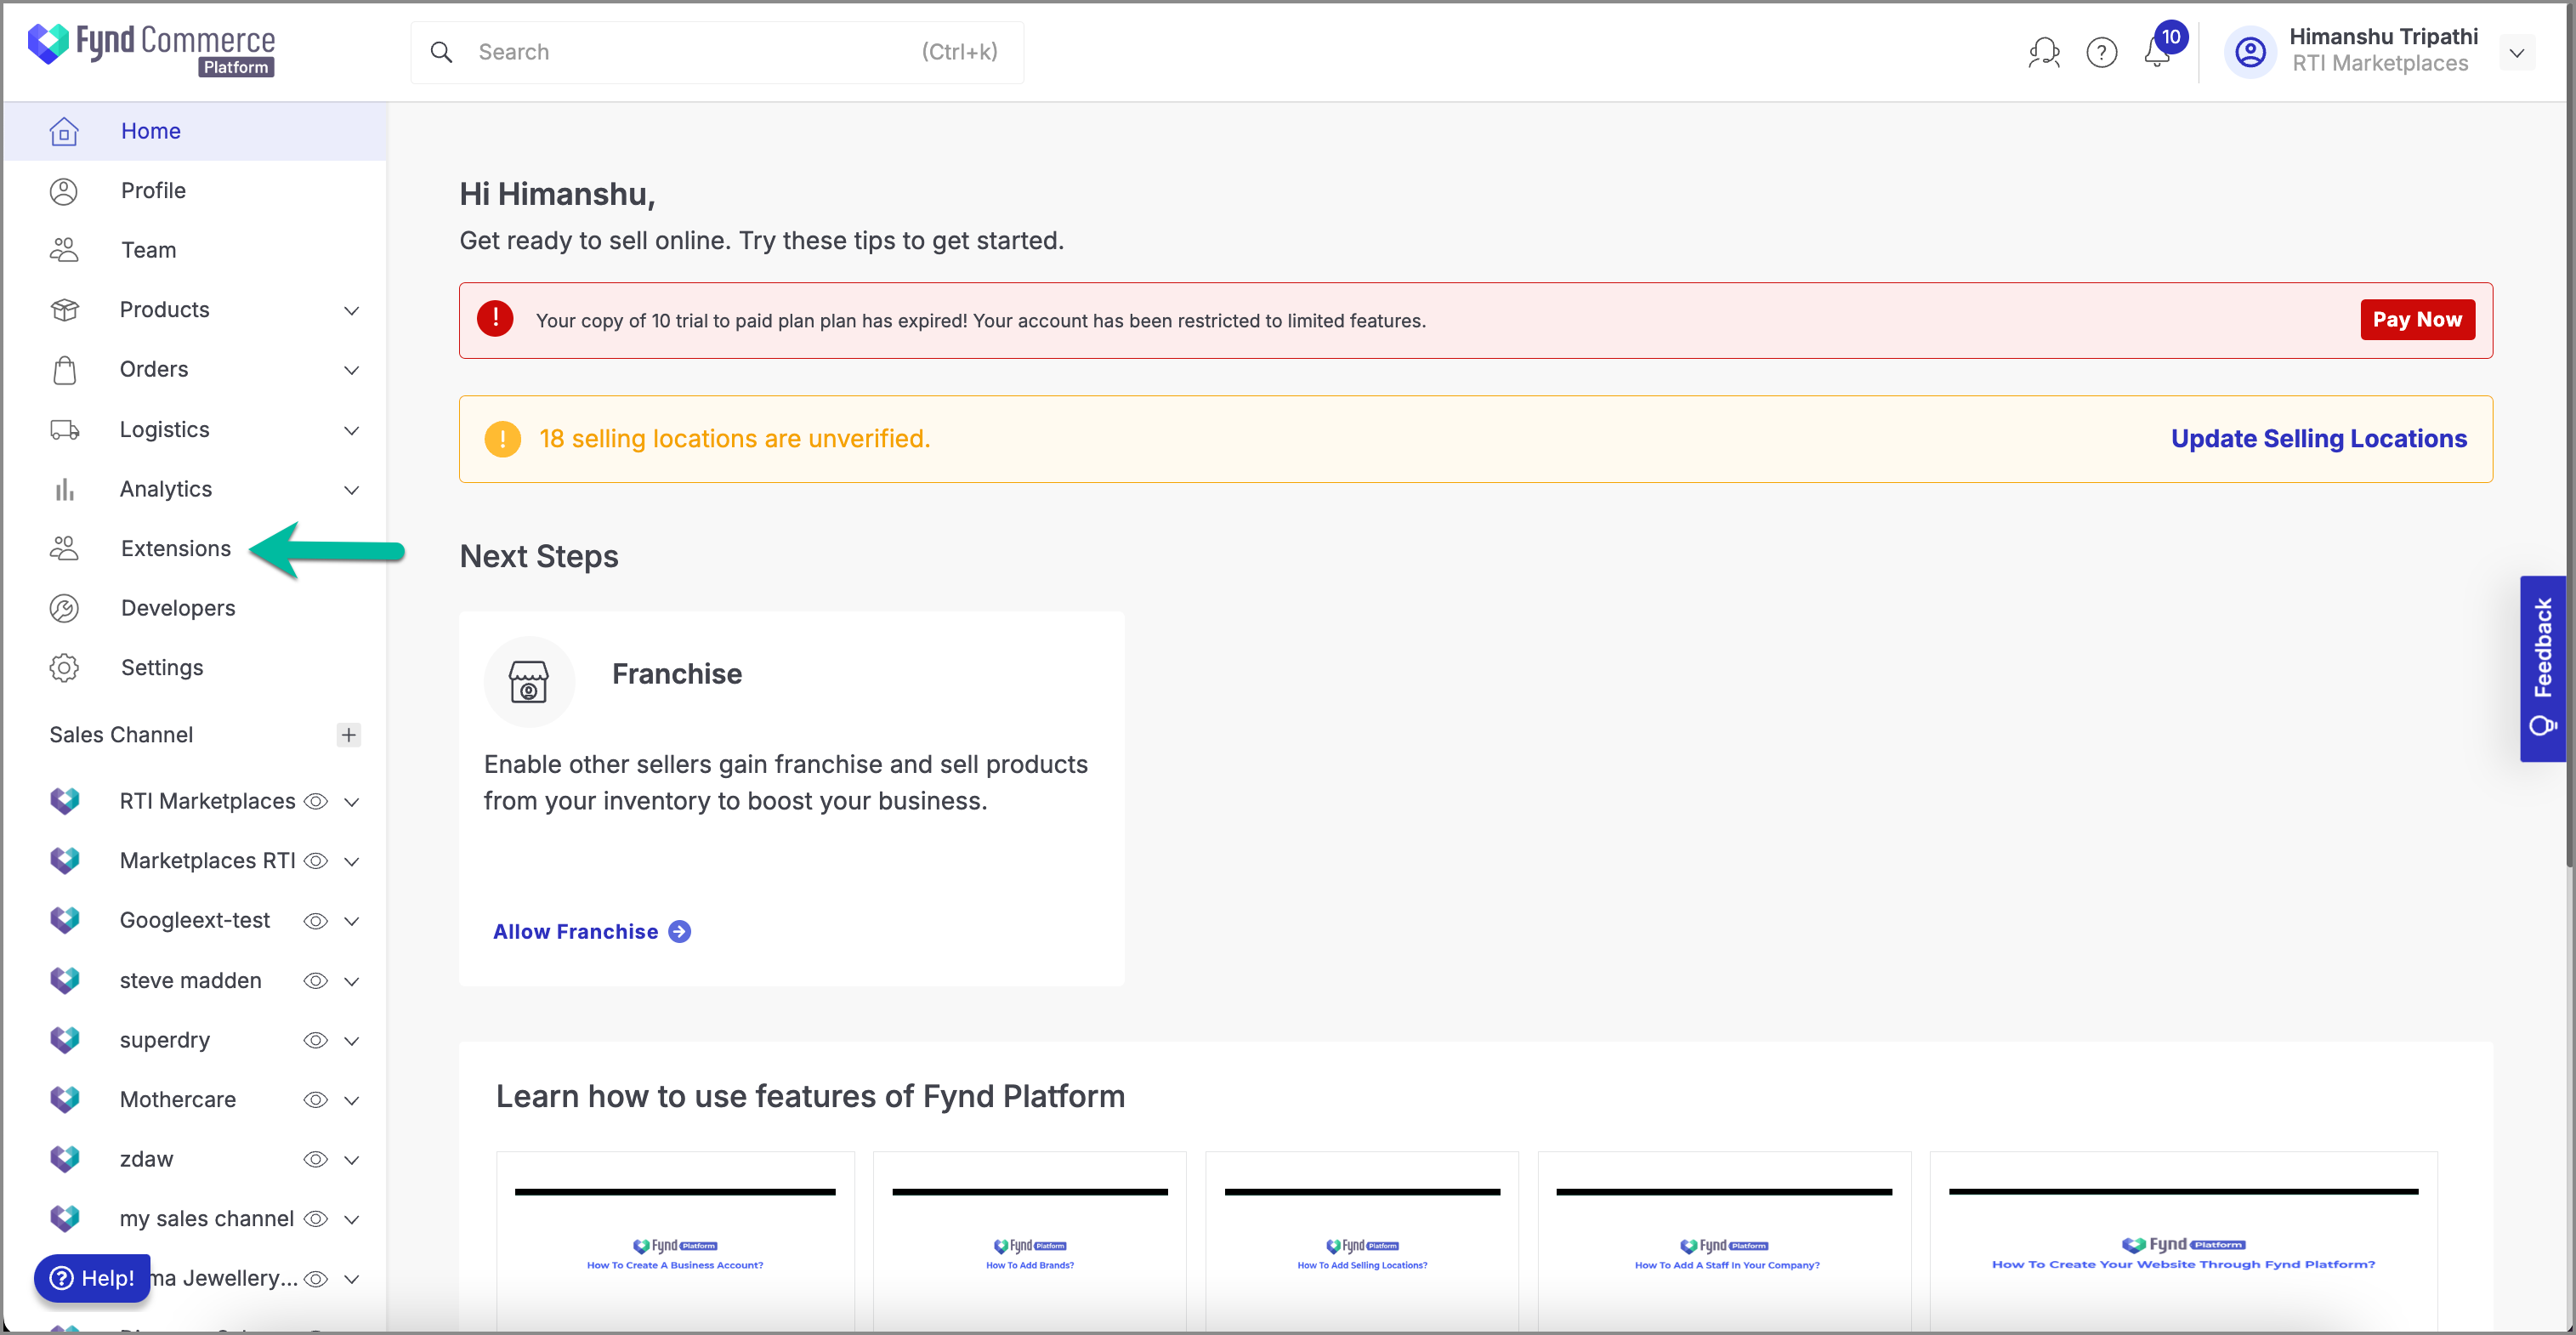
Go to the Extensions in left pane in the Fynd Platform.

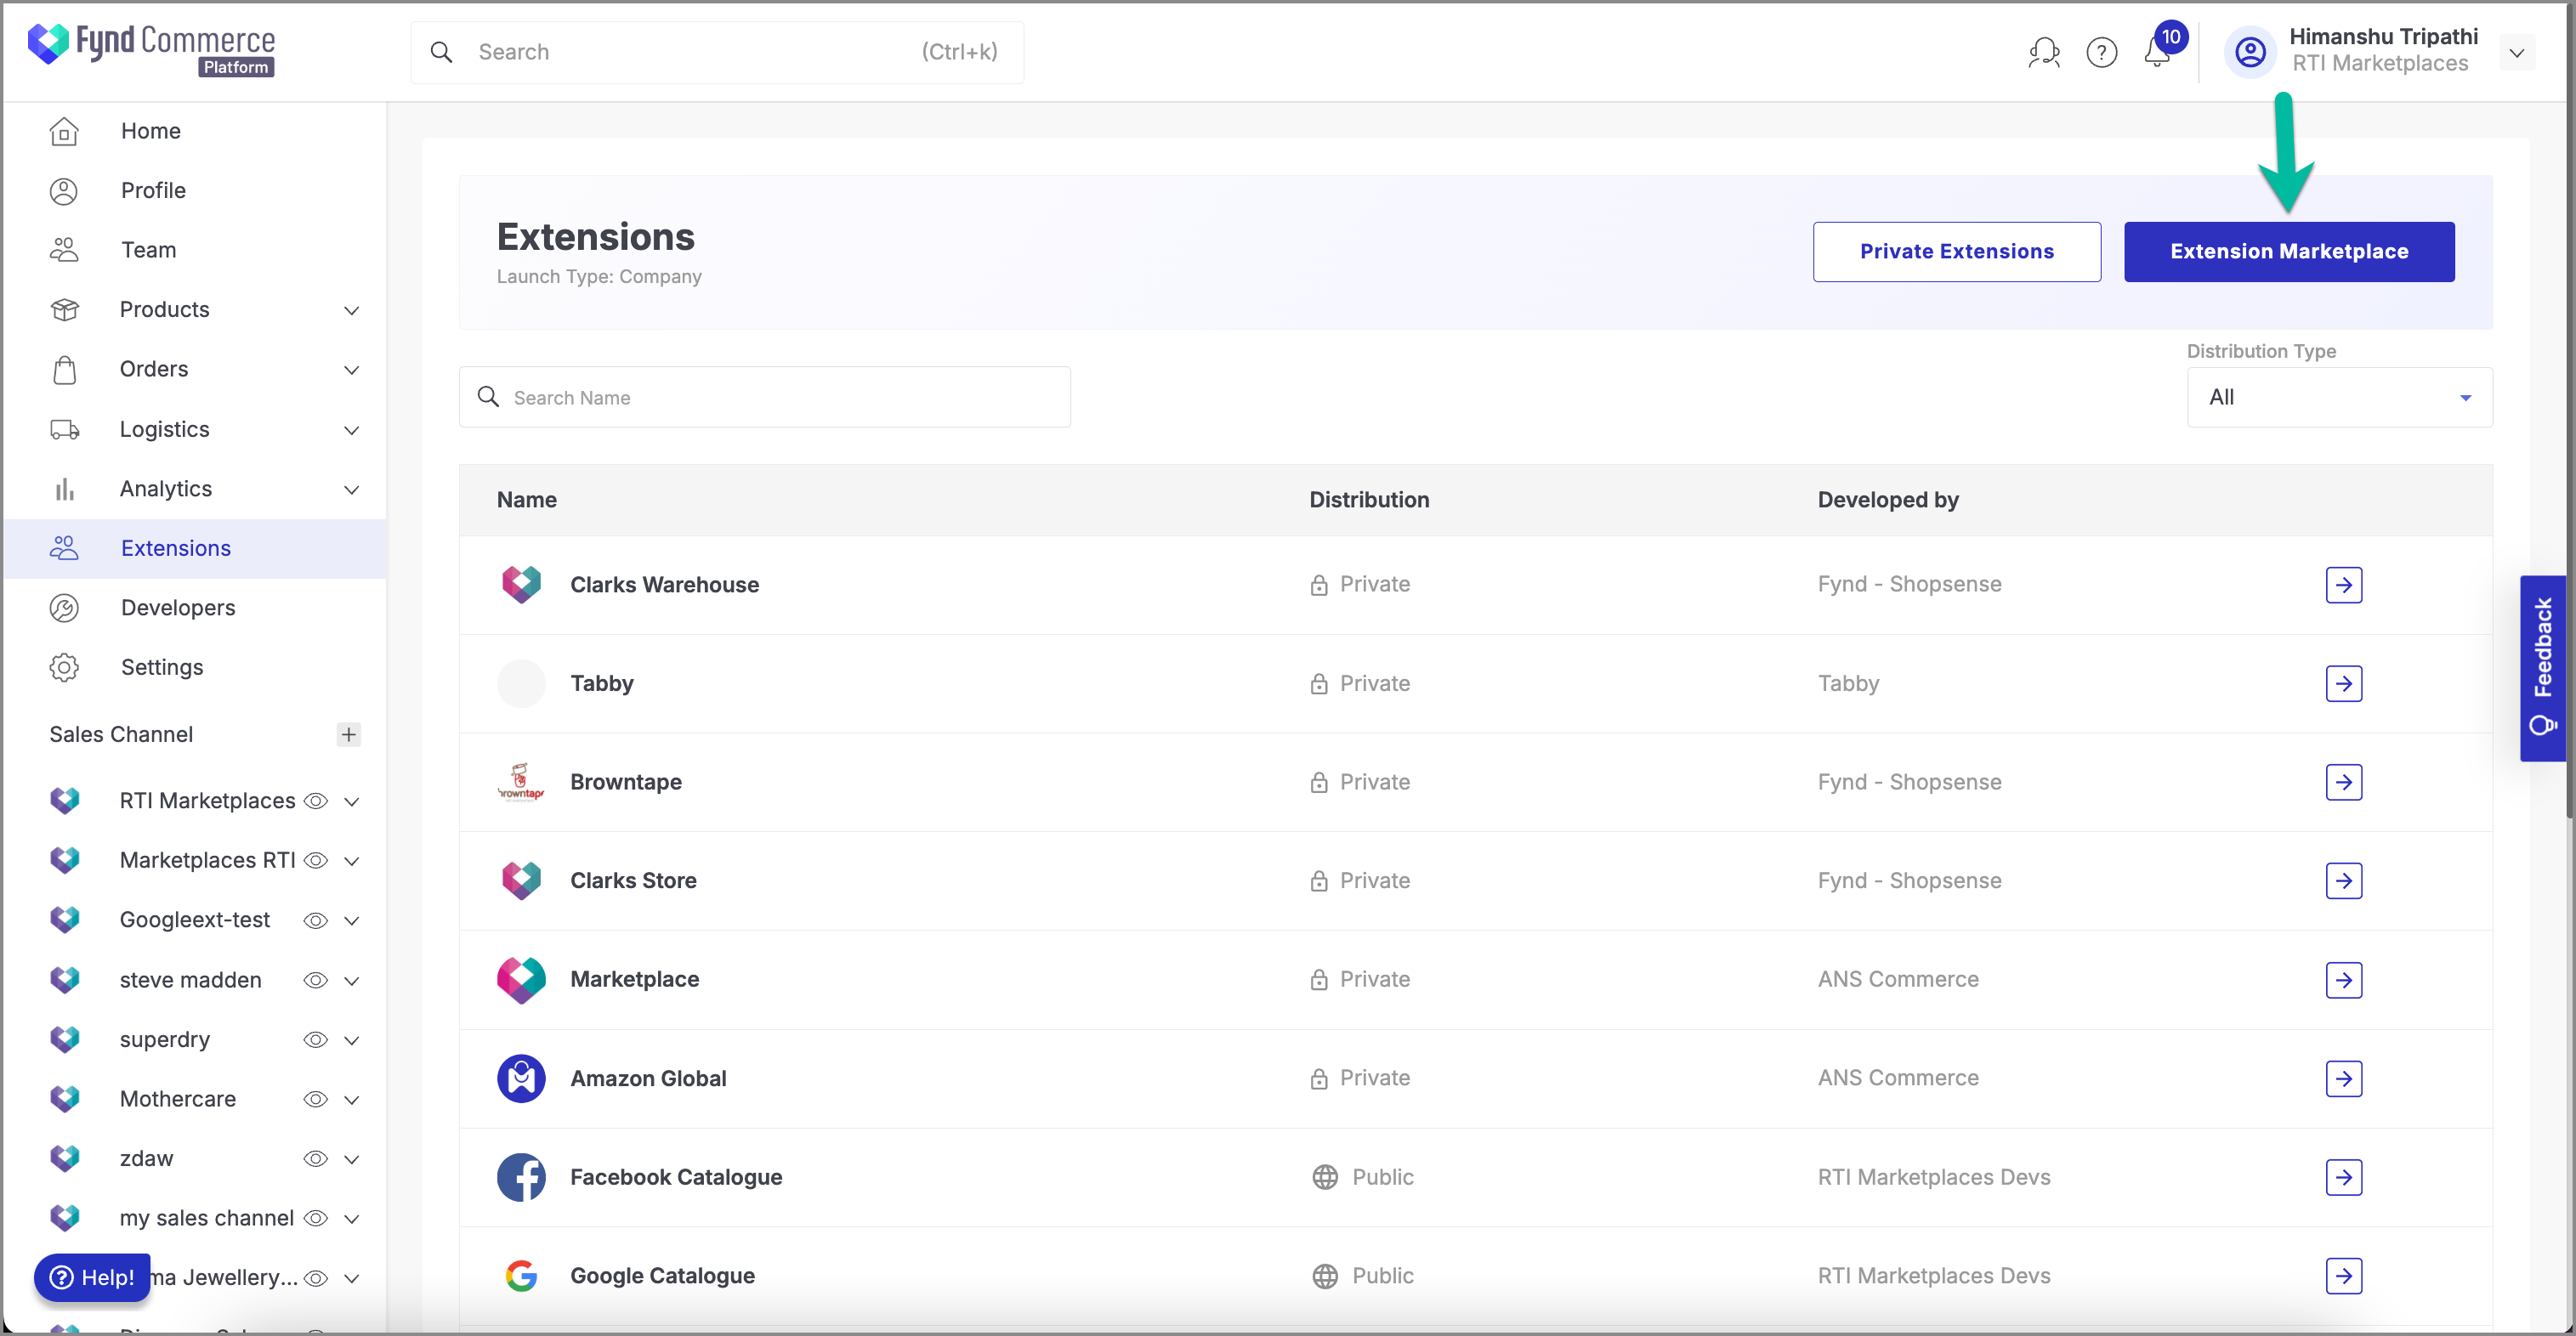
Figure 1: Click extensions Click Extension Marketplace in the upper-right side of the window.

Figure 2: click extension marketplace Navigate to the Inorbit extension.
Once you have installed this extension, it will be available in the list here.
![]()
Steps to use Inorbit Extension
- Go to Fynd Platform.
![]()
- Open Inorbit from the sales channel section on the left sidebar navigation.
![]()
Once the extension is installed, it will be available in the extension list.
Setup Extension
- Open the extension to initiate the setup. You will be prompted to wait until the Location and Products sync completes.
![]()
- Once the setup is complete, the extension’s features will be available for use. You can now map products and selling locations to make your products live on the Inorbit sales channel.
![]()
Products
On the product page, you can view the product funnel and the product section. Here, you can add SKU identifiers and make your products LIVE on Inorbit.
![]()
Product Funnel
![]()
| Item No. | Components | Description |
|---|---|---|
| 1 | Total Number of Products | The total number of products available in your inventory. |
| 2 | Total Number of Mapped Products | The number of products mapped to Inorbit SKUs. |
| 3 | Total Active Products | The number of products currently active and live on the Inorbit sales channel. |
Product Section
In this section, you can map your Inorbit products with those on the Fynd Platform and publish them on Inorbit Marketplace Extension.
How to Map Your Products
View Products Table
![]()
- All products added to your Fynd platform account will be displayed in a table.
- The table includes product details: name of the product, sales channel, mapped SKUs, active SKUs metrics, seller identifier, size, Inorbit SKU (if mapped), product status (active or inactive), and an action button for configuration.
Using Filters
Use the filter option to search for products.
![]()
| Item No. | Components | Description |
|---|---|---|
| 1 | Filter by Type | Select type from options such as Inorbit SKU, Seller identifier, or product, and enter the corresponding value. |
| 2 | Brand Filter | Select a brand from the dropdown to filter products by brand. |
| 3 | Status Filter | Select the status (active/inactive) from the dropdown to filter products by their status. |
Mapping Process
- Search or Choose the Product: Select the product you want to map from the table.
![]()
- Action: Click the action button icon next to the product.
![]()
- The Map Product page will appear, displaying metrics for mapped and active SKUs, as illustrated in the image below.
![]()
- Map the SKUs: Enter the Inorbit SKU for the product, available from your Inorbit account, into the input field. You can choose to map all SKUs, just one, or none, based on your preference.
![]()
- Status Toggle Button: Toggle the button to on to publish your product and make it live on the marketplace.
![]()
- Click Save.
![]()
Mapping Bulk Products
- Click Bulk Action.
![]()
Use Filters: Apply filters to select the products you want to download.

Figure 19: Filter options - Status Dropdown: Select the status.
- Brand Dropdown: Select the brand. For example, select ABC Brand.
Download CSV File: Click Download to get a CSV file containing the selected products.
![]()
- Edit CSV File: Open the CSV file and add Inorbit SKUs in the Inorbit SKU column.
- Update Status: Enter "Active" to publish products and "Inactive" to map but not publish them.
- Upload CSV File: Click Upload to upload the updated CSV file.
![]()
The products will be mapped and published on the marketplace. You can view the updates in the products table.
Selling Locations
The selling locations section functions similarly to the product section, with terminology adjusted for locations.
![]()
Locations Funnel
![]()
| Item No. | Components | Description |
|---|---|---|
| 1 | Total Locations | The total number of locations in your inventory. |
| 2 | Mapped Locations | The number of locations that have been mapped to Inorbit Location Codes. |
| 3 | Active Locations | The number of locations currently active and live on the Inorbit marketplace. |
Location Section
The location section allows you to map and manage your selling locations.
Selling Locations: The following columns are here in the table.
![]()
| Item No. | Components | Description |
|---|---|---|
| 1 | Name | The name of the location. |
| 2 | Location Type | The type of location (e.g., high street, mall). |
| 3 | Location Code | The unique code for the location. |
| 4 | Location Id | The identifier for the location. |
| 5 | City | The city where the location is situated. |
| 6 | INORBIT Location Code | Enter this code on the action page; it can be obtained from your Inorbit seller account. |
| 7 | Quantity Buffer | Enter a minimum quantity of products that should be available at the location. Inventory will be zero if it falls below this buffer. |
| 8 | Status | Indicates whether the location is active or inactive. Selling location inventory sync can only be enabled if GST is verified. |
| 9 | Action | For configuring the location. |
Using Filters
![]()
| Item No. | Components | Description |
|---|---|---|
| 1 | Filter Options | Use the filter option to search for selling locations. |
| 2 | Filter by Type | Select a type (e.g., Inorbit Location type, Inorbit Location, Inorbit Location Name) and enter the corresponding value. |
| 3 | Status Filter | Select the status (active/inactive) from the dropdown to filter locations by their status. |
Mapping Selling Locations
- Search the Location: Select the location you want to map from the table.
![]()
- Action: Click the action button icon next to the location.
![]()
Enter Required Fields.

Figure 28: Enter Inorbit location code and quantity buffer - Enter the Inorbit Location Code.
- Enter the Quantity Buffer.
Status Toggle Button: Toggle to on to activate the location.
![]()
- Click Save.
![]()
- Click Proceed.
![]()
Mapping Bulk Selling Locations
- Click Bulk Actions.
![]()
Use Filters: Apply filters to select the locations you want to download. Select the status. For example, select active.

Figure 33: Filter options Download CSV File: Click Download to get a CSV file containing the selected locations.
![]()
Edit CSV File: Open the CSV file and add Inorbit Location Codes in the Inorbit Location Code column.
Update Status: Enter "Active" to activate locations and "Inactive" to map but not make them live on the marketplace.
Upload CSV File: Click Upload to upload the updated CSV file.
![]()
The locations will be mapped and published on the marketplace. You can view the updates in the locations table.
Selling location inventory sync can be enabled only if GST is verified.
Manual Sync
The Manual Sync feature allows you to manage your inventory updates and synchronize your Fynd platform products and locations with the Inorbit marketplace. This section includes three tabs: Inventory Reports, Sync, and Trace Product.
![]()
Inventory Reports
In the Inventory Reports tab, you can view, download, or sync inventory to the marketplace. Use the date filters to manage inventory sent logs.
![]()
Date Filters: Select the date range to view inventory log events that occurred within that period.
Inventory Logs Table
- Date: When the event occurred
- Event: Description of the inventory update
- Count: Number of items involved
- Status: Success or failure of the event
- Action: Available actions such as exporting CSV
Export CSV: Click as shown in the image to export the inventory log to a CSV file.
Click here to download the CSV file as shown in the image below.
![]()
Sync
The Sync tab allows you to manually sync your inventory and other resources between the Fynd platform and the Inorbit marketplace.
![]()
Quantity
To sync the quantity follow the instructions given below:
![]()
- Updates From: Select the duration (Optional field. Leave it empty to sync all the mapped products.) Here, we have selected 2024-07-13 12:00:00 am (Example data entered in the field).
- Brands: Select from the dropdown
- Selling Locations: Select from the dropdown
- Click Sync to start the sync process.
![]()
Once the sync is successful, you can view the synced inventory report in the Inventory Reports section as shown in the image below.
![]()
FP-Sync
To sync the locations or products from the Fynd platform with Inorbit Marketplace follow the given instructions.
![]()
Select resources to sync from the Fynd Platform.
Locations:
- Sync: Click the button to start syncing locations from the Fynd platform.
- View Information:
- Last Started
- Status
Products:
- Sync: Click the button to start syncing products from the Fynd platform.
- View Information:
- Last Started
- Status
Once you trigger the sync the status will change to In-progress. And once the sync is completed the status will change to Completed.
Manual Sync
To manually update the inventory or sync the inventory on the Inorbit Marketplace, follow the instructions given below:
![]()
- Enter comma-separated SKUs (up to 100) to update their inventory on the marketplace.
![]()
- Click Sync.
![]()
You can view the following information if you’ve already synced the inventory before in the inventory report section.
- Inventory Sync Last Started
- Status
![]()
Trace Product
The Trace Product tab allows you to search for logs related to specific products using their seller identifier or Inorbit SKU.
![]()
- Search by Seller Identifier/Inorbit SKU: Use the dropdown to select the search type.
- Use Date Filters to Select the duration.
- Get Logs: Click the button to retrieve logs.
Additional Filters
You can use additional filters to search for logs related to specific products.
- Fynd Store Code: Select from the dropdown.
- Marketplace Location ID: Select from the dropdown.
- Status: Select from the dropdown.
- Events: Select from the dropdown.
- Export: Click to export the logs.