Email Template
Introduction
This section is for configuring an email response to the customer with the help of templates. You can send intimations to your customers during new user signup, for providing order updates, and for notifying returns and refunds.
The longevity and reliability of an email make it eligible for any communication. It can intimate a sign-up, order placement, its delivery or even for eliciting feedback.
Example: If a customer has placed an order, they will receive its corresponding email. Similarly, if a customer cancels an order, they will receive a cancellation email.
Main Screen
![]()
In this document, you will learn more about:
Create Templates
You can either create a new custom template using Create New or use any existing system templates arranged in Signup & Login, Order Processing, Order Cancellation, Order Return, and Order Refund groups. These templates will be used for choosing a template under events.
The only difference in a custom template and a system template is that the data is readily available in a system template, and the default editor is GrapesJS.
You can create custom templates using any of the 3 editors, but system template has a default GrapesJS editor.
Click on Create (refer fig. 1).
If you wish to create a custom template, click on Create New. You can create it using any of the 3 editors. Check Visual HTML Editors for more details. Else, you can continue by selecting any other system template below it.
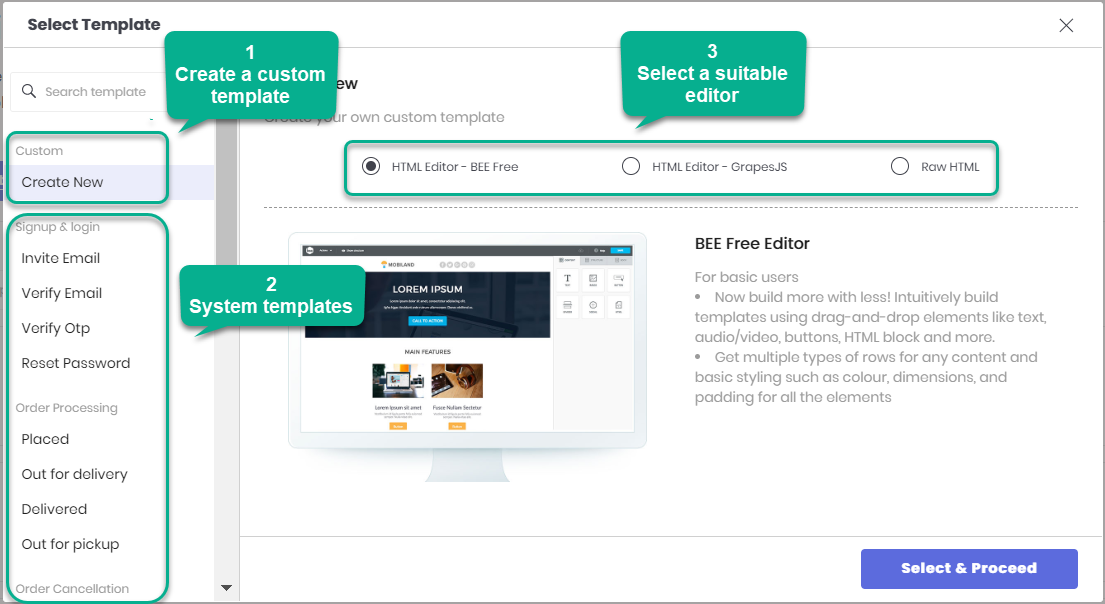
Figure 2: Select a Template
Click on Select & Proceed.
You will get the following page for configuring your template.
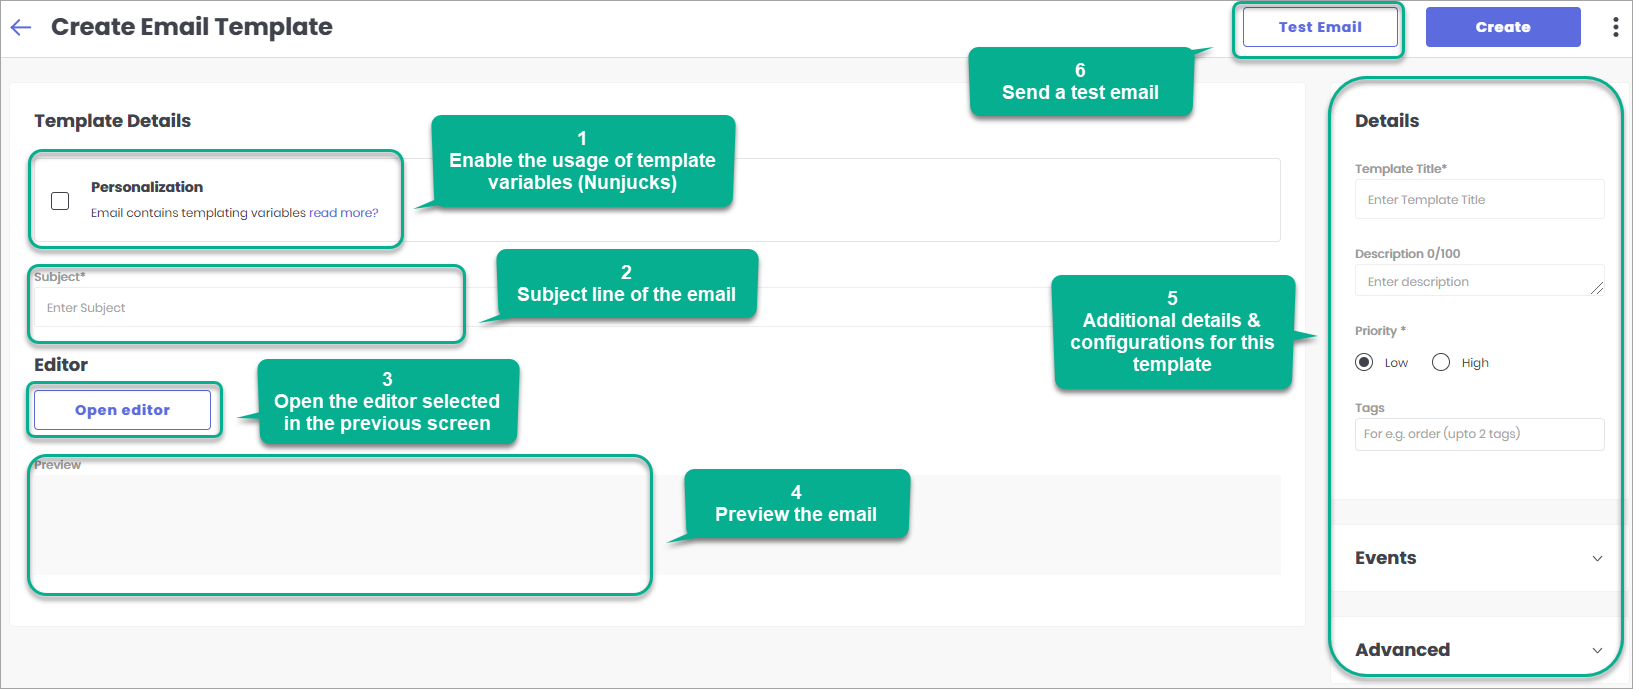
Figure 3: Configuring an Email Template Personalization - Select this only if you wish to use template variables. When the template engine Nunjucks encounters a variable, it evaluates that variable and replaces it with the value given in the JSON editor. This editor is used to add and edit variables in JSON format.
You can use existing variables. Moreover, you can create your own variables by using the following notation
"variable_name":"value"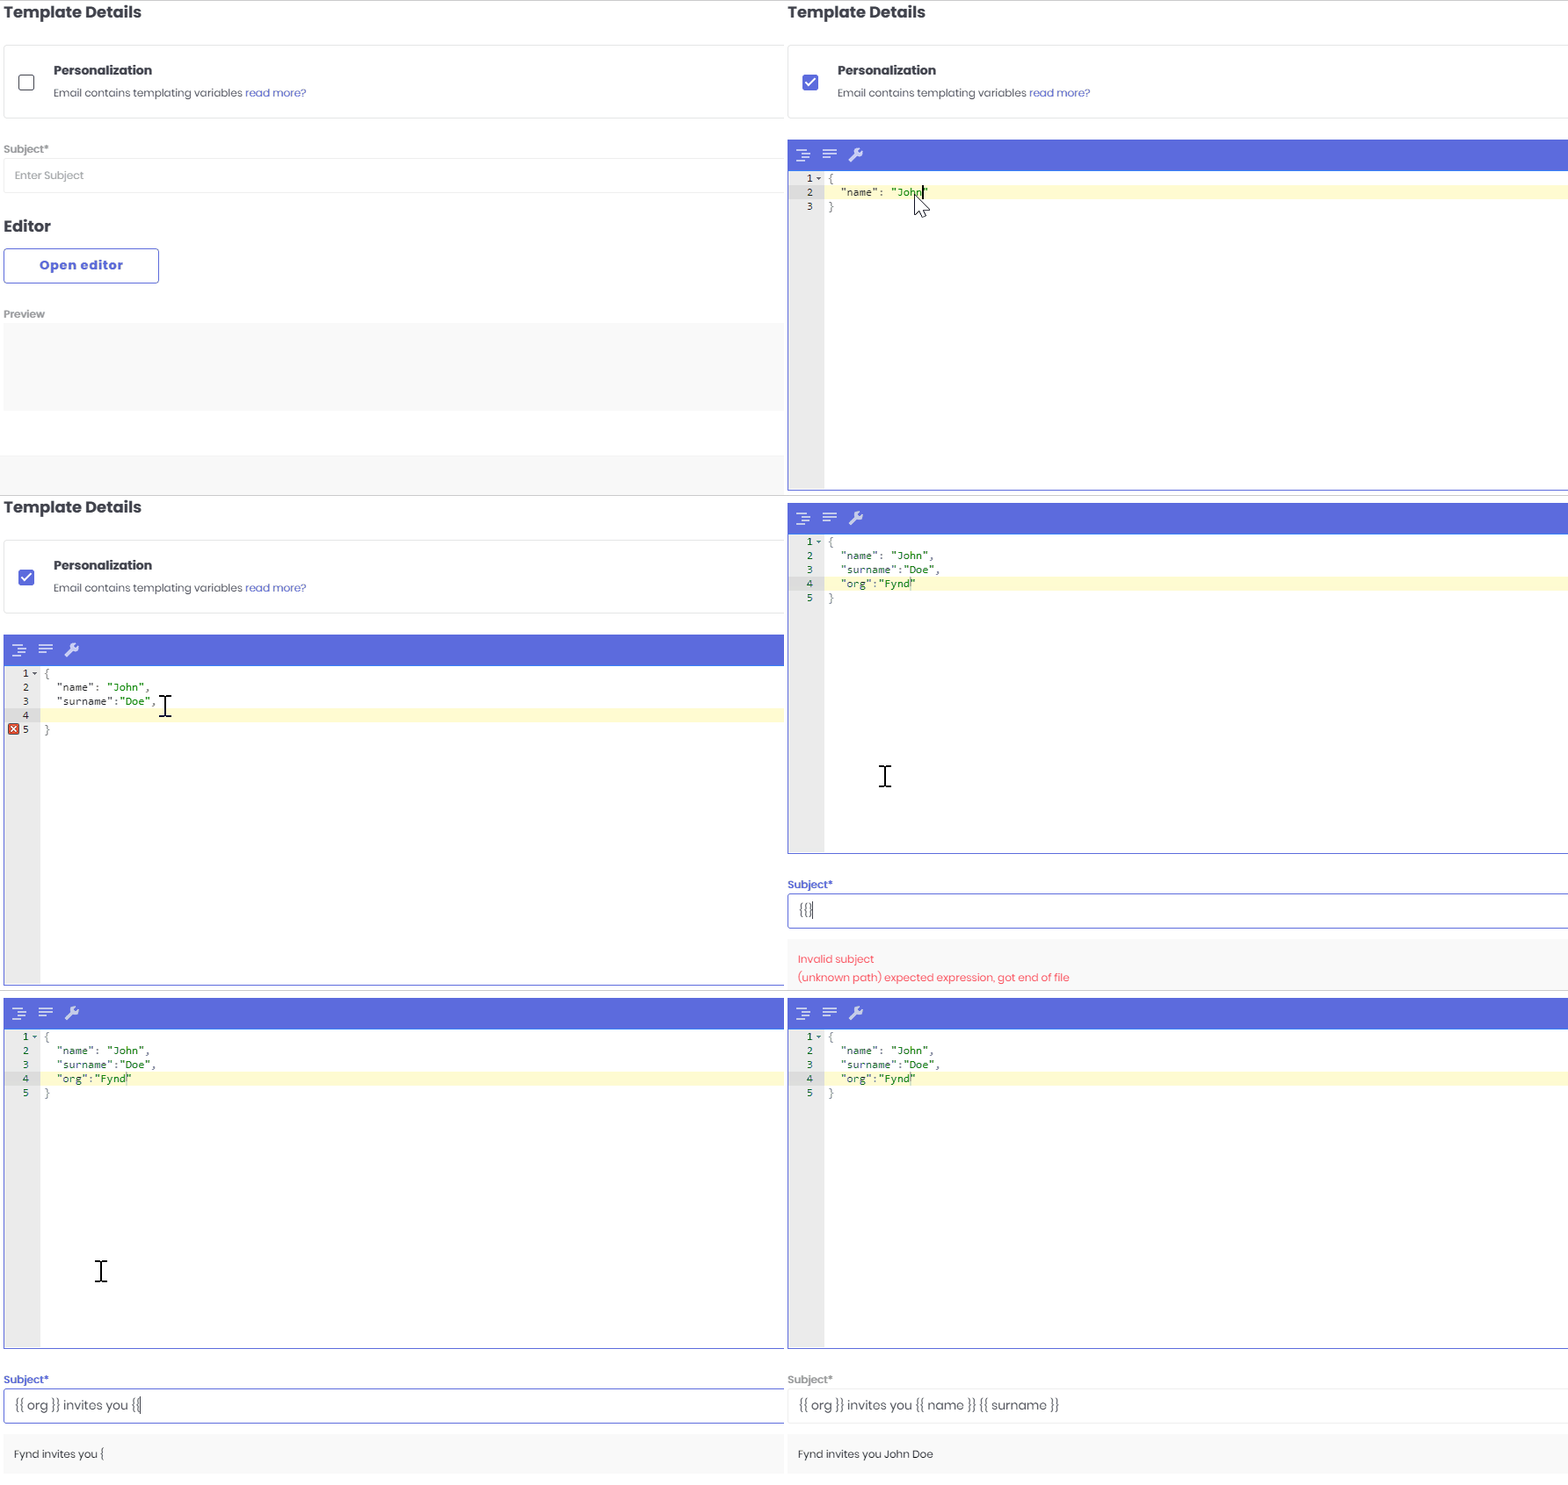
Figure 4: Personalization using templating Subject - This is the subject line of the email. You can directly enter its text or customize it using templating variables as shown in fig.4
Open Editor - If this is a custom template, it will open the selected editor in fig.2. For system template, GrapesJS editor will load by default.
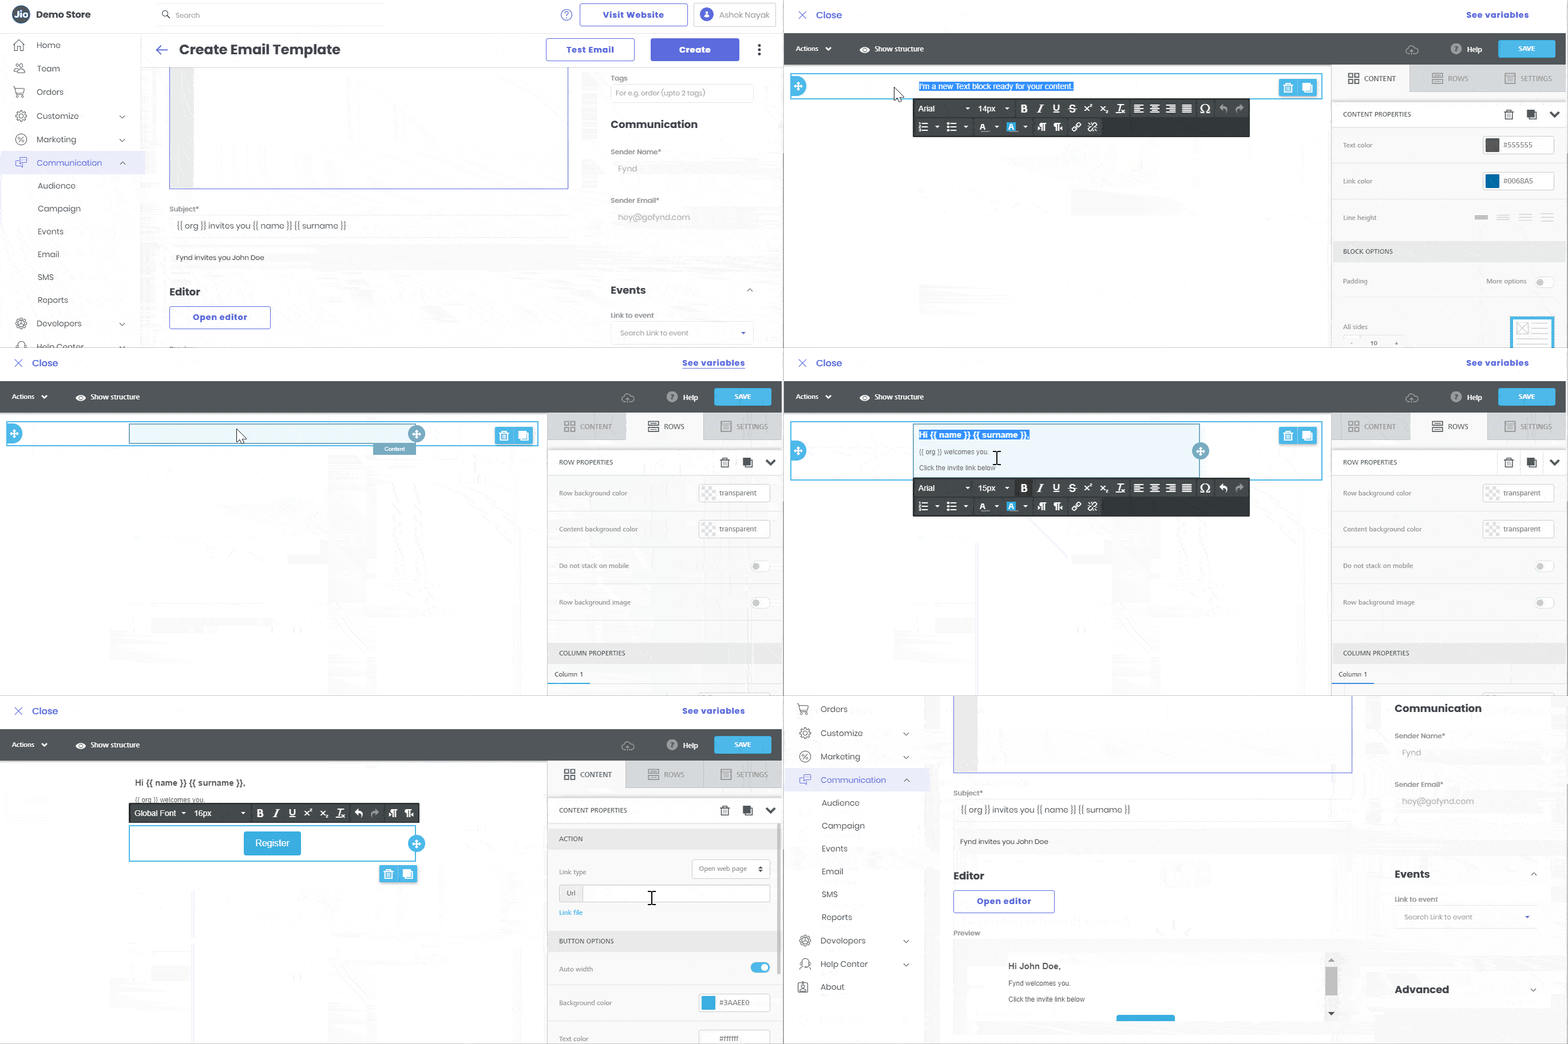
Figure 5: Template Design using BEE-free editor
noteSellers can customize email templates by dynamically integrating global currency codes (e.g., INR, USD) instead of fixed currency symbols (e.g., ₹) for amount representation. Furthermore, the templates also include timezone codes as suffixes to date and timestamp variables, guaranteeing precise time representation for recipients worldwide.
- Preview - The preview will be available only after the template is designed inside an editor as shown in fig.6.
- Configuration-Panel
- Details
- Template Title - Give a suitable name to the template. Note that this name won't reflect in the mail itself, and it is just for identifying one template from the other.
- Description - Assign a short description to the template within a limit of 100 characters. Note that this description is not the email content, and it is just for the user's understanding.
- Priority - Set a High or Low priority. For example, a payment mail is prioritized higher over an 'order delivered' mail.
- Tags - This is optional. One can, however, use tags to identify a specific email by searching its tag.
- Events
- Link to event - Assign this template to an event from the drop-down.
- Advanced
- Reply To - If the recipient of the mail sends a reply it will be sent to the email address mentioned here.
- Static To - Enter an email address whom you want to send the mail.
- Static CC - Enter an email address whom you want to send a mail, apart from the original recipient. Note that the original recipient will know who the CC recipient is. CC stands for 'Carbon Copy'.
- Static Bcc - Enter an email address whom you want to send this mail without others knowing. Bcc stands for 'Blind carbon copy' because other recipients won’t be able to see that someone else has been sent a copy of the email.
- SMTP Headers
- Key Value - This is for advanced users. You can set SMTP Headers using key-value pairs. You can use a separate header for each recipient of an email via SMTP.
- Details
Click on Test Email to verify the email content and functionality.

Figure 6: Test Email 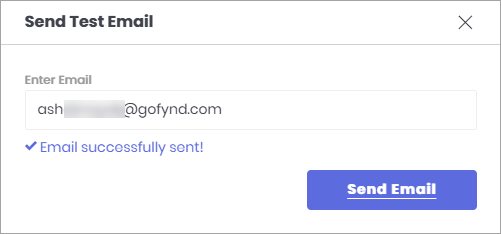
Figure 7: Email Sent 
Figure 8: Email Received 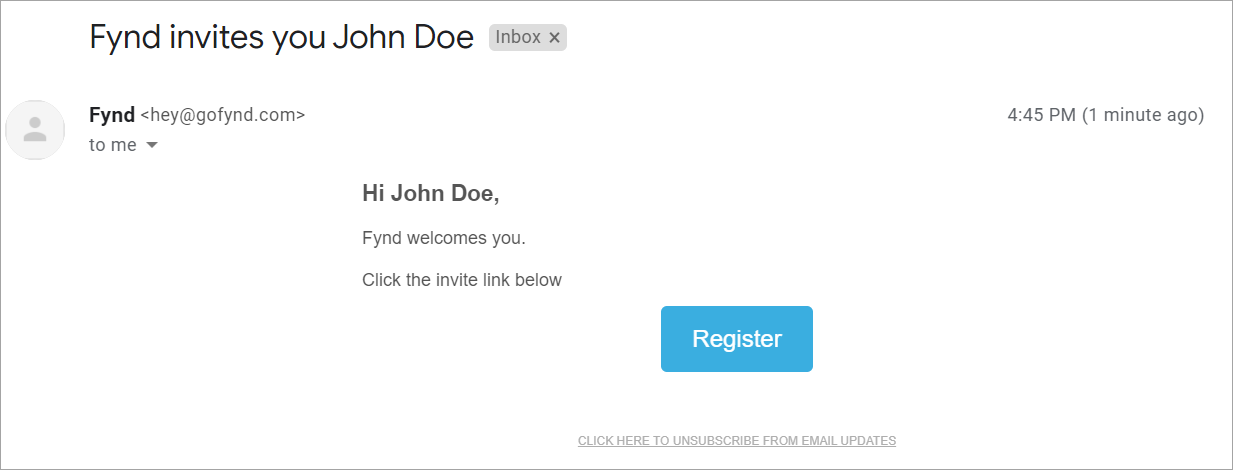
Figure 9: Successfully Received the Designed Email Later, you can proceed to save and publish this by choosing a template under events.